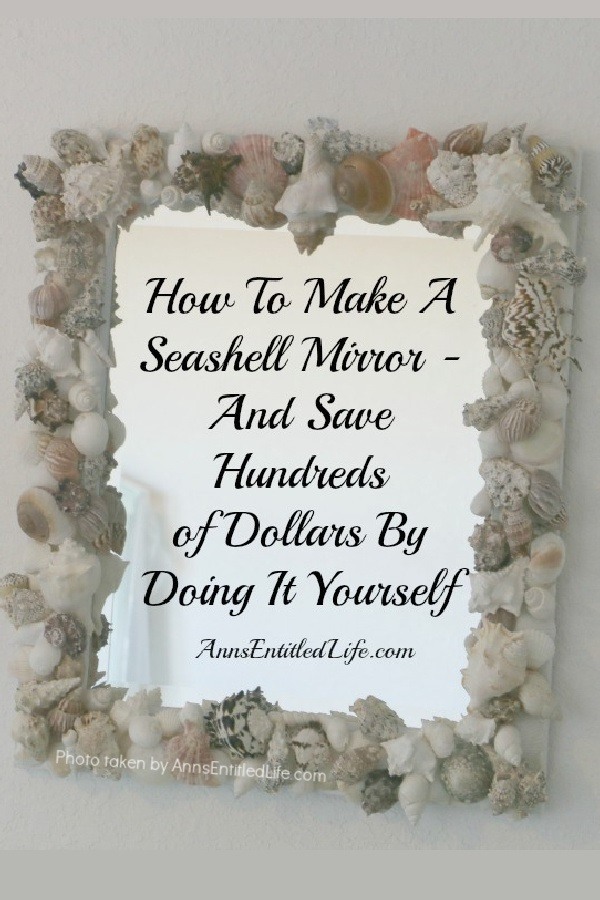
Imagine walking into your home and seeing a shimmering mirror framed in natural seashells, each one catching the light like a tiny piece of the ocean. Creating a seashell mirror is a rewarding DIY project that blends coastal charm with personal creativity. Whether you have collected shells from a beach vacation or bought a kit, this guide walks you through every step to build a professional-looking piece of wall art. From selecting the right adhesive to arranging shells for maximum visual impact, you will learn how to avoid common mistakes and complete a mirror that lasts for years.
Choose Your Mirror and Base
Pick the Right Frame or Wood Backing
Start with a sturdy base for your project. For beginners, a 5×7-inch thrifted picture frame works perfectly because it is small, affordable, and easy to handle. If you are aiming for a statement piece, use a custom-cut plywood circle or shape, such as 36 inches in diameter. Ensure the base has a recessed area to hold the mirror securely and protect the glass during assembly.
Prepare the Mirror Mounting Area
Before adding shells, confirm the mirror fits snugly in the frame. If the backing is smooth or glossy, sand it lightly to help glue adhere. Avoid sealed wood unless using chalk paint, which sticks without priming. Clean the surface thoroughly because any dust or residue can weaken the bond between shell and base.
Install Hanging Hardware First
This is a critical step many forget: attach hangers, D-rings, or wire to the back of the frame before gluing any shells. Once shells cover the back, access is impossible without damaging your work. Use a T20 screwdriver bit for hangers and a T10 bit to secure the backboard later. This ensures your finished mirror hangs safely and level.
Select and Prepare Your Shells
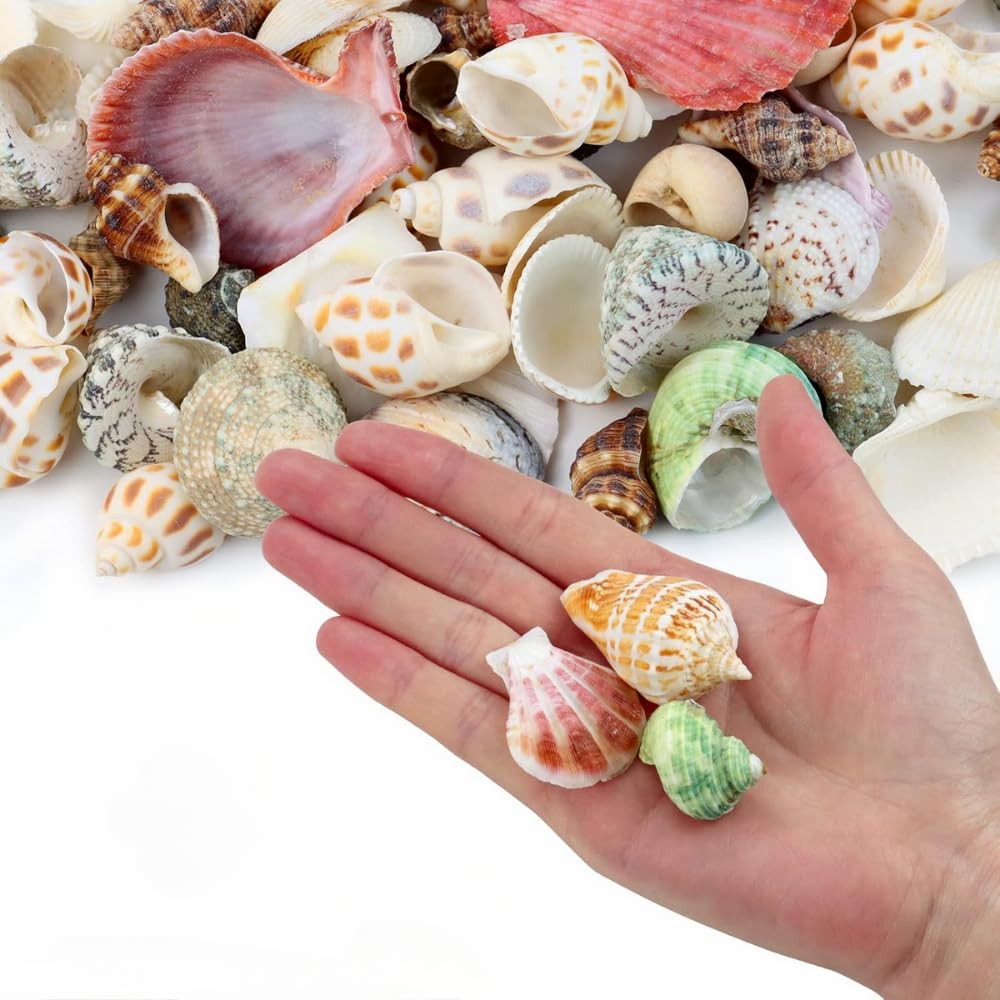
Gather a Variety of Shells and Beach Elements
You will need more shells than you think. Four hundred to five hundred oyster shells may be needed for a large 36-inch mirror, though only half will be used. Mix in scallops, clams, whelks, and bubble shells for texture. Add abalone for iridescent focal points. Include tiny white cup shells for edging. Consider sea glass, starfish, sand dollars, and driftwood for coastal flair. Having extras lets you choose the best shapes and sizes during layout.
Clean and Dry Shells Thoroughly
If shells are beach-collected, rinse them in fresh water to remove sand and salt. Soak in a bleach-water solution with a 1:3 ratio for 15 to 30 minutes to disinfect and brighten. Use an old toothbrush to scrub away any organic residue. Then, dry in direct sunlight for one to two days because moisture prevents glue from bonding properly.
Pro Tip: Store-bought shells skip the cleaning step but may lack natural character. Mix both types for best results.
Plan Your Design Layout
Dry-Fit Shells Like a Puzzle
Never glue on impulse. Lay all shells on the frame without adhesive first. Treat it like a jigsaw puzzle: start with larger foundation pieces such as oysters and scallops and build around them. Step back, take a photo with your phone, and assess balance. Adjust until the design feels organic and visually pleasing.
Use Focal Points and Flow
Place eye-catching elements like abalone, barnacles, or large conch fragments at key spots: top center, corners, or upper and lower edges. Let some shells face outward to add depth. Avoid rigid symmetry because a natural, collected look feels more authentic. Build outward from the center, gradually increasing shell size toward the edges.
Try a Themed Painted Background
For extra coastal flair, paint the base before adding shells. Use painter’s tape to divide the frame into three zones. Paint the top section sky blue using Caribbean Blue and Cloudless white. Paint the middle section sea colors using Laguna and Sea Green with dry-brushed white highlights. Paint the bottom section sand tones using Warm Caramel with Snow White dry-brushed waves. Blend edges softly with no crisp lines. Let dry completely before taping off the mirror edge with painter’s tape to protect the glass.
Use the Right Adhesive

Choose Strong, Long-Lasting Glue
Skip the hot glue gun because it fails over time. Instead, use E-6000, which is an industrial-strength, waterproof adhesive that cures in 24 to 72 hours and works best for heavy shells. Tacky Glue is strong, easy to use, and dries clear, making it ideal for medium-weight projects. Some crafters use Stick n Stay, applying it in good globs on shell bases. Store glue upside down in a cool place such as your car to prevent drying out.
Apply Glue with Precision
For small shells, use a toothpick or fine brush to dab glue. For larger ones, apply a generous blob to the shell is contact points. If using a kit with a glue jar, dip the shell base for full coverage. Press firmly and hold for 10 to 15 seconds. Work in sections to avoid drying issues.
Warning: E-6000 has strong fumes, so use it in a well-ventilated area and wear gloves.
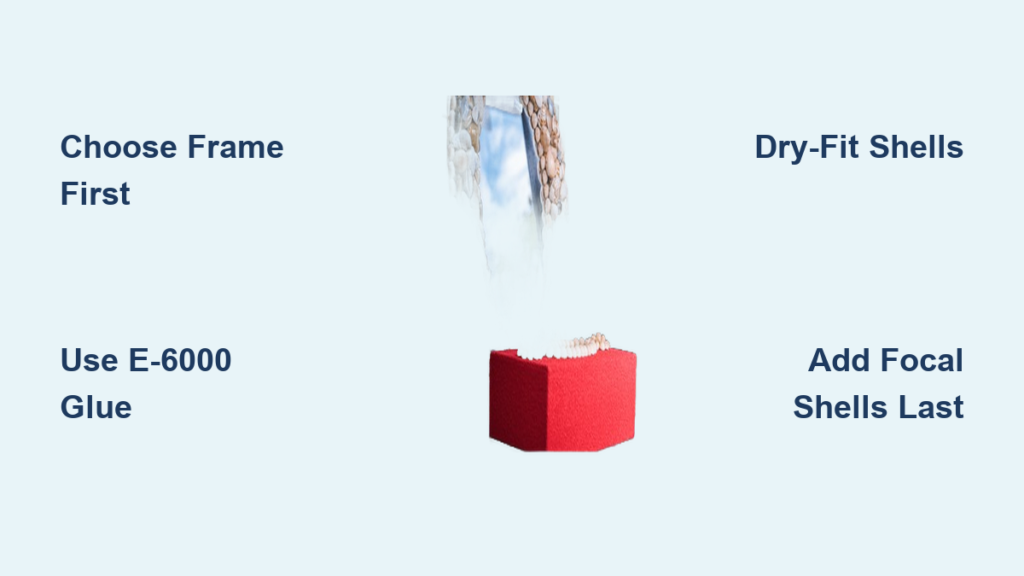
Attach Shells in Layers
Build a Foundation Layer
Start with flat, large shells like oysters and scallops. Glue them around the mirror edge, ensuring they are level and secure. These form the structural base. Leave no gaps larger than a quarter; if needed, fill with medium shells now.
Add Texture and Depth
Tuck smaller shells underneath and between foundation pieces. Use tweezers for tight spaces. Layer shells slightly overlapping to create a 3D effect. Stack some to elevate focal points. Let broken shell interiors face outward for visual interest.
Place Focal Shells Last
Save your most beautiful pieces, such as abalone, large conchs, or colorful sea glass, for last. Position them where light will catch them best. These are the wow elements that draw the eye.
Fill Gaps with Micro Shells
Use tiny filler shells to close remaining spaces. Work clockwise or counterclockwise around the frame. Step back often to check for balance. If a section looks sparse, add clusters of similar shells for rhythm.
Finish and Seal the Mirror
Remove Glue Strings and Clean the Glass
After all shells are set, wait at least 24 hours. Use a stiff paintbrush to sweep away glue strings. For dried glue on the mirror, gently scrape with a straight razor held at a low angle. Wipe the glass with window cleaner for a streak-free shine.
Sand and Add Texture
To hide the base between shells, apply a glue-and-sand mixture to exposed wood. Let dry, then lightly sand. This creates a seamless, beachy texture and ensures no bare spots show from any angle.
Seal for Durability
Though not always required, a clear sealant or glaze adds protection and shine. Use a brush to lightly coat shells, avoiding the mirror. Let dry completely. Some kits include sealant; use it to mount the mirror into the frame bed.
Install the Mirror and Backboard
Set the Mirror Securely
Place the frame face down on a soft surface such as towels. Ensure no shells or sand extend into the mirror recess; trim or file protrusions if needed. Apply sealant or strong glue to the mirror bed, then center the glass and press gently. Let it dry at least 20 minutes.
Attach the Backboard
Cut a piece of cardboard or thin wood to fit the back. Center it over the mirror and secure with screws using a T10 screwdriver. This keeps the mirror from shifting and protects the back.
Thread the Hanging Wire
Loop wire through the D-rings or hangers. Wrap the excess tightly around itself for a clean finish. Test the balance by hanging it briefly, and adjust if it tilts.
Create a Clean Back Finish
Cover the Back for a Polished Look
A messy back ruins an otherwise beautiful piece. To fix this, run a thin bead of glue along the rear edge of the frame. Press a sheet of white paper over it, smoothing out air bubbles. Trim excess with scissors once dry.
Expert Note: A clean back makes your mirror gift-worthy and shows craftsmanship from every angle.
Customize With Themes and Colors
Try an All-White or Monochrome Look
For elegance, use only white shells, abalone, and sea glass. This creates a luminous, spa-like effect. Pair with a white-painted base for a seamless coastal vibe.
Go Bold with Color and Texture
Mix vibrant shells, driftwood, and starfish for a lively, beach-combing feel. Use barnacles and broken whelks for rustic contrast. Add wish rocks or banded stones for unique detail.
Create a Coastal Triad Design
Match your painted background with shell placement. Place light shells and white sea glass at the top where the sky would be. Position blue-tinged shells and turquoise glass in the middle where the sea would be. Set beige shells and tiny cup shells at the base where sand would be. This reinforces the theme and guides the eye.
Avoid Common Mistakes
Do Not Use Hot Glue
It may hold initially, but shells will fall off within months. Stick with E-6000 or Tacky Glue for lasting results.
Do Not Skip the Dry Layout
Gluing without planning leads to gaps, imbalance, or wasted materials. Take photos of your dry layout to catch issues early.
Do Not Forget the Back
Hanging hardware, backboard, and clean finish must be addressed before shell application. Once shells are on, the back is inaccessible.
Do Not Rush the Drying Process
Allow 24 to 72 hours for full adhesive cure, especially with E-6000. Moving or hanging too soon risks shell detachment.
Display and Gift Your Seashell Mirror
Hang in the Right Spot
Place your mirror in bathrooms, bedrooms, or entryways where natural or soft light enhances the shells shimmer. Avoid direct sunlight, which can fade colors over time.
Pair With Coastal Decor
Style with a conch shell, seagrass basket, or glass jar of sand. Add a green plant or vintage book for warmth. Keep the theme cohesive but not cluttered.
Give It as a Meaningful Gift
Handmade mirrors are personal and thoughtful. Include a note about the shells origin, such as “Collected from our Florida beach trip, 2023,” to add sentimental value.
Share Your Creation Online
Post your finished mirror on Instagram, Facebook, or Pinterest. Use hashtags like #SeashellMirror or #CoastalDIY to inspire others and join the crafting community.
Frequently Asked Questions About Making a Seashell Mirror
How Long Does It Take to Make a Seashell Mirror?
Small projects using a 5×7-inch frame take several hours to complete. Large mirrors, such as 36-inch diameter pieces, can take up to 30 hours or more, including drying time between layers and final assembly.
What Type of Glue Is Best for Seashell Mirrors?
E-6000 industrial adhesive or Tacky Glue provide the strongest, longest-lasting bonds. Avoid hot glue guns because shells will eventually pop off due to poor adhesion over time.
How Many Shells Do I Need for a Large Mirror?
You may need 400 to 500 oyster shells for a 36-inch mirror, though only about half will be used in the final design. Having extras allows you to select the best shapes and sizes during layout.
Do I Need to Clean Store-Bought Shells?
Store-bought shells are typically already cleaned and dried, so they can be used directly. However, beach-collected shells require rinsing, bleaching, and sun-drying to ensure proper adhesion and prevent odor.
Can I Make a Seashell Mirror Without a Frame?
Yes, you can use custom-cut plywood or another wooden base. Simply cut your desired shape, attach hanging hardware, and follow the same shell-attachment process. This allows for creative freedom in size and form.
How Do I Prevent Shells From Falling Off Over Time?
Use strong adhesive such as E-6000 or Tacky Glue instead of hot glue. Allow proper cure time of 24 to 72 hours before handling. Apply a clear sealant over the shells for added protection against moisture and wear.
Key Takeaways for Creating Your Seashell Mirror
Making a seashell mirror is more than a craft; it is a way to preserve memories, express creativity, and bring the beach into your home. Start with a small 5×7-inch frame if you are a beginner, and work up to larger statement pieces as your confidence grows. Always install hanging hardware before gluing shells, clean and dry your shells thoroughly, and use E-6000 or Tacky Glue for durable adhesion. Take time to dry-fit your shells like a puzzle, building from large foundation pieces to smaller fillers, and save your most beautiful focal shells for last. With the right materials, patience, and attention to detail, you can create a piece that looks store-bought but carries the soul of handmade art.