You don’t need a full bathroom renovation to create a striking design impact. Dressing up a bathroom mirror can instantly transform a plain builder-grade or dated piece into a stylish focal point. The best part is that most upgrades are low-cost, non-permanent, and completely DIY-friendly, making them perfect for homeowners and renters alike. This guide walks you through proven methods, material choices, and design strategies to refresh your mirror while matching your bathroom’s style, whether that’s glam, rustic, modern, or coastal.
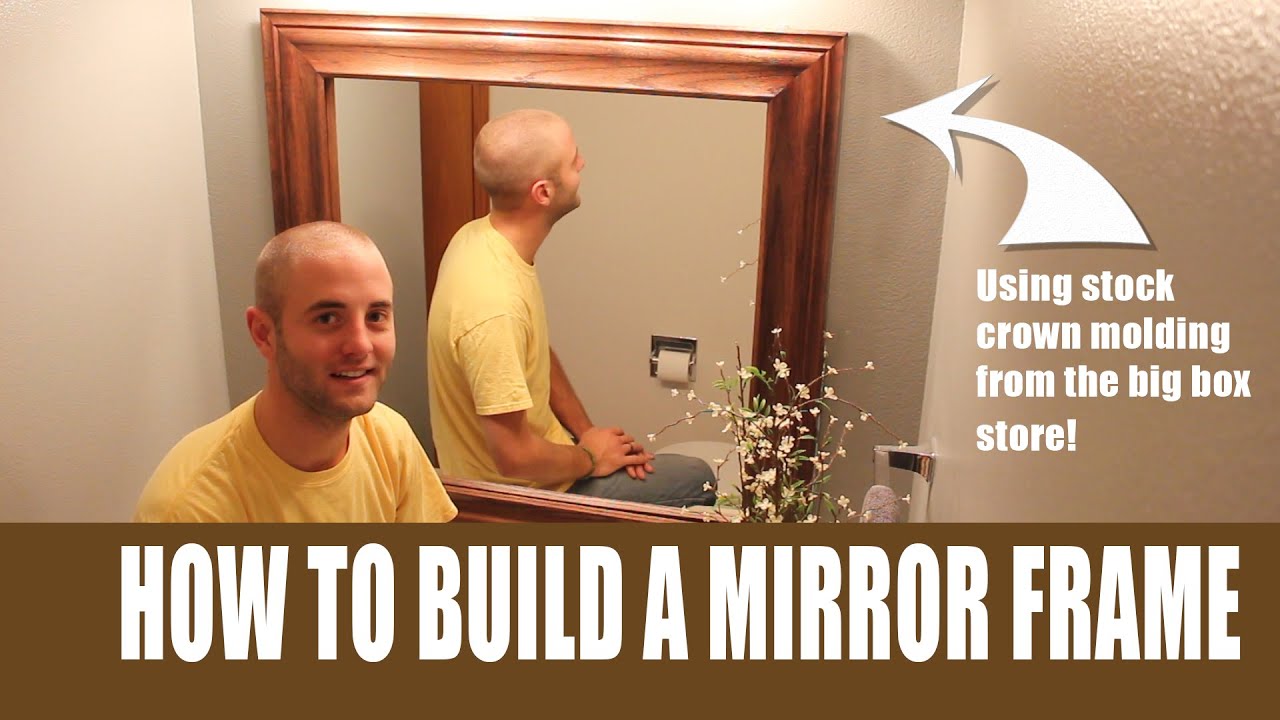
Frame It with DIY Wood Trim
Adding a custom wood frame is one of the most impactful ways to dress up a bathroom mirror. This method works especially well for large, intact mirrors that are difficult to remove.
Measure and Cut with Precision
Start by measuring your mirror’s height and width at the top, bottom, and sides. Many builder mirrors aren’t perfectly square, so taking multiple measurements ensures accuracy. Use a miter saw or miter box with a hand saw to cut 1×2 lumber or molding at 45-degree angles for clean, professional corners. Pre-cutting all four pieces before assembling prevents errors during installation.
Assemble and Paint for a Polished Look
Apply wood glue to each mitered corner, clamp the frame together, then reinforce with small screws. Sand the surface lightly between coats of primer and paint. Matte black, crisp white, or a bold color can define the bathroom’s personality. Once fully cured, clean the mirror’s edge with rubbing alcohol, apply Liquid Nails (glass-safe formula) in a wavy line along the back of the frame, and press it into place starting from the bottom. Hold with painter’s tape for 24 hours to ensure a secure bond.
Use a No-Tools Frame Kit
Pre-made mirror frame kits offer a renter-friendly, tool-free upgrade that still delivers a custom look. Brands like MirrorMate and Frame It All provide adhesive-backed trim that sticks directly to the glass.
Choose the Right Size and Finish
Select a kit that fits your mirror’s standard dimensions, such as 24″x36″ or 30″x40″, or order custom-cut pieces online. These kits come in brass, matte black, gold, and other finishes to complement your existing hardware.
Apply with Care for a Seamless Fit
Clean the mirror thoroughly with alcohol to remove oils. Peel off the adhesive backing and align the bottom piece first, pressing firmly. Continue with the sides and top, ensuring corners meet tightly. Avoid stretching the material, which can cause warping. These kits install in under an hour and can be removed without damage.
Add Crown Molding and LED Lighting
For a luxury architectural effect, use crown molding to create a multi-dimensional frame with integrated lighting. This method adds both visual depth and functional illumination.
Build a Layered Frame for Depth
Cut pre-primed crown molding pieces at 45-degree angles and attach them to a thin wood backer board using tack nails. Fill gaps at corners with caulk or hot glue, sand smooth, then spray-paint the entire assembly in a finish that complements your decor.
Install Backlit LED Strips
After sealing the frame’s bottom edge with polyurethane, attach battery-powered LED strips behind it. Route the battery pack to the side or bottom for easy access. Use adhesive mounting tape to secure the lights. When turned on, the soft glow creates a floating mirror effect and enhances ambient lighting.
Create a Glam Foam-Board Design

For a bold, sparkly upgrade on a budget, decorate foam board with Dollar Store finds and metallic finishes.
Decorate with Dollar Store Finds
Cut foam board to form a border or full overlay. Use Dollar Tree paint palettes or Walmart silver spoons, spray-paint them metallic gold or rose gold, and arrange them in a radial, chevron, or mosaic pattern. Glue everything in place with hot glue or E6000 adhesive. Add rhinestones or crystal buttons at intersections for extra sparkle.
Seal and Mount Safely
Apply water-resistant Mod Podge along the bottom edge near the sink to protect against splashes. Let dry completely before mounting with heavy-duty Command Strips. This method is lightweight, removable, and ideal for renters.
Apply Peel-and-Stick Tile Borders
Peel-and-stick floor tiles in subway, marble, or mosaic patterns create an instant tiled frame look without the mess of grout.
Choose from Realistic Tile Looks
Select moisture-resistant tiles from Home Depot, Target, or Walmart. Measure the mirror’s perimeter and cut tiles in half if needed for precise sizing. For uneven surfaces, attach tiles to a flat plywood base first, then mount the entire panel.
Install Without Grout or Mess
Peel off the backing and press tiles into place, starting at the bottom. Use a utility knife to trim corners at 45 degrees for a mitered look. No grouting, drying, or special tools required.
Wrap with Marble Contact Paper
Marble-look contact paper on a foam board or plywood creates a high-end appearance at a fraction of the cost of real marble.
Cut and Apply Like Wallpaper
Cut foam board or thin plywood to frame width of 4 to 5 inches. Apply the contact paper smoothly, using a credit card to push out air bubbles. At corners, make 45-degree mitered cuts for a seamless join and trim excess with a sharp blade.
Seal for Bathroom Durability
Seal the surface with two coats of polyurethane, especially the bottom edge, to prevent peeling in humid conditions. Attach the finished panel with mounting tape or Command Strips.
Build a Tufted Wooden Frame
For a soft, luxe texture, create a tufted frame with foam padding and water-resistant fabric.
Craft a Soft, Luxe Texture
Use IKEA photo frame boards or lightweight wood strips to form the frame base. Attach 1-inch foam padding with spray adhesive, then drape white vinyl fabric over the top. Mark tufting points in a diamond or grid pattern, carve shallow indentations, and secure crystal buttons at each point.
Mount Without Damage
Fold excess fabric to the back and glue or staple it in place. Clean the mirror, apply double-sided mounting tape, and press the frame into place. The result is a plush, high-end look ideal for master bathrooms.
Disguise a Medicine Cabinet
Outdated mirrored medicine cabinets can be updated without removal using peel-and-stick finishes.
Cover with Peel-and-Stick Finishes
Apply peel-and-stick wallpaper or tiles to the doors and sides. Choose geometric, floral, or metallic patterns to hide tarnished backing or worn chrome. For the top surface, use subway tile-look vinyl to create a seamless countertop extension.
Frame the Entire Unit
Build a wooden or molding frame that wraps around the entire cabinet, merging it with the mirror. This creates the illusion of a built-in unit and hides gaps or mismatched edges.
Style by Design Theme
Match your mirror upgrade to your bathroom’s overall style for a cohesive look.
Rustic Farmhouse with Reclaimed Wood
Use pallet boards or barn wood stained in warm walnut or whitewashed gray. Attach with construction adhesive for permanence or Command Strips for rentals. Pair with black iron sconces and mason jar accessories.
Coastal with Rope and Shells
Wrap natural jute rope around a wooden frame, securing with hot glue every few inches. Glue seashells or driftwood pieces at the corners or along the bottom edge. Use blue-and-white nautical wallpaper behind the mirror or as a border.
Mid-Century Modern with Bold Color
Embrace vintage mirrors instead of replacing them. Paint walls in avocado green or mustard yellow, and add teak trays or brass accessories. A black or walnut-finish frame enhances the retro vibe.
Integrate Functional Upgrades
While dressing up your mirror, consider adding functional elements that improve daily use.
Add a Shelf or Ledge
Attach a floating shelf above or around the mirror to hold skincare, candles, or plants. Use L-brackets or hidden cleats for support. Choose water-resistant wood or laminate to withstand humidity.
Install Sconces or Backlighting
Mount sconces at eye level on either side of the mirror to eliminate facial shadows. Use warm white bulbs (2700K to 3000K) for flattering light. Alternatively, add LED strip lights behind the frame to create a soft halo effect.
Protect Against Moisture
Any materials used near the sink must be properly sealed to prevent damage from humidity.
Seal All Porous Materials
Apply two coats of polyurethane or water-resistant Mod Podge to any wood, foam, fabric, or paper used near the sink. Focus on the bottom edge and reapply every 1 to 2 years in high-humidity bathrooms.
Ensure Proper Ventilation
Run the bathroom fan for 20 to 30 minutes after showers to reduce condensation. This prevents mold, adhesive failure, and warping. If no fan exists, consider installing a quiet, humidity-sensing model.
Choose the Right Method for Your Needs
Selecting the right approach depends on your situation, whether you’re renting, own your home, or plan future renovations.
Renters: Use Removable Solutions
Stick to Command Strips, peel-and-stick tiles, or frame kits. Avoid nails, screws, or heavy adhesives that could trigger deposit deductions. Foam board and contact paper projects are ideal because they install easily and remove without damage.
Homeowners: Invest in Permanent Upgrades
DIY wood frames with Liquid Nails or construction adhesive offer long-term durability. Pair with spray-painted finishes and LED lighting for a custom-built look that adds resale value.
Future Renovations: Delay Major Work
If you plan to replace the vanity or countertop soon, hold off on mirror upgrades. A new vanity may change the mirror’s position or size, making current efforts obsolete.
Frequently Asked Questions About Dressing Up a Bathroom Mirror
What is the easiest way to dress up a bathroom mirror without tools?
No-tools frame kits are the easiest option. These adhesive-backed trim pieces come in various finishes and sizes. Simply clean the mirror, peel off the backing, and press the pieces into place. They install in under an hour and can be removed without damage.
Can I frame a bathroom mirror myself with wood?
Yes, you can create a custom wood frame using 1×2 lumber or molding. Measure the mirror carefully, cut pieces at 45-degree angles with a miter saw, assemble with wood glue and screws, paint or stain, then attach using Liquid Nails (glass-safe formula). This method takes 3 to 6 hours but delivers a professional, permanent result.
How do I dress up a bathroom mirror on a budget?
Peel-and-stick tile borders and marble contact paper are the most budget-friendly options, costing $10 to $30. Foam board decorated with Dollar Store items like paint palettes or plastic spoons also costs under $15 and creates a bold statement.
Will these mirror upgrades damage rental deposits?
Removable solutions like Command Strips, adhesive frame kits, and peel-and-stick materials won’t damage mirrors or walls when removed properly. Always clean surfaces with rubbing alcohol before applying adhesives, and remove everything carefully before moving out.
How do I protect my mirror upgrade from bathroom humidity?
Seal all porous materials (wood, foam, fabric) with two coats of polyurethane or water-resistant Mod Podge. Focus on bottom edges near the sink. Run the bathroom fan for 20 to 30 minutes after showers to reduce condensation and extend the life of your upgrade.
Key Takeaways for Dressing Up Your Bathroom Mirror
Dressing up a bathroom mirror is one of the most cost-effective design upgrades you can make. Whether you spend $10 on contact paper or 6 hours building a custom wood frame, the transformation is immediate and impactful. Frame it with DIY wood trim for a permanent, high-end look, or use removable solutions like frame kits and Command Strips if you’re renting. Add crown molding and LED lighting for architectural depth and functional illumination. Match your upgrade to your bathroom’s style, whether that’s rustic farmhouse with reclaimed wood, coastal with rope and shells, or mid-century modern with bold colors. Always seal porous materials against moisture and ensure proper ventilation to protect your investment. Start small, test your design, and enjoy the results.