You’ve seen this look in luxury hotels and high-end bathrooms—a sleek mirror glowing softly around the edges, casting a gentle halo on the wall. It’s not magic; it’s a backlit mirror, and you can build one yourself for less than $150. Whether you’re upgrading your bathroom, adding ambiance to your bedroom, or creating a statement piece for your living room, backlighting a mirror transforms it from functional to fabulous.
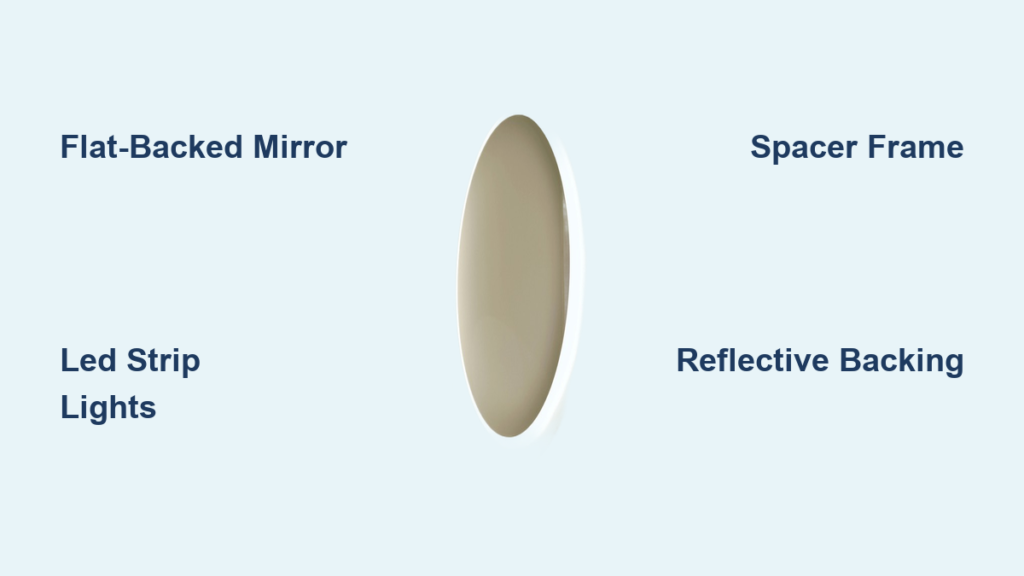
The process is simpler than you might think. Using just a few key components—LED strip lights, a spacer frame, and a flat-backed mirror—you can create a modern, floating glow effect that enhances both lighting and space perception. In this guide, you’ll learn how to choose the right materials, install LED strips safely, avoid common mistakes, and achieve professional results.
Choose the Right Mirror for Backlighting
Select a Flat-Backed Mirror
Use a frameless, flat-backed mirror for easiest installation. Avoid mirrors with pre-attached brackets, frames, or recessed mounting hardware because these interfere with attaching a spacer frame and LED strips. A smooth back allows clean adhesion and even light distribution.
If your mirror has mounting clips or brackets, remove them carefully using a screwdriver or pry bar. Clean any adhesive residue with isopropyl alcohol before proceeding.
Size and Placement Considerations
Measure your wall space and decide on mirror dimensions. Common sizes range from 24×30 inches for bathroom vanities to 36×48 inches for full-length mirrors. Larger mirrors require more LED strips and stronger wall anchors due to increased weight.
Ensure the mirror will be mounted on a solid surface such as studs in drywall, masonry, or concrete. Avoid hollow drywall unless using heavy-duty toggle bolts rated for the mirror’s weight.
Advanced Option: Etched or Frosted Glass
For a premium internal glow effect, use an etched or frosted mirror. This involves removing the reflective backing along the edges so light shines through the glass instead of just around it. Sandblasting creates the most crisp and uniform frosting, while chemical etching requires careful application but works for small areas. Use adhesive vinyl stencils to define glowing borders or patterns.
Pro Tip: Sanding alone won’t remove the metallic coating effectively. Use proper tools and safety gear including goggles and a respirator when sandblasting.
Pick the Best LED Lights for Your Mirror
Use LED Strip Lights for Flexibility
LED strip lights are the top choice for DIY backlit mirrors because they’re flexible, adhesive-backed, and easy to cut and install along the mirror’s perimeter. Choose strips with 12V or 24V DC power for safer installation, high density of 60 LEDs per meter for brighter output, IP65 or higher waterproof rating if installing in bathrooms, and dimmable capability for adjustable ambiance. Avoid cheap, non-waterproof strips because they fail quickly in humid environments.
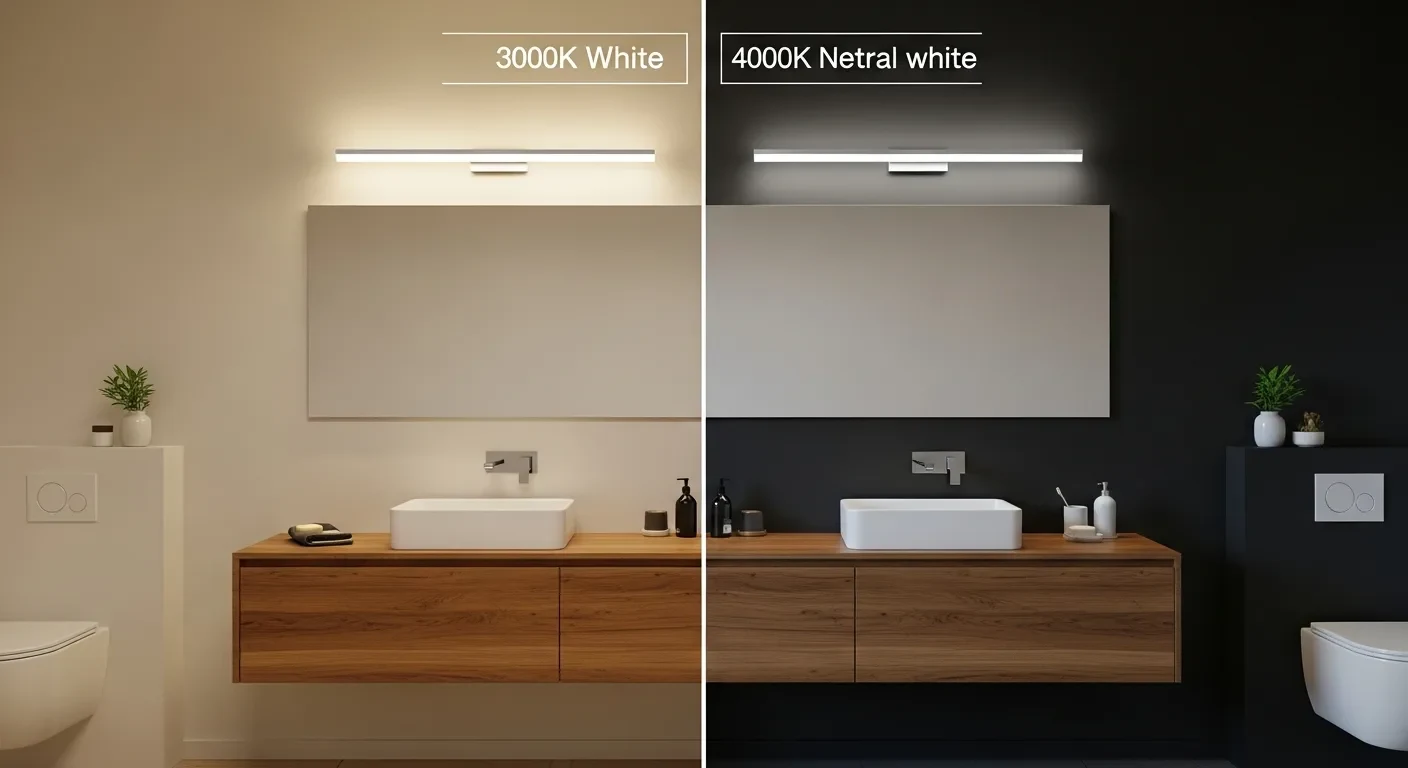
Match Color Temperature to Room Use
Color temperature affects mood and function. Choose based on where the mirror will go:
| Room | Recommended Temperature | Effect |
|---|---|---|
| Bathroom | 4000K (neutral white) | Natural skin tones for grooming |
| Bedroom | 2700K–3000K (warm white) | Relaxing, cozy glow |
| Makeup Station | 5000K–6500K (daylight) | Accurate color rendering |
Upgrade to RGB or Smart LEDs
Want dynamic lighting? Use RGB LED strips with remote or app control. These let you change colors, set scenes, schedule on and off times, and integrate with voice assistants like Alexa or Google Home. Smart systems may require a Wi-Fi or Bluetooth controller, power supply with signal receiver, and mobile app setup. These upgrades add $20–$50 to your budget but offer maximum customization.
Build a Spacer Frame for the Glow Effect
Cut Wood or MDF to Size
A spacer frame lifts the mirror off the wall, creating space for light to spread and form a halo effect. Use half-inch thick wood or MDF cut half an inch smaller than the mirror on all sides so it stays hidden behind the glass. Measure mirror width and height, subtract one inch from each dimension, cut four pieces for vertical sides and top/bottom, then sand edges smooth. Optional: paint the frame white to reflect more light forward.
Add a Wire Notch
Cut a small half-inch notch in one corner of the frame to route the LED power cable through. This keeps wires hidden behind the mirror. Use a jigsaw or chisel to make a clean groove. Avoid drilling directly into the mirror edge because this risks breakage.
Attach Frame to Mirror Back
Use industrial-strength double-sided tape or construction adhesive such as Liquid Nails to bond the frame to the mirror’s back. Apply adhesive evenly, press firmly, and let cure for 2–4 hours. Ensure the frame is centered and level before setting.
Warning: Never rely solely on adhesive for wall mounting. This is only for securing the frame to the mirror. Wall support comes from separate mounting hardware.
Install LED Strip Lights Step by Step

Measure and Cut Strips Precisely
Measure the mirror’s perimeter and cut LED strips to fit. Cut only at marked points usually indicated by copper pads or scissors icons. For a rectangular mirror, cut four segments for top, bottom, left, and right. Leave slight gaps at corners to prevent overlap. Most strips can bend at 90-degree angles, but avoid sharp folds that damage internal circuits.
Stick LEDs Close to Mirror Edge
Peel the backing and press the strip onto the outer edge of the spacer frame within one inch of the mirror’s edge. This maximizes the glow effect. Press firmly along the entire length to ensure adhesion. If the surface was cleaned with alcohol and is dry, the strip should stick permanently.
Common Mistake: Strips not sticking? Re-clean the surface and consider using LED mounting clips for extra security.
Connect and Test Before Final Mount
Link all strips to the power supply and plug in temporarily. Check for even brightness, no flickering, and proper remote or dimmer function. If using multiple strips, connect them in parallel rather than daisy-chained beyond 16 feet to prevent voltage drop and dimming at the end. Fix issues now by adjusting placement, reseating connectors, or adding amplifiers if needed.
Optimize Light Diffusion for Maximum Glow
Add a Reflective Backing Panel
Without a reflective surface behind the LEDs, light escapes backward, reducing brightness. Install a white foam board, MDF, or painted panel behind the strips. Cut the panel to match mirror size, paint it white if using wood, and attach with tape or screws to the spacer frame. This reflects stray light forward, boosting glow intensity and eliminating dark spots.
Use a Diffuser for Smooth Glow
A frosted acrylic sheet placed over the LEDs softens the light and hides individual dots. This creates a seamless, uniform halo. Cut the diffuser to fit inside the spacer frame. Avoid clear plastic because it highlights LED points rather than diffusing them.
Design Note: Skip the diffuser if you want a more dramatic, directional glow.
Maintain the Correct Wall Gap
When mounted, the mirror should sit half to one inch from the wall. This gap allows light to spread evenly across the surface behind. Use wall spacers or recessed mounting hardware to achieve this. Too close results in weak glow while too far causes light spill and inefficiency.
Mount the Mirror Safely
Find Studs or Use Heavy-Duty Anchors
Never mount a heavy mirror on drywall with standard screws. Use wood studs with 2.5-inch screws for stud walls, toggle bolts or snap toggles rated for mirror weight for hollow drywall, and masonry anchors with carbide-tipped bits for brick or concrete. Weigh your mirror before purchasing anchors. A 24×30-inch glass weighs approximately 10 pounds while larger ones can exceed 30 pounds.
Drill Pilot Holes and Hang Securely
Mark screw positions on the wall. Drill pilot holes slightly smaller than anchors. Insert anchors, then screw in mounting screws, leaving quarter inch protruding so the mirror can slide on. Align the mirror’s frame notches with the screws and gently lower into place. Use a level to ensure it’s straight and adjust with shims if needed.
Safety First: Always have a helper when lifting large mirrors. One slip can cause injury or glass breakage.
Conceal Wiring for a Clean Look
Route Cables Through Spacer Frame
Run the LED power cord through the notch in the spacer frame so it exits cleanly from the top or side. Keep connections tight and insulated. Use wire connectors or solder joints covered with heat shrink tubing.
Hide Wires with Cord Covers
Use paintable wire channels or surface raceways to hide cords running down the wall. Match the channel color to your wall or paint it for invisibility. Alternatively, run wires through the wall if you have electrical knowledge or plug into a nearby outlet with a cord hider.
Pro Tip: Install a wall dimmer switch or motion sensor for hands-free control. This is especially great for nighttime bathroom use.
Upgrade with Smart Controls
Install a Dimmer for Adjustable Brightness
Use an inline or wall-mounted dimmer compatible with your LED driver. This lets you switch from bright task lighting to soft night glow. Types include rotary dial, touch slider, and remote-controlled options. Ensure the dimmer matches the voltage and wattage of your system.
Add Voice or App Control
For full automation, use smart LED controllers connected via Wi-Fi or Bluetooth. Control with a smartphone app, set schedules such as warm light at night and bright in the morning, and integrate with Alexa or Google Assistant. For example, say “Alexa, turn on bathroom mirror lights to 50% warm white.”
User Idea: Could you run two LED strips with warm and cool white and blend them? Yes, use dual-channel controllers to mix colors and adjust tone.
Prevent Common Problems
Fix Uneven Lighting
If some sections are dimmer, check for voltage drop by avoiding daisy-chaining long runs. Use parallel wiring or amplifiers every 16 feet and ensure all connectors are secure. Reposition strips closer to the mirror edge for stronger glow.
Stop Flickering
Flickering usually means a loose connection, incompatible dimmer, or overloaded power supply. Reseat all plugs, use the correct driver, and avoid mixing LED types on one circuit.
Avoid Light Bleed Behind Mirror
If light escapes behind the mirror, add a white reflective backing, seal gaps with foam tape, and ensure no LEDs face directly backward. This keeps the glow focused where it should be on the wall.
Maintain and Troubleshoot Your Backlit Mirror
Clean Safely Without Damaging LEDs
Wipe the mirror with standard glass cleaner but avoid spraying liquid near edges because moisture can seep behind and damage electronics. Use a dry or slightly damp cloth around the perimeter.
Replace Faulty LED Segments
If part of the strip fails, cut out the damaged section and solder in a replacement segment. Alternatively, use plug-and-play connectors for easier replacement. Most strips last 30,000–50,000 hours which is 5–10 years, but individual sections can be repaired.
Check for Overheating
LEDs run cool, but poor ventilation can cause heat buildup. Ensure strips aren’t covered or enclosed, the power supply has airflow, and no flammable materials are nearby. Use UL-listed or CE-certified components for safety.
Frequently Asked Questions About Backlighting a Mirror
What is the best LED color temperature for a bathroom mirror?
Use 4000K neutral white for bathrooms because it provides natural skin tones for grooming. If you prefer a warmer ambiance, 2700K works well, though it may be less ideal for precise tasks like makeup application.
How much does it cost to backlight a mirror yourself?
DIY backlit mirrors cost between $50–$150 depending on materials. This includes the mirror, LED strips, power supply, spacer frame materials, and wiring accessories. This is significantly less than commercial backlit mirrors which range from $100–$500+.
Can I backlight any type of mirror?
Most flat-backed, frameless mirrors work best. Avoid mirrors with pre-attached frames, brackets, or recessed mounting hardware because these interfere with spacer frame installation. The mirror should have a smooth, clean back surface for adhesive application.
Do I need an electrician to install a backlit mirror?
No, most DIY installations use low-voltage 12V or 24V LED systems that plug into standard outlets. No hardwiring is required unless you choose to route cables through the wall. Simply follow the plug-and-play setup for basic installations.
How long do LED strip lights last in a backlit mirror application?
LED strip lights typically last 30,000–50,000 hours, which translates to approximately 5–10 years of daily use. Quality waterproof strips in proper installations often exceed this lifespan.
Can I use a backlit mirror as my main bathroom light?
Yes, a fully perimeter-lit backlit mirror can provide enough light for basic bathroom tasks. For primary illumination, use high-density LED strips (60 LEDs per meter or more) and ensure the mirror is large enough to distribute sufficient light across the space.
Key Takeaways for Backlighting Your Mirror
Backlighting a mirror is a high-impact, low-cost upgrade that elevates any room’s look and feel. With the right materials, attention to detail, and a few basic tools, you can create a custom fixture that rivals $500 store-bought models for under $150. The key steps include choosing a flat-backed mirror, building a spacer frame to create the glow gap, selecting appropriate LED strips with the right color temperature and waterproof rating, and mounting safely with proper wall anchors.
Remember to add a reflective backing panel to maximize brightness, test all electrical connections before final mounting, and conceal wiring for a clean, professional appearance. Whether you want soft ambient lighting for your bedroom or a bright vanity setup for your bathroom, backlighting transforms an ordinary mirror into illuminated art that enhances both function and aesthetics in any space.