You’ve seen them in therapy clinics, spell rooms, and holiday decorations. Mirror boxes are versatile enclosures that serve practical, therapeutic, and metaphysical purposes. Whether you need one to manage chronic pain, protect a fragile mirror during a move, or amplify your intentions in rituals, the right build makes all the difference. This guide covers how to make a mirror box for every purpose, using materials costing under $20 and build times ranging from 2 minutes to under an hour.
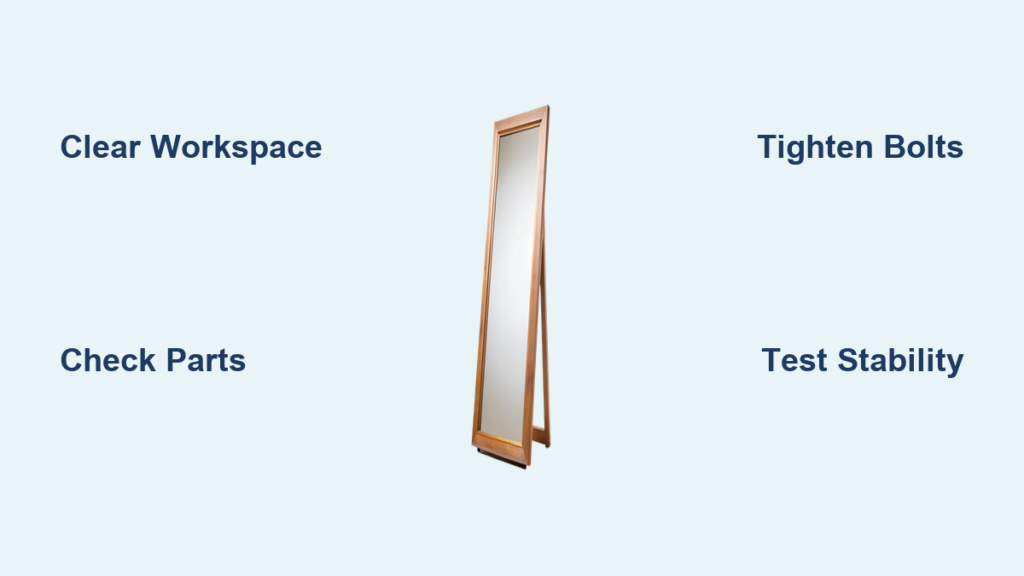
Build a Therapeutic Mirror Box for Pain Relief

This version helps manage phantom limb pain, stroke recovery, and Complex Regional Pain Syndrome (CRPS) by using visual feedback to retrain the brain.
Gather Your Materials
Collect these items from hardware stores and glass shops. Many retailers give away scrap mirror pieces, so ask before buying.
• ¾-inch plywood: Four 8.5 × 11-inch panels
• Scrap mirror: One 8.5 × 11-inch piece
• Drywall screws: ⅛-inch size
• Construction adhesive: Liquid Nails or similar
• Tools: Drill, Phillips screwdriver, saw
Cut and Pre-Drill the Panels
Request pre-cut wood at your hardware store to save time. Use a drill bit slightly smaller than your screws to pre-drill holes at the ends of each panel. This prevents wood from splitting during assembly.
Assemble the Wooden Frame
- Lay one panel flat as the base.
- Attach a second panel vertically using screws to form a 90° angle.
- Repeat with the remaining two panels to create a rectangular open-top box.
- Secure all corners with screws.
Skip clamps and wood glue. Drywall screws make assembly faster and more stable.
Mount the Mirror Securely
- Apply a thin bead of construction adhesive along the inner rim of the frame.
- Add a swirl of glue in the center for extra support.
- Carefully place the mirror face-up into the frame.
- Press evenly and let cure for at least 10 minutes before moving.
Wipe any excess glue immediately with a cloth.
Use It for Hand Therapy
Place your unaffected hand in front of the mirror. Move it while watching the reflection “move” the affected limb. This visual illusion helps retrain the brain and reduce pain. Use daily for 10 to 15 minutes as part of a graded motor imagery (GMI) routine.
Create a Decorative Mirror Box From Dollar Store Supplies
Turn cheap store finds into a dazzling centerpiece perfect for gifting or holiday decor.
Collect Your Supplies
• Themed box from Dollar Tree (Valentine’s, Christmas, or any holiday)
• Six small mirrors from Dollar Tree
• Spray paint in silver, gold, or bronze
• Gorilla Clear Grip adhesive
• Hot glue gun and sticks
• Fix All glue for trim
• Diamond Bling strips
• Baby wipe, masking tape, coffee stirrer
Prep and Paint the Base
Remove all stickers from the box and wipe clean with a baby wipe. Spray-paint the edges to hide black borders. Silver gives a festive look, but gold or bronze works for different seasons.
Attach Mirrors With Strong Adhesive
- Apply Gorilla Clear Grip to one side of the box.
- Press a mirror into place and reinforce with hot glue on the back.
- Repeat for all sides.
Work quickly because hot glue sets in seconds. If a mirror sits crooked, use that side as the bottom.
Add Sparkly Bling Trim
- Pre-cut Diamond Bling strips to match each edge.
- At corners, cut small triangles to create seamless joins.
- Use a coffee stirrer to apply Fix All glue under the trim.
- Press down and use masking tape to hold lifting corners.
Use 3-row bling on the top edge for maximum impact.
Install Decorative Feet
- Apply Gorilla Glue to the base of each knob.
- Position on the bottom corners.
- Tape in place and let dry overnight.
Optional: Add extra bling around the feet or glue a brooch to the front.
Display Your Creation
Place on a shelf or table. Fill with small decor like a vintage glass tree or candles. Swap silver paint for gold or bronze to match different holidays.
Make a Minimalist Mirror Box in Under 2 Minutes
This fast, cheap, and surprisingly sturdy version works great for gifts, plant displays, or centerpieces.
Get the Right Mirrors
• Four beveled square mirrors for sides
• One flat square mirror for base
• Hot glue gun and glue sticks
Glue Sides to Base
- Run a thin line of hot glue along the back edge of a side mirror.
- Press it to the outer edge of the base mirror.
- Hold for 10 seconds until set.
- Repeat for all four sides.
Work quickly because hot glue cools fast.
Reinforce the Corners
Apply a small dab of hot glue at each inside corner where mirrors meet. This adds stability. Optional: Add cork protectors to the bottom to prevent surface scratches.
Use as a Centerpiece or Gift
Fill with succulents, crystals, or holiday decor. At under $7 each, these make excellent teacher gifts or party favors.
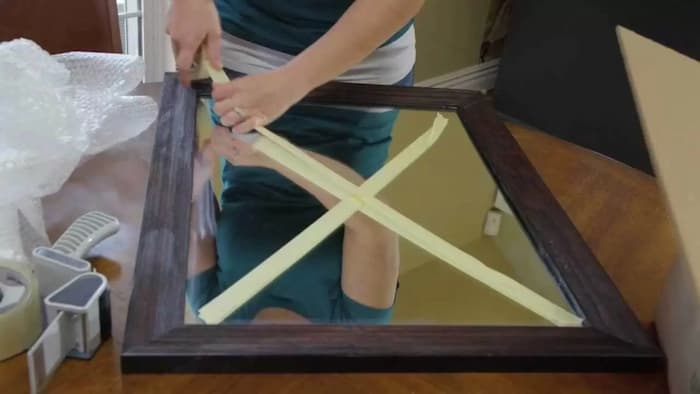
Pack a Mirror Box for Safe Moving
Protect large mirrors from cracks, scratches, and breakage during a move.
Choose a Sturdy Cardboard Box
Pick a double-walled box slightly larger than the mirror. If unsure, consult a moving company for the right size. Never use a flimsy or previously used box.
Clean and Pad the Mirror
- Wipe the surface with glass cleaner and a soft cloth.
- Dry completely.
- Wrap bubble wrap or foam around all edges.
- Add cardboard corner protectors for extra strength.
Optional: Apply commercial adhesive film to the entire surface.
Build the Protective Box
- Reinforce corners by taping 4-inch-wide cardboard strips vertically along each box corner.
- Create padding inserts by cutting U-shaped cardboard channels to cradle the mirror’s edges.
- Double-box by placing the mirror in an inner box, then inserting into a larger outer box. Fill gaps with packing peanuts.
Insert and Seal the Mirror
- Place the wrapped mirror inside the box.
- Close flaps and seal all seams with packing tape.
- Extend tape over edges for durability.
Label clearly with “FRAGILE,” “THIS SIDE UP,” and the room destination.
Load With Care
Place upright in the moving truck. Use straps or furniture pads to prevent sliding. Never stack heavy items on top.
Use a Mirror Box for Magic and Rituals
In metaphysical practice, mirrors amplify intention, reflect energy, and create infinite loops.
Choose Your Mirror Type
• Compact mirror: Portable, place sigils or affirmations inside
• Mirror plate: Stable surface for spellwork
• Bathroom mirror: Tape photos face-down for return-to-sender spells
Set Up a Magical Mirror Box
- Line a box with aluminum foil if no mirrors are available.
- Place a written intention, photo, or sigil inside.
- Close the box to activate the reflection effect.
For banishing, decorate with black fabric or banishing symbols.
Amplify Your Intentions
| Goal | How to Use |
|---|---|
| Amplify Power | Place a charged crystal in front of a mirror |
| Reflect Negativity | Close a mirror box with a curse note inside |
| Speed Up Results | Put a sigil in a mirrored enclosure |
| Prosperity | Add green paper or gold paint |
| Binding | Use black-backed mirrors |
| Emotional Release | Write a letter, tape it to a mirror face-down |
Charge and Consecrate
- Clean the box with salt water or sage.
- Set your intention aloud.
- Use color magic by painting red for passion or blue for calm.
Quick Fixes and Material Substitutions
No mirrors? No problem. Use these affordable alternatives.
Try Aluminum Foil
Line the inside of any box with shiny-side out foil. It reflects energy and works in spellwork. Foil isn’t a mirror, but it’s reflective and that counts.
Use Reflective Paint
Paint the interior with metallic silver or chrome paint for a mirrored effect.
Repurpose What You Have
• Old wooden boxes
• Picture frames (tape two back-to-back)
• Storage containers with smooth interiors
Key Takeaways for Building Your Mirror Box

No matter your goal, a mirror box is within reach. Choose your build based on purpose: wooden frames for therapy, hot-glue mirrors for decor, cardboard for moving protection, and foil-lined boxes for ritual work. Materials cost under $20 total, and build times range from 2 minutes to one hour. Pre-drill wood to avoid splitting, work fast with hot glue, and always label moving boxes clearly. Wear gloves when handling glass and test stability before placing heavy items inside.
Frequently Asked Questions About Mirror Boxes
What is a mirror box used for?
Mirror boxes serve multiple purposes including therapeutic pain relief (CRPS, phantom limb), decorative home decor, safe moving transport, and magical ritual work.
How much does it cost to make a mirror box?
Costs range from under $7 for a simple hot-glue craft version to under $20 for decorative builds. Therapeutic wooden versions cost under $15 when using scrap materials.
How long does it take to build a mirror box?
Minimalist versions take about 2 minutes. Decorative crafts take 1 to 2 hours. Wooden therapeutic boxes and moving boxes take 30 to 60 minutes.
Can I use aluminum foil instead of mirrors?
Yes. Aluminum foil works as a reflective substitute for metaphysical purposes. Line the box with shiny-side out foil for energy work and spell amplification.
Is a mirror box safe for children?
Adult supervision is required when handling glass mirrors and hot glue. For children’s therapy, use plastic mirrors or acrylic alternatives.
How do I clean and maintain my mirror box?
Clean mirrors with glass cleaner and a microfiber cloth. Store in a dry, temperature-stable place. Reapply edge guards or foil if worn over time.