You’ve got a beautiful mirror but no wall space to mount it. Maybe you’re planning a wedding backdrop, setting up a photoshoot, or need something portable for a dressing area. Wall mounting isn’t always possible or desired. That’s where a freestanding mirror stand becomes the perfect solution. This guide walks you through how to make a stand for a mirror using simple tools and affordable materials.
By the end, you’ll have a sturdy, stable stand tailored to your mirror’s size and weight. You’ll learn two proven designs, essential materials, and critical stability techniques to prevent tipping.
Choose the Right Stand Design
Before gathering materials, select a structural design that matches your mirror and intended use.
Easel-Style A-Frame Stand
This design works best for medium to large mirrors up to 30 pounds. It mimics an artist easel with two legs meeting at the top and a central support, forming a stable A-shape. The main advantages are foldability and space efficiency. You can store it flat or hang it on a wall when not in use. This makes it ideal for temporary setups, event venues, or rental spaces where portability matters.
Shelf/Ledge Support Frame
Choose this design if your mirror can rest on a base rather than hang. A horizontal ledge supports the bottom edge while C-brackets or vertical supports hold the top. This configuration provides excellent weight distribution and easy disassembly. It’s the better choice for heavier mirrors or permanent installations where the stand will remain in place for extended periods.
Gather Materials and Tools
Stock up on common lumber and hardware before starting construction.
Essential Wood Components
You need several wood pieces to build a strong, lightweight stand. Legs should be 2×2 or 2×4 boards cut to 30 to 40 inches long. Frame edging uses 1×2 boards to reinforce plywood edges. Side supports are 1×3 boards that provide wider mounting surfaces. The backing panel is quarter-inch plywood cut to your mirror’s dimensions. The shelf or ledge is solid wood or plywood that supports the mirror from below.
Fasteners and Hardware
Gather these items before starting your build. Wood glue or construction adhesive bonds the mirror to its backing. An 18-gauge stapler with three-quarter-inch staples secures thin trim without splitting wood. Pocket hole screws measuring two and a half inches create strong, hidden leg joints. Finish nails measuring one-quarter inch attach frame trim invisibly. Regular wood screws one to two inches long assemble ledges and brackets. C-brackets hold the mirror top in place. A hook-and-eye latch locks easel-style stands upright. Rubber or wooden feet prevent rocking on uneven floors.
Tools You Will Need
You need a power drill, pocket hole jig, brad or staple gun, circular or miter saw, sander, clamps, measuring tape, and a square. These basic tools handle all the cutting, joining, and finishing required for both stand designs.
Build an Easel-Style Mirror Stand
Create a foldable stand that doubles as wall art when closed.
Frame the Mirror Backing
Start by reinforcing the mirror support surface. Lay a quarter-inch plywood sheet face-down on a flat surface. Apply wood glue along one long edge of a 1×2 board. Press the board flush against the plywood edge. Secure with three-quarter-inch staples every six inches. Repeat on all four sides. Let the glue dry completely before proceeding.
This wooden frame prevents plywood warping and gives solid edges for mounting. Ensure all corners are square.
Assemble the A-Frame Legs
Build a strong, balanced base that resists tipping. Cut three 2×2 boards to 36 inches or adjust based on your mirror height. Use a pocket hole jig to drill one and a half-inch angled holes at both ends of each board. Arrange two boards as outer legs with one as a cross-brace near the base. Join with two and a half-inch pocket screws and wood glue.
Angle the legs slightly outward to widen the footprint and lower the center of gravity. The cross-brace adds lateral strength and prevents wobbling.
Attach the Mirror Frame to the Stand
Connect the plywood backing to the A-frame securely. Position the framed backing atop the legs. Align 1×3 boards with the front edge of the plywood. Glue and nail them in place using one-quarter-inch finish nails. Repeat for top and bottom edges to fully encase the backing.
This creates a seamless wooden frame around the mirror, hiding the plywood edge and adding rigidity.
Add Hinges and Locking Mechanism
Enable folding and ensure safe use. Attach two heavy-duty hinges to the top of the A-frame and the upper back edge of the mirror frame. Allow the mirror to fold down flat when not in use. Install a hook-and-eye latch on the front to lock it upright.
Never rely on hinges alone for safety. The latch prevents accidental collapse.
Mount the Mirror Securely
Bond the mirror permanently to the backing. Clean both the mirror back and plywood surface thoroughly. Apply construction adhesive in a zig-zag pattern. Carefully lower the mirror into place. Press firmly and place weights on the edges. Let cure for 24 hours before moving.
Do a dry fit first to confirm alignment before gluing. Avoid silicone-based adhesives that may fail under weight over time.
Build a Shelf/Ledge Mirror Stand
For mirrors that sit on a base, this design offers superior stability.
Cut and Prepare the Legs
Start with sturdy vertical supports. Cut two legs from 2×4 or 2×2 lumber 30 to 40 inches tall. Bevel the bottom ends at 10 to 15 degrees for better floor contact. Attach small blocking pieces made from 2×2 scraps near the base to support the ledge.
Wider legs using 2×4 lumber increase stability for heavier mirrors. Ensure both legs are identical in length to prevent tilting.
Construct the Support Ledge
Build a shelf strong enough to bear the mirror weight. Cut a horizontal board slightly wider than the mirror. Position it on the blocking pieces. Secure from underneath with one and a half-inch wood screws.
Use screws instead of glue so the stand can be disassembled for transport. The ledge should support at least one-third of the mirror height for optimal balance.
Install C-Brackets for Top Support
Prevent the mirror from tipping forward. Cut a lap joint or notch into the top of each leg. Insert a C-bracket so it cradles the mirror’s upper edge. Initially the bracket rests by gravity. Drill two pilot holes and secure with screws from the back.
Never carry the stand by the C-bracket alone. It is not load-rated unless screwed in securely.
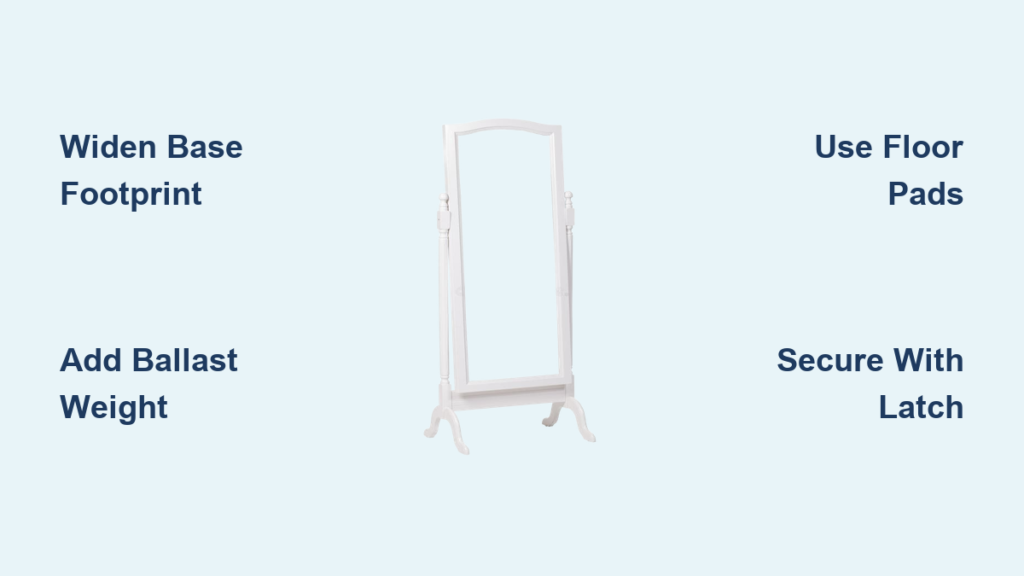
Boost Stability and Prevent Tipping
Top-heaviness is the primary risk with mirror stands. Counter it with smart design choices.
Widen the Base Footprint
The stand base should extend beyond the mirror width on both sides. For a 24-inch wide mirror, aim for a 30 to 36-inch wide base. Angle legs outward at the bottom like a pyramid.
This dramatically improves resistance to forward tipping.
Add Ballast Weight
For heavy mirrors over 25 pounds, add low-profile weights. Place concrete pavers, sandbags, or metal plates on the base cross-member. Conceal with fabric skirts for event use.
Use 10-pound sandbags hidden under a draped base. They are portable and effective for wedding setups.
Use Floor Pads to Stop Rocking
Even floors are not perfectly level. Attach rubber pads or wooden feet to leg bottoms. Use adjustable furniture glides for precision leveling.
This small step prevents wobble and protects flooring.
Optional Tether to Wall
If safety is critical in public spaces, add a discreet backup. Run a nylon strap or wire from the top rear of the stand to a wall anchor. Keep it tight but hidden.
This does not interfere with the freestanding appearance but adds peace of mind.
Finish and Customize Your Stand
Make your stand match your space or event theme.
Sand and Seal the Wood
Sand all surfaces with 120-grit paper followed by 220-grit. Wipe away dust. Apply paint, stain, or clear sealant.
Use semi-gloss paint for durability and easy cleaning. Choose matte black for a modern look or white wash for rustic charm. Sealing protects against scratches and moisture.
Add Decorative Touches
Elevate the design with simple upgrades. Attach corner guards or molding for elegance. Install knobs or handles for easier transport. Wrap legs with rope or fabric for wedding themes.
Use gold-painted C-brackets for a vintage Hollywood feel. Keep decorations lightweight to avoid imbalance.
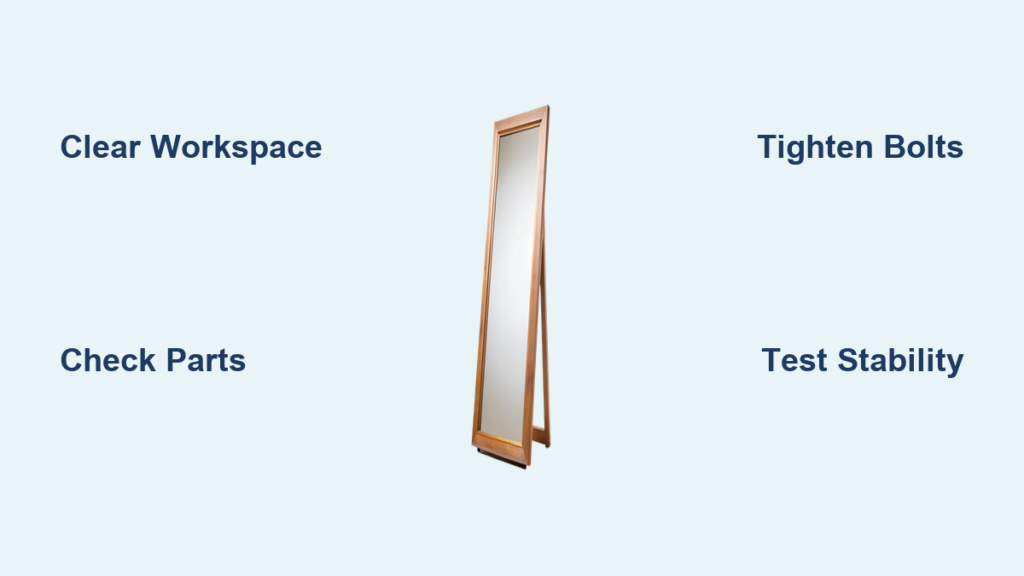
Test Before Use
Never skip this final step. Dry-fit the mirror to check alignment. Set up the stand on the actual floor surface. Gently push the top. There should be no wobble or tip.
If unstable, widen the base or add ballast. Your stand should feel solid even when lightly bumped.
Frequently Asked Questions About Making a Mirror Stand
What is the most stable design for a heavy mirror?
The shelf or ledge design with C-brackets offers the best stability for heavy mirrors. It supports the mirror from below and cradles the top edge. Adding ballast weights to the base further prevents tipping.
Can I make a mirror stand foldable?
Yes, easel-style stands with hinges fold flat for storage and transport. Attach hinges at the top and add a hook-and-eye latch to lock the position. This works well for event use.
How much does it cost to build a mirror stand?
Materials typically cost 30 to 60 dollars for lumber, screws, glue, and finish. This is far cheaper than purchasing a commercial mirror stand.
What tools do I need to build a mirror stand?
You need basic DIY tools including a power drill, pocket hole jig, brad gun, circular saw, sander, clamps, and measuring tape. No advanced skills are required.
How do I prevent my mirror stand from tipping?
Widen the base footprint beyond the mirror width, angle legs outward, add ballast weight to the base, and use floor pads for uneven surfaces. These techniques significantly improve stability.
Key Takeaways for Building Your Mirror Stand
Building a stand for a mirror is a smart, affordable solution for flexible placement. Choose the easel-style design for portability and foldability. Choose the shelf design for heavy mirrors requiring superior support. Focus on a low center of gravity, wide base, and secure mounting. Use pocket hole screws and wood glue for strong joints. Test stability before use and add ballast if needed. With the right materials and techniques, your DIY mirror stand will be safe, stylish, and sturdy for years to come.