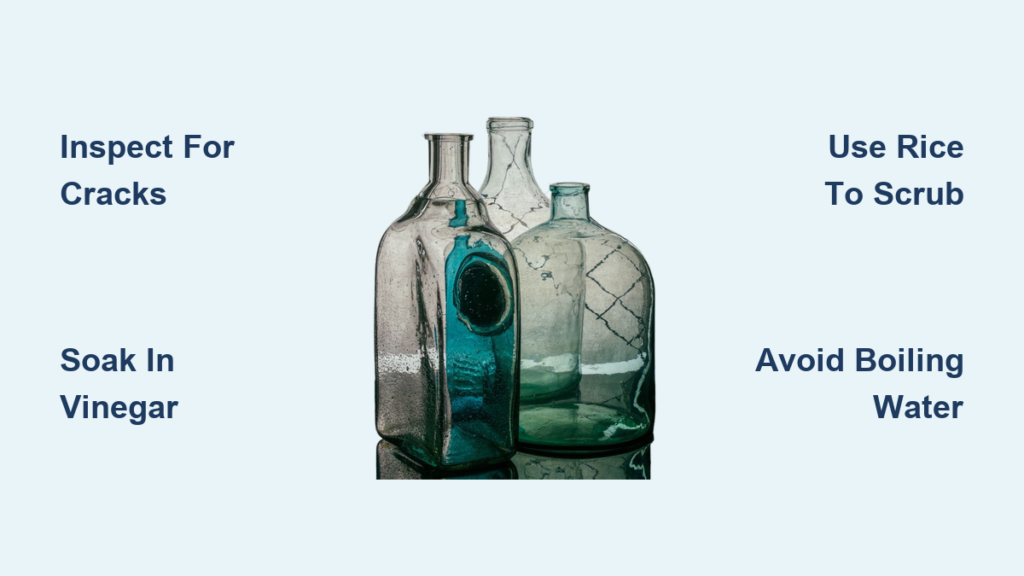
Finding an antique glass bottle buried in soil or tucked away in an old barn feels like uncovering a piece of forgotten history. But before you can admire its craftsmanship, it’s likely coated in decades of grime, mineral crust, or oily residue from buried metal. How to clean antique glass bottles safely—without cracking fragile glass or destroying collectible value—is a skill every bottle digger and vintage collector should master.
Most antique bottles suffer from surface dirt, rust stains, internal buildup, or cloudy “sick glass” caused by centuries of moisture exposure. The key is matching your method to the bottle’s condition: gentle soaking for delicate pieces, abrasive agitation for stubborn grime, and targeted chemical treatments for mineral deposits. This guide walks you through every step, from initial inspection to final polish, so you can restore your antique glass bottles safely and effectively.
Pre-Cleaning Inspection Steps

Before any water or chemicals touch your bottle, a quick visual check prevents costly mistakes and irreversible damage.
Check for Cracks and Fragility
Examine the bottle in good light, rotating it slowly. Look for hairline cracks, chips, or thin spots near the base or neck. Bottles from the 1800s, such as druggist flasks or “puff” bottles, often have delicate walls. Never shake these with heavy abrasives. If the glass feels paper-thin or makes a faint “ping” when tapped lightly, treat it as high-risk.
Identify the Type of Dirt
Determine whether the grime is loose soil, hardened mud, oily residue, or mineral crust. Surface dirt rinses easily. Mineral deposits appear as white, chalky rings. Oily films may look iridescent. Internal debris that won’t budge likely needs soaking or agitation.
Consider Collector Value
Some collectors prefer bottles with original patina. Over-cleaning, especially with harsh chemicals, can strip authenticity and lower resale value. If you plan to sell, light cleaning only is recommended. Reserve deep cleaning for personal display pieces.
Remove Loose Debris First
Start cleaning outdoors to avoid tracking mud into your workspace.
Shake and Brush Off Dry Dirt
Hold the bottle upside down and tap the base to dislodge loose soil. Use a soft brush, like a toothbrush, to sweep away dust from embossed lettering or crevices. This prevents clogging drains later.
Rinse With a Garden Hose
A quick outdoor rinse removes bulk grime. Use low pressure to avoid forcing water into micro-cracks. Let the bottle dry slightly before moving to soaking so you can see what remains.
Soak Bottles to Loosen Grime
Soaking softens stubborn buildup and prepares the glass for scrubbing without aggressive handling.
Use Dish Soap and Warm Water
Fill a bucket with warm water and a few drops of Dawn dish soap, a favorite for its degreasing power. Submerge the bottle fully, ensuring it’s filled with water to prevent floating. Soak for 4 to 12 hours. This loosens most surface dirt and light oils.
Try Vinegar for Mineral Buildup
For cloudy rings or hard water stains, mix 1 part white vinegar to 3 parts warm water. Heat gently on the stove (do not boil), then pour into the bucket. Soak overnight. Vinegar dissolves calcium and lime without harming glass.
Test Denture Tablets for Tough Residue
Drop 1 to 2 Polident tablets into a liter of warm water with the bottle. The effervescence helps lift organic matter and mineral deposits. This works well for internal haze, and you can reuse the solution for multiple bottles.
Avoid Boiling or Thermal Shock
Never place cold glass into boiling water. Sudden temperature changes can crack the bottle instantly. Always use warm, not hot, water, especially on older pieces.
Clean the Exterior Safely
Once soaked, tackle the outside with the right tools to avoid scratches.
Scrub With 0000 Steel Wool
For rust stains common on bottles buried near metal, use super-fine 0000 steel wool. It removes rust without scratching glass. Wet the area, rub gently in a circular motion, and rinse. Avoid coarse grades, as they can leave permanent marks.
Use Comet for Stubborn Grime
Sprinkle Comet cleanser on a damp sponge and scrub tough spots. Its mild abrasiveness cuts through baked-on dirt without damaging the surface. Rinse thoroughly afterward.
Finish With a Magic Eraser
Even after scrubbing, some residue lingers in the glass texture. A Mr. Clean Magic Eraser lifts films and haze that brushes miss. Use light pressure and dampen the eraser first for best results.
Clean the Interior Without Scratching
Narrow necks make inside cleaning tricky. Standard brushes often can’t reach curved shoulders.
Shake With Uncooked Rice
For safe, gentle agitation, add ¼ cup uncooked long-grain rice to the bottle. Pour in soapy water, seal the opening with your hand or a rubber stopper, and shake vigorously for 30 to 60 seconds. The rice grains scrub the walls without chipping glass. Strain and reuse the rice.
Use Aquarium Rocks for Heavy Buildup
For thick internal grime, add a handful of aquarium gravel, soapy water, and shake. The rocks act like tiny scrubbers. Strain through a mesh sieve to save the rocks. Only use this method on sturdy bottles, and avoid thin-walled antiques.
Try Birdshot for Tough Stains
Shotgun birdshot (about 2 teaspoons) with soapy water is highly effective for algae, tar, or barnacle-like deposits. Shake hard, but never use this on flasks or 1800s bottles. The weight can crack the base.
Insert a Metal Ball Chain
For bottles with very narrow necks, buy metal fan pull chain from a hardware store. Remove the pull ring, drop the chain into the bottle with vinegar or soapy water, and shake. The links reach into corners and break up stuck dirt, then exit easily without scratching.
DIY Bottle Brush for Tight Spaces
When store brushes don’t fit, make your own custom tool.
Build a Custom Sponge Brush
You’ll need a wire clothes hanger, a small kitchen sponge, and wire cutters with pliers.
Steps:
1. Cut a 12 to 18 inch piece of hanger.
2. Cut a sponge piece slightly larger than the bottle neck.
3. Wrap the sponge tightly around one end of the wire.
4. Twist the wire with pliers to secure it.
Insert and twist to scrub. The sponge conforms to curves. Ensure it’s tightly fastened so it doesn’t break off inside the bottle.
Handle “Sick Glass” Carefully
Some cloudiness can’t be cleaned because it’s permanent internal damage.
Recognize Sick Glass Symptoms
If the bottle looks foggy, whitish, or iridescent even after thorough cleaning, it may have sick glass. This occurs when moisture penetrates micro-fractures in the glass over decades of burial. It’s not surface dirt; it’s internal degradation.
Accept or Mask the Haze
Sick glass is irreversible. Some collectors value it as proof of age. If you dislike the look, temporarily mask it by coating the inside with baby oil, mineral oil, or melted Vaseline. The oil fills the cracks and restores clarity until it dries or evaporates. Reapply as needed.
Remove Mineral and Oily Stains
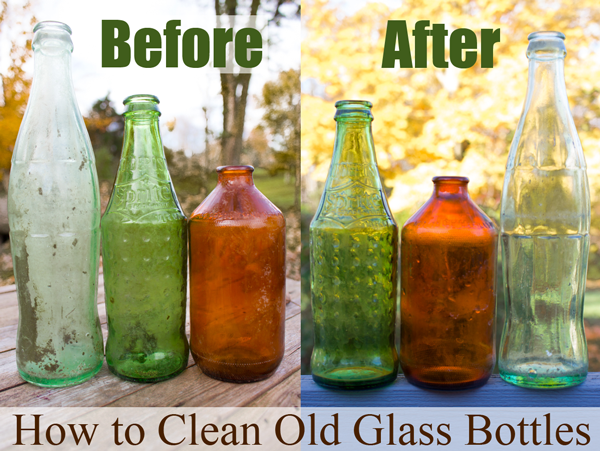
Target specific stains with the right chemical solution.
Soak in Citric Acid for Limescale
For white, crusty mineral rings, mix 1 tablespoon citric acid per cup of warm water. Soak for 1 hour, then rinse well. Citric acid is food-safe and effective, making it ideal for bottles you might repurpose.
Use CLR for Heavy Deposits
CLR (Calcium, Lime, Rust) remover works fast on stubborn buildup. Dilute as directed and soak for 10 to 15 minutes. Always test first on an inconspicuous area. Rinse thoroughly, as residue can etch glass over time.
Treat Oily Residue With Paint Thinner
For tar-like or greasy internal films, pour 1 to 2 oz paint thinner into the bottle. Let sit for 15 to 30 minutes, swirl, and pour out. Follow with a soapy water shake. Use in a well-ventilated area and wear gloves. Never mix with other chemicals.
Follow Safety and Preservation Rules
Protect yourself and your bottles throughout the process.
Wear Gloves and Eye Protection
Always use nitrile gloves and safety goggles when handling lye, Drano, paint thinner, or CLR. These chemicals can burn skin or damage eyes.
Never Use Wire Wheels or Sandpaper
These tools permanently scratch glass and destroy surface integrity. Even steel wool should be limited to 0000 grade.
Avoid Boiling Water
Thermal shock is a leading cause of breakage. Use warm water only, and never pour boiling liquid into a cold bottle.
Don’t Shake Thin-Walled Bottles
Flasks, druggist bottles, and 1800s “puffs” are fragile. Agitation with rocks or birdshot can crack the base. Stick to soaking and gentle brushing for these pieces.
Choose the Right Cleaning Protocol
Match the method to the bottle’s condition for the best results.
General Cleaning for Moderate Dirt
- Brush off loose soil outdoors.
- Soak in soapy water overnight.
- Scrub exterior with sponge and 0000 steel wool.
- Shake interior with rice and soap.
- Rinse and air dry in sunlight.
Heavy Duty Cleaning for Stubborn Grime
- Soak in vinegar or denture tablets overnight.
- Use paint thinner for oily films.
- Agitate with birdshot or metal chain.
- Soak in citric acid or CLR for mineral spots.
- Polish exterior with Magic Eraser.
Delicate Bottle Cleaning
- Soak in mild detergent for 24 or more hours.
- Flush with a warm water stream.
- Use DIY sponge brush for light scrubbing.
- Avoid shaking, abrasives, and harsh chemicals entirely.
Dry and Store Properly
The final step ensures long-term clarity and preservation.
Air Dry in Sunlight
Place bottles upside down on a drying rack. Sunlight helps evaporate moisture and prevents mold. Avoid towels, as they can leave lint or fibers inside.
Store in a Dry Place
Keep cleaned bottles in a low-humidity environment. Moisture encourages mineral deposits and can worsen sick glass. Use display cabinets with silica gel packs if needed.
Reapply Oil for Sick Glass
If you’ve treated haze with oil, reapply every few months or when cloudiness returns. It’s a temporary fix, but one that keeps the bottle looking its best.
Frequently Asked Questions About Cleaning Antique Glass Bottles
Can I use boiling water to clean antique glass bottles?
No. Boiling water causes thermal shock, which can crack or shatter antique glass instantly. Always use warm water and let bottles gradually adjust to temperature changes.
What is sick glass and can it be reversed?
Sick glass is permanent cloudiness caused by moisture penetrating micro-fractures over decades of burial. It cannot be reversed, but you can temporarily mask it with baby oil, mineral oil, or melted Vaseline.
Is it safe to use bleach on antique bottles?
Bleach is not recommended for antique glass. It can leave residue and doesn’t effectively remove mineral deposits. Vinegar, citric acid, or CLR work better for mineral buildup without risking damage.
How do I clean inside a bottle with a very narrow neck?
Use uncooked rice with soapy water and shake, or insert a metal ball chain (fan pull chain) with cleaning solution. Both methods reach into curves without scratching or getting stuck.
Should I clean antique bottles if I plan to sell them?
Light cleaning only is recommended for bottles intended for sale. Many collectors prefer original patina, and over-cleaning can reduce value. Let buyers decide how to restore pieces they purchase.
What’s the best way to remove rust stains from glass?
Use 0000 super-fine steel wool wet with soapy water. Rub gently in circular motions. Avoid coarser steel wool grades, which can permanently scratch the glass surface.
Key Takeaways for Restoring Antique Glass Bottles
Cleaning antique glass bottles successfully comes down to three core principles. First, always inspect before you clean; identifying fragility, dirt type, and collector value prevents irreversible damage. Second, match your method to the bottle’s condition: gentle soaking and rice agitation for delicate pieces, heavier abrasives and chemical treatments only for sturdy bottles with stubborn grime. Third, recognize the limits of cleaning. Sick glass cannot be restored, and some stains require professional equipment like ultrasonic cleaners or bottle tumblers.
Start with the gentlest method that works, and escalate only as needed. Your patience will be rewarded with beautiful, display-worthy bottles that retain their historical character.