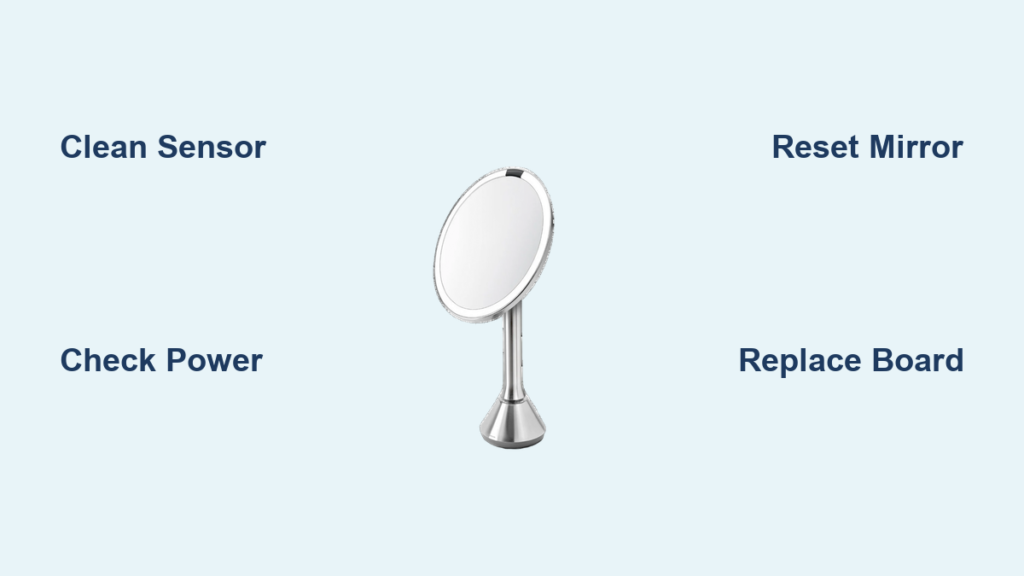
You reach for your bathroom mirror after a shower, tap the sensor, and nothing happens. No lights, no response, maybe just a flicker. You are not alone. A touch sensor mirror not working is one of the most common smart bathroom complaints. The good news? Most issues are not permanent. Whether it is unresponsiveness, phantom touches, or flickering lights, the fix is often simple: cleaning, resetting, or a quick power check.
This guide cuts through the confusion. Based on real user reports, technician insights, and engineering data, we will walk you through exactly why touch sensors fail and how to fix them step by step. You will learn how to diagnose power issues, clean sensors properly, reset your mirror, and when to replace the control board. No guesswork. Just proven solutions.
Power Supply Failure Signs
If your mirror does not respond at all, start with power. Even partial functionality, like a working defogger, means power is getting through. But inconsistent or missing power is often the root cause.
Check Outlet and Circuit
Follow these steps to verify power delivery:
- Unplug the mirror or turn off the breaker if hardwired.
- Plug in a phone charger or small lamp to test the outlet.
- If no power, check the circuit breaker or fuse box.
- For bathroom circuits, verify the GFCI outlet has not tripped.
Bathrooms require GFCI protection. If the outlet has Test and Reset buttons, press Reset after tripping.
Test Transformer Output

Most touch sensor mirrors run on 12V DC, powered by a transformer or LED driver.
Use a multimeter to measure voltage at the mirror input terminals. Set to DC voltage, touch red probe to positive and black to negative. Reading should be 12V ±5% (11.4V to 12.6V).
If voltage is low or absent, check transformer connections in the junction box. Ensure wires are tight and polarity is correct. Replace the transformer if output is unstable.
A failing transformer often causes flickering lights and sensor failure, even if the mirror appears to power on.
Clean the Sensor Surface
Sixty percent of unresponsive sensors are fixed with cleaning. Oils, moisture, toothpaste, and soap scum block capacitive or IR sensors.
Safe Cleaning Steps
- Turn off power at the outlet or breaker.
- Wipe the sensor area with a dry microfiber cloth.
- For residue, lightly dampen the cloth with distilled water or mild glass cleaner.
- Never spray directly on the mirror. Liquid can seep behind the glass.
- Dry completely before restoring power.
Avoid ammonia (Windex), vinegar, alcohol, paper towels, or abrasive scrubbers. These damage coatings. Clean weekly in high-use bathrooms to prevent buildup.
Reset the Touch Sensor
Electrical noise or firmware glitches can freeze the sensor. A reset clears the system and recalibrates sensitivity.
Standard Power Reset
- Unplug the mirror or turn off the breaker.
- Wait 5 to 10 minutes to discharge capacitors.
- Restore power.
- Tap the sensor once.
This often restores function after power surges or humidity spikes.
Advanced Reset Options
Some mirrors respond to alternative reset methods:
- Long press: Hold the touch button for 10 or more seconds after power-on.
- Triple-tap: Tap quickly three times.
- Sequence reset: Follow model-specific steps in the manual.
Not all models support advanced resets. Check your user guide.
Diagnose Phantom or Intermittent Touches
When your mirror turns on by itself or works only sometimes, the issue is likely environmental or electrical.
Is It Moisture or EMI?
Phantom activation is often caused by:
- Condensation on or inside the mirror
- Water bridges across the sensor
- Electromagnetic interference from hairdryers, radios, or Wi-Fi
Quick test: Dry the mirror thoroughly. Turn off nearby electronics. If phantom touches stop, EMI or moisture is the culprit.
High humidity is a top cause of erratic sensor behavior.
Fix EMI Issues
- Relocate high-frequency devices away from the mirror.
- Ensure the mirror and electrical system are properly grounded.
- Choose models with EMI-shielded PCBs for long-term reliability.
Identify Sensor Type: Capacitive vs. IR
Not all touch sensors are true touch. Many are infrared (IR) proximity sensors that detect hand movement near the glass.
How to Tell the Difference
- Capacitive sensor: Requires light touch. Feels like a smartphone screen.
- IR sensor: Responds to hand within 1 to 2 inches. No touch needed.
U3 is an IR reflective sensor. It detects touches from behind a clear spot in the mirror. Not at all a touch sensor.
If your mirror activates without touch, it is IR-based and more prone to false triggers from steam or reflections.
Fix IR Sensor Misalignment
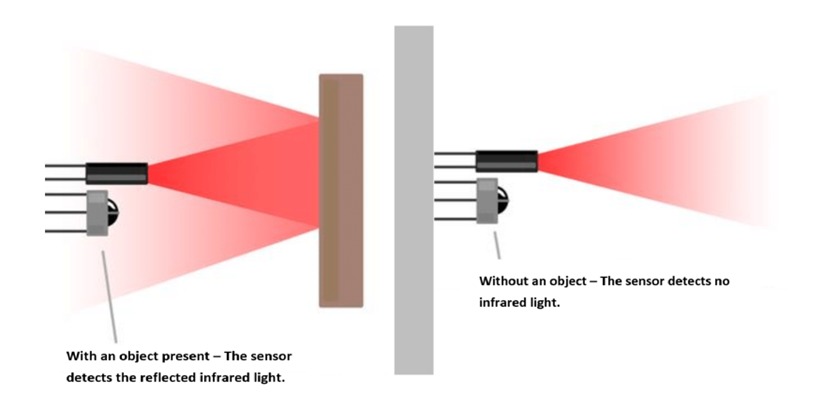
IR sensors (often labeled U3) must align with a clear spot in the mirror backing. If misaligned, the beam cannot detect reflections.
Realignment Steps
- Power off and unplug the mirror.
- Remove from wall if possible.
- Locate the IR sensor on the back. Usually near the edge.
- Ensure the IR beam points through a transparent section of glass.
- Secure with non-conductive foam tape if repositioning.
Some replacement IR sensors trigger continuously when behind glass due to reflection. Mount externally if needed.
Test Internal Wiring and Connections
Loose or damaged wiring causes flickering, partial function, or total failure.
What to Check
- Terminal screws on the PCB or junction box. Tighten if loose.
- Frayed or pinched wires behind the mirror.
- Corroded connectors from moisture exposure.
- Solder joints on the board. Look for cracks or dark spots.
Opening the mirror may void the warranty and risks electric shock. Only proceed if experienced. If you suspect internal wiring problems, contact a qualified technician.
Replace Failed Control Board or Driver
If cleaning and resetting fail, the LED driver or control board may be dead.
Symptoms of Board Failure
- No lights, even after power reset
- Defogger works but lights do not
- Sensor shows no signs of life
Replacement Options
| Component | Replaceable? | Notes |
|---|---|---|
| LED driver | Yes | Match 12V DC input and wattage (e.g., 40W for 30W LEDs) |
| Control board | Yes | Most reliable fix. Widely available online |
| IR sensor (U3) | Yes | May need realignment |
| Transistor (T1) | Yes | Common failure in switching circuit |
Replaced the board by another one, compatible 12V and IR sensor, and now it works fantastic.
Board Replacement Tips
- Match input voltage (almost always 12V DC).
- Ensure wattage rating exceeds your LED load.
- Verify function compatibility (dimming, Bluetooth, defogger).
- Watch for glass reflection issues with new IR sensors.
Prevent Future Sensor Failures
A working mirror today does not guarantee long-term reliability. Prevent problems before they start.
Control Humidity
- Run the exhaust fan during and 15 to 30 minutes after showers.
- Wipe the mirror dry after heavy steam.
- Install a dehumidifier in poorly ventilated bathrooms.
High humidity causes corrosion, short circuits, and sensor drift.
Avoid Installation Mistakes
- Mount away from direct water spray.
- Do not install above a sink unless IP44-rated or higher.
- Allow airflow behind the unit to prevent overheating.
- Use a licensed electrician for hardwired models.
Choose Quality Mirrors
Look for these features:
- IP44+ rating (splash-proof)
- Sealed electronics with conformal coating
- Double-insulated PCBs
- CE, RoHS, UL, or ETL certification
Hotels and apartments should standardize on industrial-grade mirrors tested for 100,000+ touch cycles in humidity chambers.
When to Call a Professional
Some issues are beyond DIY fixes.
Call a Technician If
- You see sparks, smoke, or burning smell
- There is visible damage to wiring or housing
- The mirror is hardwired and you are unsure
- Problems persist after cleaning and resetting
- The unit is under warranty
Never open a hardwired mirror without cutting power at the breaker.
Final Fixes by Symptom
| Symptom | Likely Cause | Solution |
|---|---|---|
| No response | Dirty sensor, power loss | Clean, reset, check outlet |
| Flickering lights | Bad driver, loose wire | Test voltage, replace driver |
| Phantom activation | Moisture, EMI, IR reflection | Dry mirror, relocate devices, reposition sensor |
| One side not working | Partial circuit failure | Inspect PCB, replace control board |
| Delayed response | Low power, aging sensor | Clean, reset, check transformer |
| Bluetooth works, touch does not | Sensor circuit failure | Replace control board |
Frequently Asked Questions About Touch Sensor Mirrors
Why is my touch sensor bathroom mirror not responding?
Most common causes include dirt, oil, or moisture on the sensor, power supply interruption, internal wiring disconnection, or sensor or PCB failure. Start by cleaning the sensor with a dry microfiber cloth, then reset the mirror, and verify power connections.
How do I reset a touch sensor mirror?
Unplug the mirror or cut power at the breaker. Wait 5 to 10 minutes. Restore power and tap the sensor. Some models require a long press or triple-tap. Check your manual for model-specific instructions.
Can bathroom humidity affect the touch sensor?
Yes. Humidity causes condensation inside the housing, corrosion of PCB traces, and phantom touches or unresponsiveness. Use an exhaust fan, wipe the mirror dry after showers, and choose an IP44+ rated mirror.
Why do my mirror lights not turn on?
If the sensor seems to respond but lights do not, the LED driver has likely failed. Other possibilities include burnt-out LED strips or loose internal connections. Contact a professional for internal repairs.
When should I call a professional?
Call a technician if you see sparks, burning smell, or damaged wires. Also call if there are cracks in the housing or glass, if problems persist after troubleshooting, or if the mirror is hardwired or under warranty.
How do I fix a Bluetooth mirror that will not connect?
Ensure pairing within 10 feet. Disable and re-enable Bluetooth on both devices. Unpair and re-pair the devices. Reset the Bluetooth module via power cycle. If Bluetooth works but touch does not, the sensor circuit has an issue.
Key Takeaways for Fixing Touch Sensor Mirrors
Most touch sensor mirror not working issues are fixable. Start with cleaning the sensor surface using a dry microfiber cloth. This resolves up to 60% of unresponsiveness cases. If cleaning does not work, perform a power reset by unplugging the mirror and waiting 5 to 10 minutes before restoring power.
For persistent issues, test the power supply with a multimeter. Verify the transformer outputs 12V DC. If voltage is correct but the mirror still fails, the control board or LED driver likely needs replacement. Always match voltage and wattage when replacing components.
Prevent future failures by controlling bathroom humidity with exhaust fans, choosing IP44+ rated mirrors, and performing weekly sensor cleaning. Avoid DIY PCB repairs unless you have electronics experience. For hardwired units or visible wiring damage, always call a licensed electrician.