
Is your side mirror stuck, making grinding noises, or refusing to fold? A faulty mirror motor can compromise visibility and safety, especially on vehicles with power-folding, heated, or memory mirror features. The good news: most side mirror motor issues can be diagnosed and repaired at home for under $25, saving you hundreds in dealership costs. This guide walks you through every step, from identifying symptoms to testing, repairing, or replacing the motor on common vehicles like Chevrolet Silverado, Ford Fiesta, and European models.
You’ll learn how to test electrical connections, bypass the control switch, clean corroded contacts, free seized gears, and replace the motor using proven techniques. Whether your mirror is completely frozen or only moving in one direction, this comprehensive fix will restore full functionality.
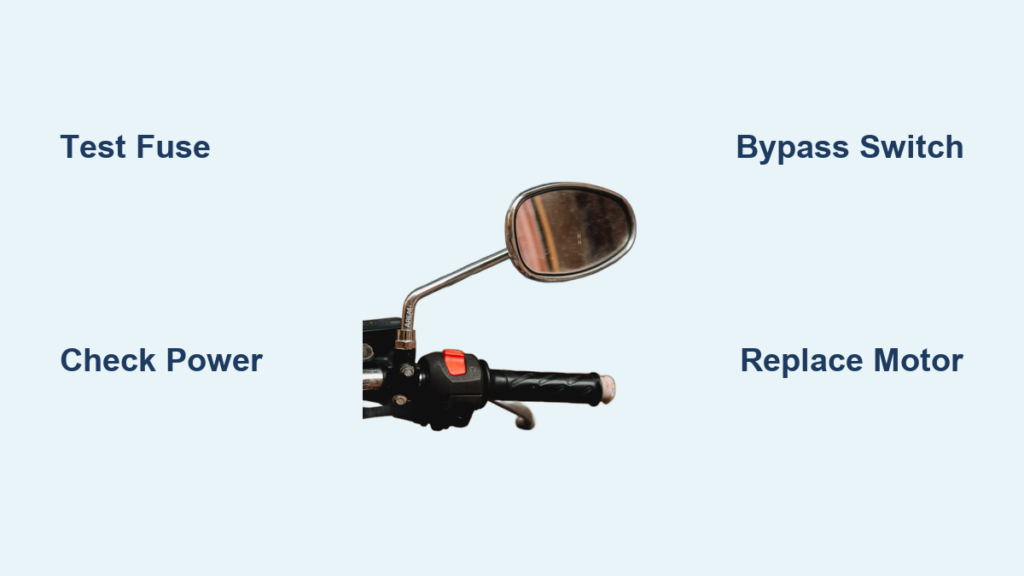
Identify Common Side Mirror Motor Failure Symptoms
Before diving into repairs, confirm the motor is actually the problem. Side mirror motor failures typically present recognizable patterns that help you narrow down the issue quickly.
Watch for these key symptoms when using your mirror controls:
• No movement in any direction when pressing up, down, left, or right on the switch, while the opposite mirror works normally
• Partial movement where vertical adjustment works but horizontal fails, indicating one of the two internal motors has burnt out
• Clicking or grinding noises without any mirror motion, suggesting gear binding or mechanical seizure
• Mirror resets position automatically on memory-equipped systems, which may indicate a sensor fault rather than motor failure
• Slow or incomplete folding where the mirror stops after moving about one inch before fully extending or retracting
Pro Tip: Try manually assisting the mirror during fold commands. Gently push the mirror in the direction it’s trying to go. This sometimes resets the position sensor and restores temporary function.
Test Fuse and Power Supply

Electrical issues are the most common cause of mirror problems, and they’re also the easiest to fix. Always start here before disassembling anything.
Locate the Correct Mirror Fuse
Most side mirror circuits run through the driver’s door module or a general accessories circuit. Check your fuse box for labels like DDM, Power Mirrors, or Door Controls. The driver-side kick panel or lower dash area typically houses these fuses.
Use a fuse puller to remove and inspect the fuse. Look for a broken filament inside the glass. Replace only with the same amperage rating to avoid damaging the circuit.
Caution: Some vehicles don’t have a dedicated mirror fuse. If you can’t find one labeled specifically, test all fuses in the door control section.
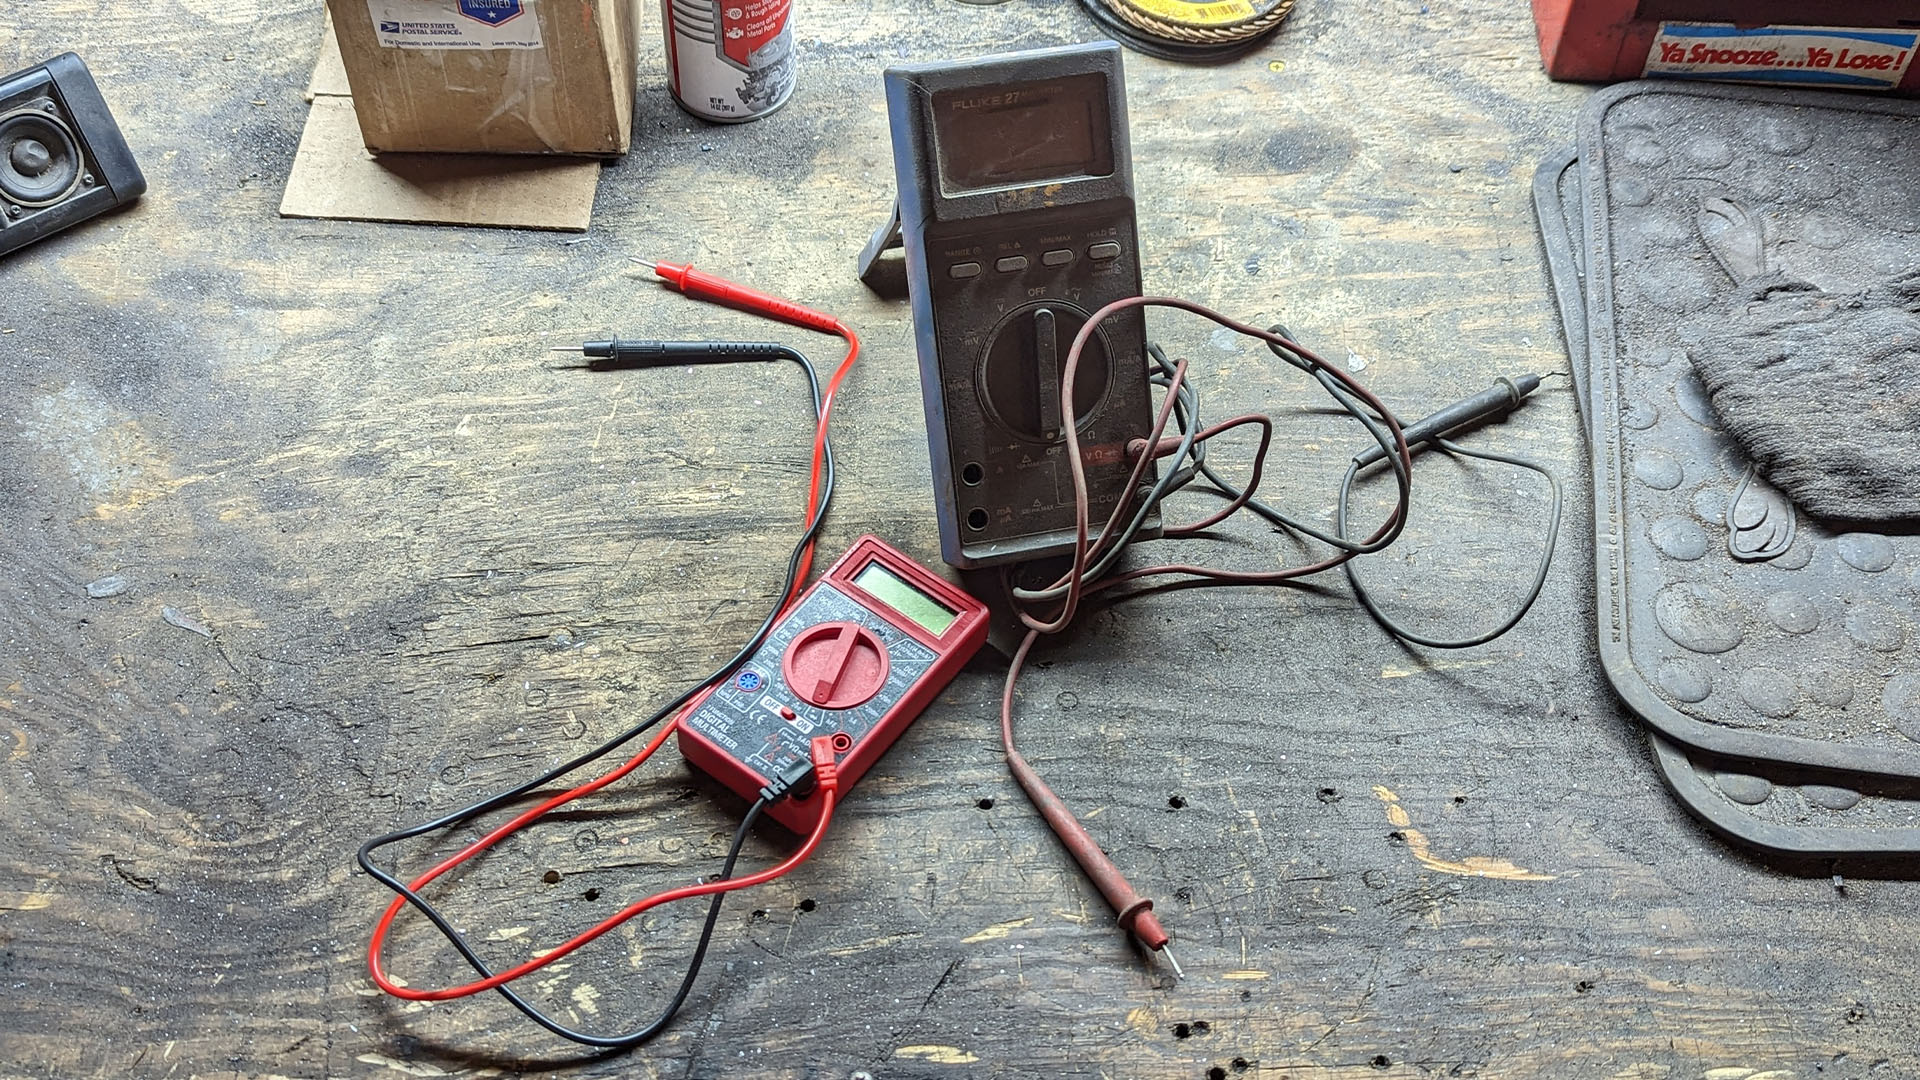
Verify Power Reaches the Mirror Switch
Grab a test light or multimeter to confirm power is getting to the switch itself. Turn your ignition to the on position, then backprobe the switch connector’s power terminal. You should see 12 volts present.
If no power reaches the switch, trace the problem back to the fuse or the wiring harness. If power is present but nothing happens when you press directional buttons, the switch itself is likely faulty and needs replacement.
Diagnose Wiring and Connector Problems
Corroded connectors and damaged wires are frequent culprits that mimic motor failure. Testing at the motor connector helps isolate whether the problem is upstream or in the motor itself.
Test Power Delivery to the Motor Connector
Due to the small terminal sizes in mirror connectors, standard test probes won’t fit. Use straightened paper clips as makeshift probes to make contact.
Clip your test light leads to the blue and yellow wires, then activate the left/right control on your switch. The light should illuminate when you press the button. Repeat this test with the green and yellow wires for up/down movement.
Interpretation: If the light comes on, power is reaching the motor, which means the issue is either the motor itself or a bad ground connection. If no light appears, the problem lies upstream in the switch, wiring, or connector.
Check Mirror Control Switch Function
The switch sees heavy use and can fail even while other components remain functional. Testing it requires confirming both input power and output signals.
Set your multimeter to measure voltage. With the switch connected, activate each direction and check the corresponding output wire. Pressing up should send power to the green wire, left should activate the blue wire, and so on.
If input power reaches the switch but no output signal appears on any wire when you press buttons, the switch has failed and requires replacement. Some switches integrate into the door control module and may need reprogramming after installation.
Apply Direct Power to Test the Motor
This critical test confirms whether the motor itself is functional by bypassing all vehicle wiring and switches. Disconnect the motor harness and apply external power directly.
Use a 9-volt battery or a 12-volt power supply. Connect the positive lead to the blue wire terminal and negative to the yellow wire. The mirror should move horizontally. Reverse the polarity and it should move the opposite direction. Test the green wire the same way for vertical movement.
Success Signal: If the motor responds to direct power, the fault is definitely in the switch, wiring, or connector, not the motor. If nothing happens, the motor is burnt out, seized, or has an internal wiring problem.
Remove Mirror Glass to Access the Motor
Now comes the trickiest part of the repair. Removing the mirror glass requires patience and the right tools to avoid cracking the glass or breaking clips.
Safe Glass Removal Techniques
Manually tilt the mirror glass inward to expose the rear attachment points. Insert a plastic trim tool behind the glass at the edge and gently pry outward to release snap clips. Work around the entire perimeter, releasing each clip gradually.
On Ford Fiesta models, pull from behind using your fingers or a pointed pick to release the dual-tab connector. For Chevrolet Silverado trucks, disconnect the heated mirror wires, which use two spade terminals, and the auto-dimming circuit with its two black wires.
Safety First: Wear gloves and apply painter’s tape over the glass surface if it shows any cracks. Excessive force can shatter the glass or damage the retaining clips.
Remove and Inspect the Motor Assembly
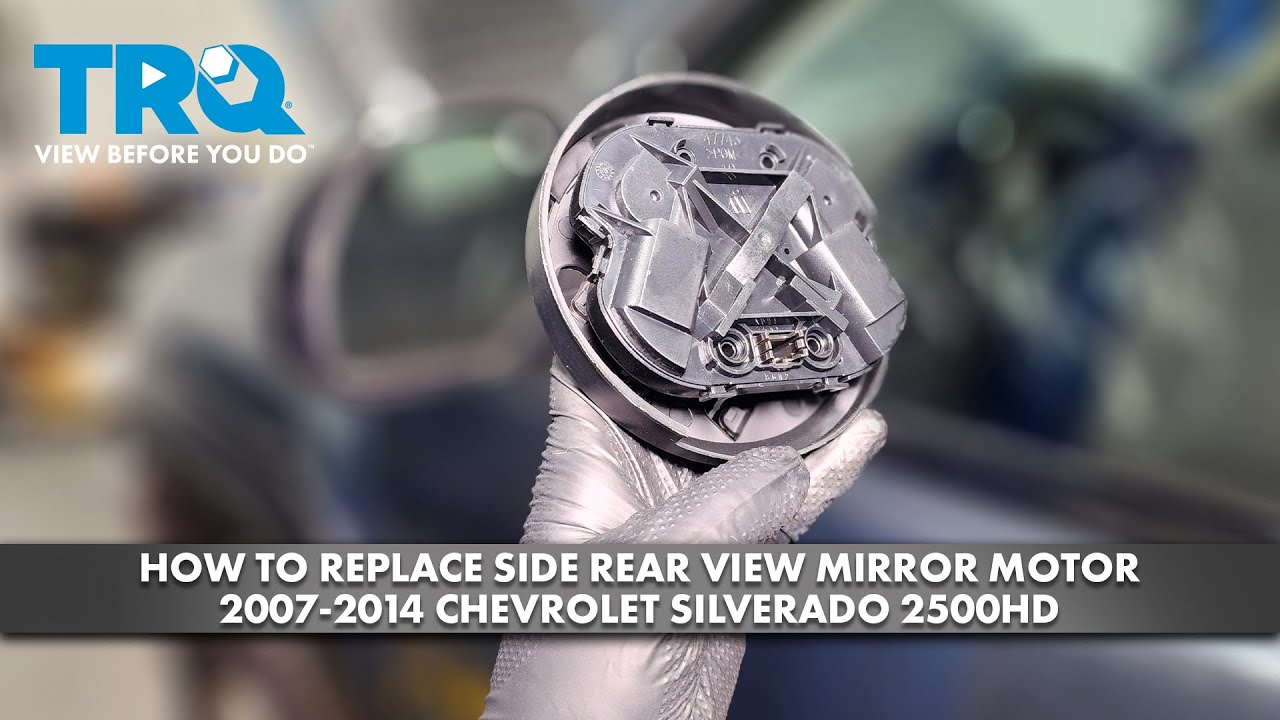
With the glass off, you can now access the motor housing. Removal procedures vary by vehicle, so follow the steps matching your make and model.
Vehicle-Specific Removal Steps
For Chevrolet Silverado 2500HD models from 2007 to 2014, remove four T10 Torx screws, one at each corner of the motor housing. Pop off the housing to reveal the rear electrical connector, then disconnect the wiring harness.
Ford Fiesta models from 2011 to 2019 require three T15 Torx screws. One screw remains hidden until you remove another, so work diagonally. After removing all screws, pull the motor forward to disconnect the rear plug.
European models from PSA, VW, and BMW typically require prying off the rear housing with a plastic trim tool, then feeding the wiring loom through the mounting hole. Two Torx screws under the rubber boot secure the motor housing, often requiring a long-reach Torx key.
Expert Note: If the motor resists removal after taking out all visible screws, check for hidden clips or rubber seals holding it in place. Apply slight twisting pressure while wiggling to free it.
Repair or Replace the Side Mirror Motor
Once you have the motor out, you have several repair options depending on what’s wrong. Some issues can be fixed without buying a new motor.
Clean Corroded Contacts
Remove the plastic cap from the motor terminals and inspect for corrosion. Clean the pins with fine sandpaper or a metal file, then spray electrical contact cleaner on both the motor terminals and the housing sockets. This often resolves intermittent operation caused by corrosion buildup.
Free Seized Shafts and Gears
If the motor runs but the mirror doesn’t move, the gears may be seized or the shaft stuck. Remove the motor from its casing, loosen the retaining clip slightly, and gently work the shaft back and forth to free it. Apply lightweight oil or synthetic grease to lubricate the mechanism.
For broken plastic gears, apply high-strength super glue to minor cracks. Severe damage requires motor replacement.
Install Replacement Motor
Transfer the mounting bracket from your old motor to the new one. Use a metal trim tool to pry the bracket open like a clamshell, releasing the four corner clips and center pivot. Align the bracket with the new motor shaft and press down firmly until seated.
Reassemble and Reinstall the Mirror
Reverse your removal steps carefully, ensuring all connections are secure and nothing gets pinched.
Reattach Mirror Glass
Align the bracket pivot arms with the slots on the mirror glass backing. Press down on the four mounting tabs using a small screwdriver to snap them into place. Position the glass over the motor assembly and push firmly inward until you hear it click. Confirm all four tabs are fully seated by gently wiggling the glass.
Reconnect All Wiring
Reconnect the main motor harness, heated mirror wires, and auto-dimming circuit. Polarity doesn’t matter for heated mirrors or auto-dimming. Ensure no wires get pinched when you reinstall the housing.
For folding mirrors, rotate the outer housing 45 degrees clockwise to engage the locking mechanism. Use pliers to align the grooves if needed, which is common on European models.
Test Mirror Function After Repair
Power up your vehicle and test all mirror functions. Activate up, down, left, and right movements, then test fold and unfold if equipped.
Check for smooth, full-range motion without binding or unusual noises. Watch for delayed responses or the mirror drifting back to a default position, which could indicate a position sensor issue.
User Result: A properly repaired mirror should fold correctly, though it may operate slightly slower than the original factory motor. This is acceptable for restored functionality.
Troubleshoot Common Post-Repair Issues
If problems persist after reassembly, these solutions address frequent issues.
Mirror doesn’t move at all: A loose connector or broken spade terminal is likely. Recheck all electrical connections, especially at the mirror base where movement occurs.
Partial movement only: The bracket is misaligned or pivot arms aren’t fully seated. Disassemble and verify all four arms lock into place.
Slow folding: Low battery voltage, weak motor power, or insufficient lubrication cause this. Re-lubricate gears or test the motor voltage output.
Grinding noise during operation: Gear misalignment or debris in the gear train is the culprit. Disassemble, clean thoroughly, and realign the gears.
Mirror resets position automatically: The motor position sensor needs resetting. Manually cycle the fold and unfold function three to five times to recalibrate.
Cost Comparison: Repair vs Replace
| Option | Average Cost | Notes |
|---|---|---|
| Motor-only DIY repair | $12–$25 | Includes parts; saves 80–95% |
| Aftermarket mirror assembly | $80–$180 | May lack advanced features |
| OEM mirror assembly | $200–$600 | Includes glass, housing, motor |
| Dealership labor | $150+/hour | Typically 1.5–2 hours labor |
DIY motor replacement remains the most cost-effective approach for most vehicles. Aftermarket motors are available from suppliers like AliExpress for around $12-15, while full mirror assemblies cost significantly more.
Frequently Asked Questions About Fixing Side Mirror Motors
Can I fix a side mirror motor without replacing it?
Yes, many issues can be resolved without replacement. Cleaning corroded contacts, lubricating seized gears, and repairing broken wire connections often restore function. Only replace the motor if testing confirms it’s burnt out or mechanically failed beyond repair.
How do I know if my mirror motor is bad?
Test by applying 12-volt power directly to the motor terminals. If the mirror moves, the motor is functional. If nothing happens, the motor has failed. Also watch for grinding noises, partial movement, or complete unresponsiveness when using the controls.
How much does it cost to replace a side mirror motor?
DIY replacement costs between $12 and $25 for the motor itself. Dealership parts and labor can run $200 to $600 or more for a complete mirror assembly. Aftermarket mirror units cost $80 to $180.
Can I drive with a broken side mirror motor?
You can drive, but visibility is compromised. A stuck mirror reduces blind spot awareness and may be illegal if the mirror cannot be adjusted. Temporary manual adjustment is possible on some models, but proper repair is recommended for safety.
Why does my power folding mirror only move an inch?
This often indicates the motor position sensor has lost calibration. Try manually assisting the mirror during fold commands to reset the sensor. If this doesn’t work, the motor may be weak or the mechanism binding.
Key Takeaways for Fixing Your Side Mirror Motor
Most side mirror motor problems stem from simple electrical issues like blown fuses, corroded connectors, or failed switches. Always test these first before disassembling the mirror. When direct power testing confirms a bad motor, replacement motors cost under $25 online, making DIY repair far more affordable than dealership service.
The most critical steps are systematic diagnosis through electrical testing, careful glass removal to avoid breakage, and proper bracket transfer during motor replacement. Take photos during disassembly to ensure correct reinstallation. With patience and the right tools, you can complete this repair in under two hours and restore full mirror functionality.


