
You’re ready to share a presentation, stream a movie, or show photos on a big screen. The question is: how do you mirror on Mac to your TV? Fortunately, macOS includes built-in AirPlay functionality that makes wireless screen mirroring simple. Whether you have an Apple TV, an AirPlay-compatible smart TV, or a non-AirPlay device, you have options.
This guide covers everything you need to know about mirroring your Mac to external displays. You’ll learn how to use native AirPlay, switch between mirror and extend modes, control audio output, use third-party apps for non-AirPlay TVs, and troubleshoot common issues.
Enable Screen Mirroring via AirPlay
macOS includes native screen mirroring through AirPlay, allowing you to project your Mac display to compatible TVs or Apple TV devices without cables.
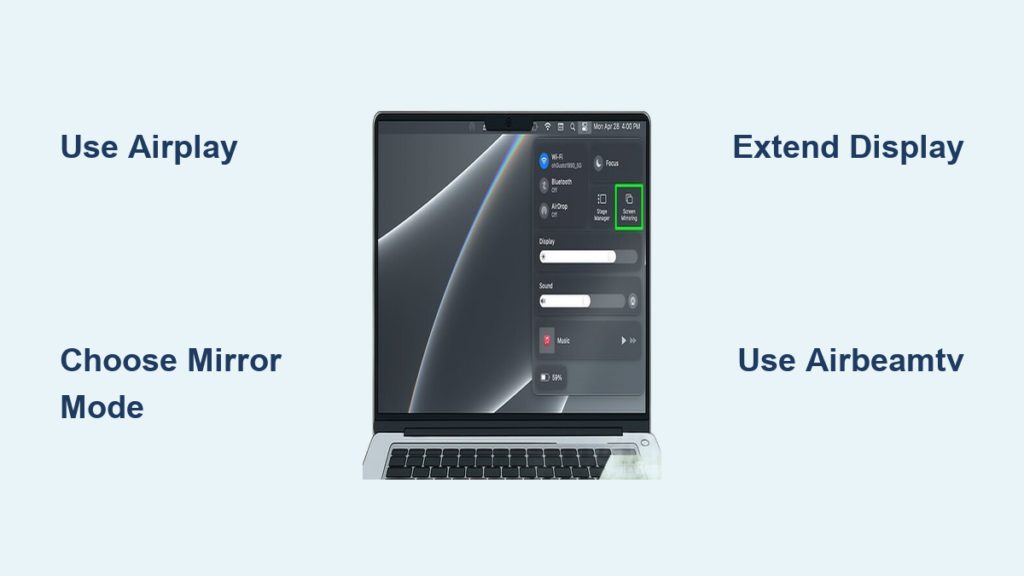
Access Screen Mirroring in Control Center
- Click the Control Center icon in the top-right corner of the menu bar.
- Scroll down and select Screen Mirroring.
- Choose your TV or Apple TV from the list of available devices.
Your Mac screen will appear on the TV within seconds. An AirPlay badge may briefly flash on the TV during connection.
Check Network and Compatibility Requirements
Before mirroring, verify these conditions are met:
• Both your Mac and the TV must be connected to the same Wi-Fi network.
• The receiving device must support AirPlay 2 (Apple TV, or smart TVs from Samsung, LG, Sony).
• Bluetooth and Wi-Fi must be enabled on your Mac.
If your TV does not appear in the list, try restarting both devices or checking AirPlay settings on the TV (usually under Settings > AirPlay).
Choose: Mirror or Extend Display
When connecting to an external display, macOS offers two distinct modes. Understanding the difference helps you choose the right one for your needs.
Mirror Your Screen
Mirror mode displays identical content on both your Mac and the TV. This mode is ideal for watching videos, presenting slideshows, or sharing photos with guests. It activates automatically when you select a device in Screen Mirroring.
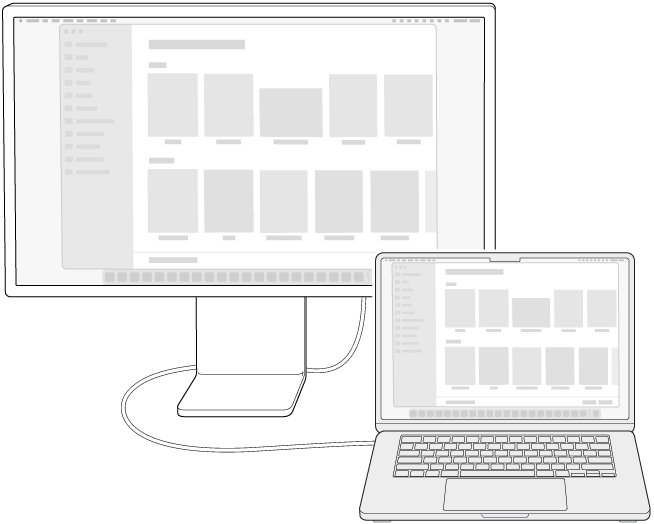
Extend to a Second Display
Extended mode treats your TV as a separate workspace. You can drag windows between screens and use both displays independently. This works well for coding with documentation on the side, video editing with timelines and previews, or keeping notes open during Zoom calls.
To switch to extended mode, click the blue screen icon in the menu bar, select Change, and choose Extended Display.
Arrange Displays for Natural Cursor Flow

When using extended mode, arranging your displays to match your physical setup makes cursor movement feel natural.
Customize Your Display Layout
- Go to System Settings > Displays > Arrange.
- You will see two screen icons representing your Mac and the TV.
- Drag the Mac icon to reflect its physical position relative to the TV.
For example, if your Mac sits below your TV on a desk, drag the Mac icon below the TV icon in the arrangement window. The white bar on a display icon indicates the menu bar location, which is your primary display.
Stop Mirroring or Disconnect
Ending a mirroring session takes just a few clicks.
End Mirroring Quickly
Click the screen icon in the menu bar and choose Stop Mirroring. Alternatively, reopen Screen Mirroring in Control Center and select Disconnect. On MacBooks, closing the lid automatically ends the session unless a power adapter is connected and settings allow extended mode to continue.
Control Audio Output During Mirroring
A frequent concern is whether audio automatically switches to the TV. The answer is no, you retain full control over audio routing at all times.
Manually Select Your Audio Output
When mirroring begins, macOS may default to TV audio, but you can change this anytime:
• Click the volume icon in the menu bar and select your preferred output device.
• Or go to System Settings > Sound > Output and choose from available options.
Available outputs include internal speakers, wired speakers via 3.5mm or USB, Bluetooth headphones, external DACs, or the TV if supported.
Mirror Video While Keeping Audio on Mac
You can mirror your Mac to a TV while playing sound through wired high-fidelity speakers connected to your Mac. This setup is perfect for music visualizers on a big screen or avoiding low-quality TV speakers. Screen mirroring only transmits video, leaving audio routing completely independent.
Use AirBeamTV for Non-AirPlay TVs
If your TV lacks AirPlay support, third-party apps like AirBeamTV provide an excellent alternative. This app mirrors your Mac to Samsung, Sony, Roku, and other smart TVs without requiring Apple TV or cables.
Install AirBeamTV on Your Mac
- Visit airbeam.tv and download the macOS version.
- Locate the downloaded .pkg installer file in your Downloads folder.
- Open the installer and follow the on-screen prompts.
- Allow the app in System Settings > Privacy & Security if prompted.
A trial version is available so you can test the app before purchasing.
Start Mirroring Wirelessly
Launch the AirBeamTV app, click “Start Mirroring,” and your Mac screen will appear on the TV instantly. No cables or additional hardware are required.
Stream Netflix, Hulu, YouTube via AirBeamTV

AirBeamTV supports most streaming platforms, though browser choice matters for optimal performance.
YouTube Works in Any Browser
Open YouTube in Safari, Chrome, or Firefox, then click Start Mirroring in AirBeamTV. The video plays on your TV in real time.
Netflix and Hulu Require Chrome
Safari does not support casting Netflix or Hulu through AirBeamTV due to DRM restrictions. Open these services in Google Chrome instead, then start mirroring. The content will appear on your TV in high definition.
Chrome handles wider codec and streaming protocol compatibility, making it the better choice for DRM-protected content.
Optimize Performance and Reduce Lag
Some delay is normal with wireless mirroring, especially over Wi-Fi. These steps minimize lag.
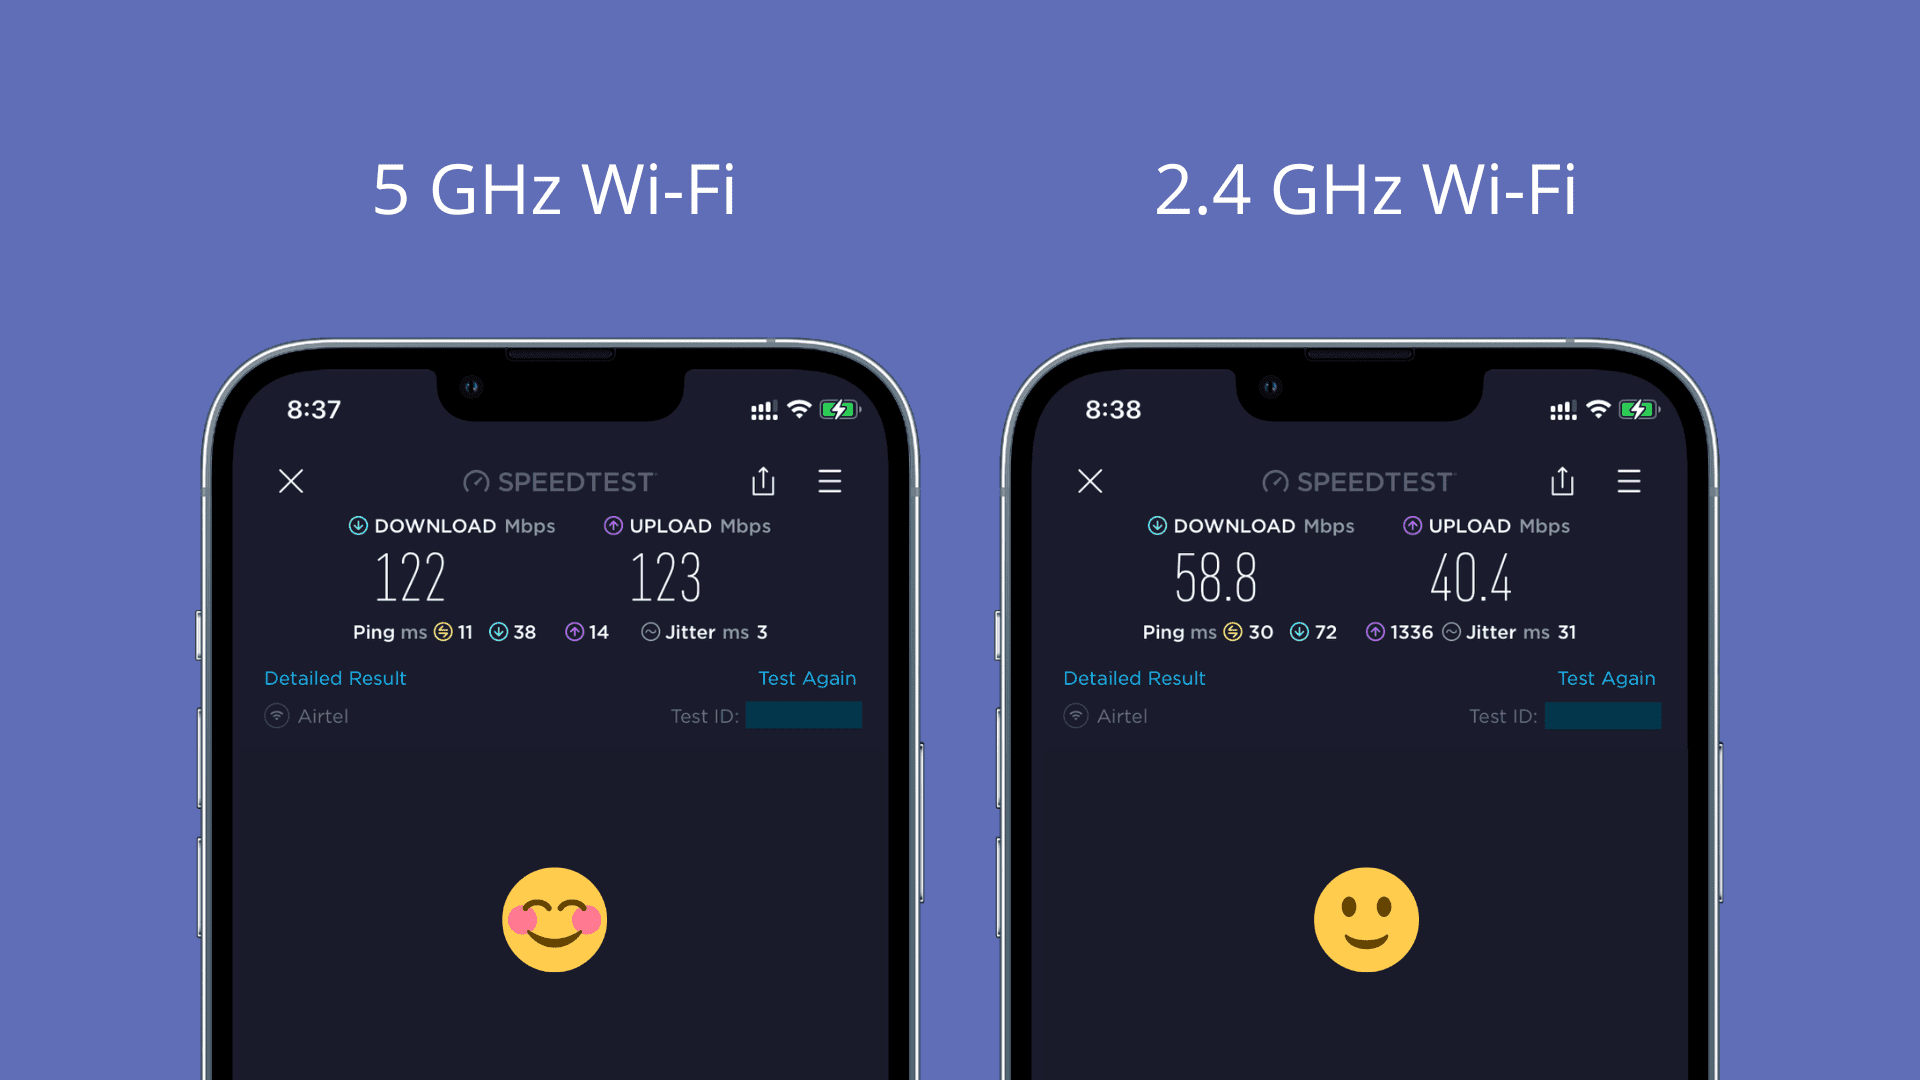
Use 5 GHz Wi-Fi
Switch to the 5 GHz frequency band for faster speeds and less interference. Avoid 2.4 GHz when possible, and keep your router close to both your Mac and TV.
Reduce Network Load
Pause downloads, cloud backups, or other video calls during mirroring. Limit the number of devices connected to your network.
Free Up Mac Resources
Close unused applications and disable heavy browser tabs before starting a mirroring session. Restarting your Mac before important presentations helps ensure smooth performance.
Supported TVs and Compatibility
AirBeamTV works with most modern smart TVs from major brands including Samsung, Sony, and Roku. Additional brands like Philips and Sharp may also be supported depending on their streaming capabilities.
No Apple TV, Chromecast, or HDMI cables are required. This software-based solution works entirely over your Wi-Fi network, making it ideal for renters or anyone avoiding additional hardware.
Troubleshoot Common Mirroring Issues
TV Not Showing in Screen Mirroring List
Verify both devices are on the same Wi-Fi network. Enable AirPlay on the TV through its settings menu. Restart both your Mac and the TV. For AirBeamTV, ensure the app is running and network discovery is active.
No Sound on TV or Mac
Manually select your desired audio output in System Settings > Sound > Output. Do not assume audio stays on your Mac after connecting. Verify the output selection immediately after starting mirroring.
Lag or Choppy Video
Switch to 5 GHz Wi-Fi, close background applications, and temporarily lower your screen resolution. Minor lag is acceptable for video playback but avoid fast-paced gaming.
AirBeamTV Installation Fails
Check your macOS version for compatibility. Allow the app from System Settings > Privacy & Security. Temporarily disable antivirus software if installation continues to fail.
Key Use Cases for Mac Screen Mirroring
Entertainment
Watch Netflix, Disney+, YouTube, or Twitch on a big screen. Display photo albums or home videos during gatherings. Stream fitness workouts with clear audio and visuals.
Work and Productivity
Present PowerPoint, Keynote, or PDFs during meetings. Share Zoom, Teams, or Google Meet on a larger display. Use extended mode for multitasking with multiple windows.
Creative and Music
Show album art or music visualizers while playing through high-end speakers. Present designs from Final Cut Pro or Photoshop to clients. Mirror coding environments with documentation open on a second screen.
Final Tips and Recommendations
For Apple ecosystem users with AirPlay 2-compatible TVs, the built-in Screen Mirroring feature offers the fastest setup and lowest latency. For non-AirPlay TVs, AirBeamTV provides reliable mirroring without extra hardware. Audiophiles should keep speakers connected to the Mac and route only video to the TV to preserve sound quality.
Professionals benefit from Extended Display mode for multitasking. Always test your setup before presentations or movie nights to check for lag, audio sync, and display resolution issues.
Frequently Asked Questions About Mirroring on Mac
Can I mirror my Mac to a TV without Apple TV?
Yes. Use the built-in Screen Mirroring feature for AirPlay-compatible TVs, or install AirBeamTV for non-AirPlay smart TVs from Samsung, Sony, or Roku.
Does screen mirroring automatically play audio on the TV?
No. Audio routing remains independent. You can keep sound on your Mac, route it to external speakers, or send it to the TV. The choice is entirely yours.
Why is Netflix not showing on my TV when mirroring?
Netflix and Hulu require Google Chrome for AirBeamTV mirroring. Safari blocks these services due to DRM restrictions. Switch to Chrome and try again.
How do I fix lag when mirroring my Mac?
Use 5 GHz Wi-Fi instead of 2.4 GHz. Reduce network congestion by pausing other activities. Close unused apps on your Mac and lower resolution if needed.
Can I extend my display instead of mirroring?
Yes. After connecting, click the blue screen icon in the menu bar, select Change, and choose Extended Display. This turns your TV into a second workspace.
Key Takeaways for Mirroring Your Mac
Mirroring your Mac to a TV opens up powerful possibilities for entertainment, work, and creativity. Use Control Center > Screen Mirroring for native AirPlay functionality with compatible TVs. Both your Mac and display must be on the same Wi-Fi network. Choose Mirror mode for duplicate content or Extend mode for a second workspace. Audio output remains fully independent from video, giving you flexibility to use external speakers or keep sound on your Mac.
For non-AirPlay TVs, AirBeamTV provides reliable wireless mirroring without additional hardware. Remember to use Chrome for Netflix and Hulu streaming via third-party apps. Test your setup before critical presentations to ensure everything works smoothly. With the right configuration, you can achieve a seamless, cable-free mirroring experience that transforms your Mac content onto the big screen.


