A damaged or missing mirror on your Freightliner truck creates a serious safety hazard and can lead to costly citations. Whether you need to replace a cracked heated side mirror on your M2, a motorized unit on a Cascadia, or a hood spot mirror, doing the job yourself saves significant money on labor. This guide walks you through every mirror replacement procedure, from identifying the correct parts to testing electrical connections, with model-specific steps for Freightliner M2, Cascadia, and all other models.
Choose the Right Mirror Replacement for Your Freightliner
Selecting the correct replacement mirror depends on the damage type and your specific truck model. Freightliner trucks use three primary mirror configurations, and choosing wisely prevents future problems.
Mirror Types by Model
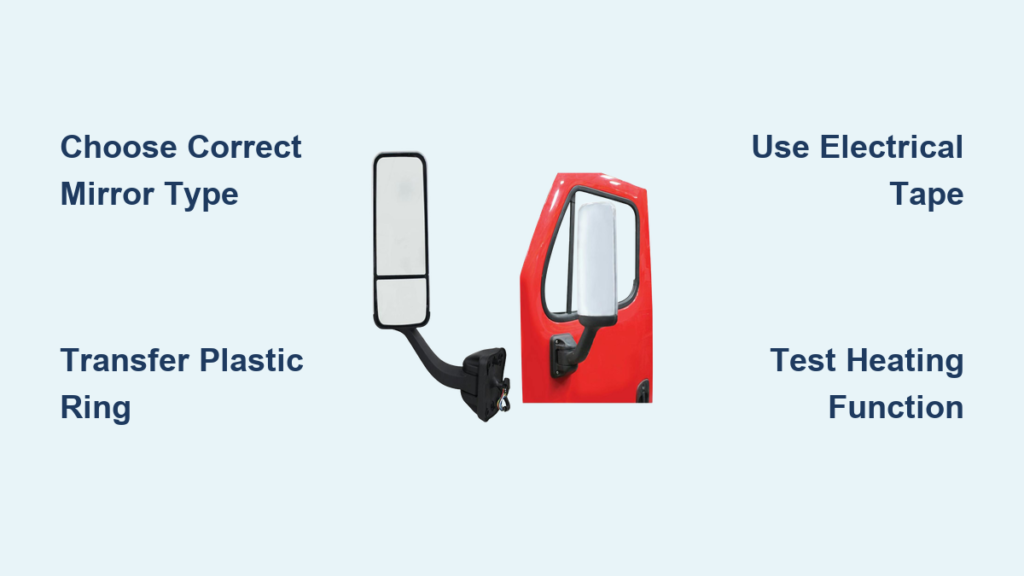
Freightliner M2 box trucks use heated side mirrors with either 2 electrical connections on the passenger side or 3 connections on the driver side. The 2020 Cascadia features motorized side mirrors with internal adjustment motors and vibration-dampening pads. All models use hood-mounted spot mirrors secured by rubber grommets beneath a chrome plastic cover.
Replacement Scope Options
Consider these three options based on damage severity:
• Mirror glass only: Works for cracked glass with intact housing and wiring. Lower cost but risks electrical damage during swap.
• Back housing plus glass: Best for worn clips, broken mounts, or damaged heater elements. Provides better durability than glass-only replacement.
• Complete assembly: Includes mount, housing, and wiring harness. Recommended for driver side M2 mirrors or any Cascadia motorized unit to simplify installation.
Pro Tip: On 2020 Cascadia models, the plastic ring securing the motorized mirror must be transferred from your old unit. This part does not come with the replacement.
Tools Required for Freightliner Mirror Installation
Having the right tools prevents scratched paint, cracked housings, and dropped components. Gather these items before starting any mirror replacement.
Essential Toolkit
| Tool | Purpose |
|---|---|
| Flathead or plastic pry tool | Release side retaining clips without damaging surfaces |
| T30 Torx screwdriver | Remove rear mounting screws on driver side M2 |
| Star bit T20-T30 | Unscrew hood mirror cover |
| T-wrench or T-handle | Apply torque in tight spaces |
| Needle-nose pliers | Grip grommets and rotate locking tabs |
| Electrical tape (4-6 inch strips) | Hold hood mirror cover during removal |
| Dielectric grease or silicone spray | Ease wire routing in narrow channels |
Warning: Always use a plastic pry tool on side mirrors. Metal tools can crack housings or damage paint, leading to expensive repairs.
Replace Heated Side Mirror on Freightliner M2

The M2 uses heated mirrors that require electrical connections. The driver side takes longer due to extra wiring.
Remove the Old Mirror
-
Release the side retaining clips. Passenger side has 2 clips, driver side has 3.
-
Disconnect the heater wiring. Passenger side uses a 2-plug system. Driver side has 1 harness plus 2 individual wires for a total of 3 connections.
-
Remove the rear mounting piece on driver side only. Unscrew the two T30 Torx screws and slide out the back panel to access wire routing.
-
Extract the mirror assembly once all fasteners and wires are disconnected.
Install the New Mirror
-
Plug the heater wires into the new mirror. Route existing wiring through the new back housing if reusing components.
-
Reinstall the rear mounting piece on driver side. Apply dielectric grease to wires for smoother routing.
-
Seat the mirror firmly into the mounting point. The fit is tight but achievable with even pressure.
-
Test the heating function. Turn on the ignition and wait 1-2 minutes. The glass should feel warm to the touch.
Time Estimate: 20-30 minutes per side. Difficulty: Intermediate.
Replace Motorized Side Mirror on 2020 Cascadia
https://www.amazon.com/Freightliner-Cascadia-2020-Mirror-Replacement-Plastic/dp/B08X5YJZQW
The Cascadia uses a mechanical release system and requires transferring a critical plastic ring.
Remove the Damaged Mirror
-
Push the housing fully into the mount to engage the release mechanism.
-
Lift the side clip to release the housing from the base.
-
Turn the vertical switch upward to disengage the motorized adjustment mechanism.
-
Use needle-nose pliers to grip and rotate the small tab into the unlock position.
-
Pull the mirror straight out once released.
Critical Step: The plastic ring on your old mirror must be transferred to the new unit. This ring is not included with replacement parts.
Install the New Mirror
-
Transfer the plastic ring from the old mirror to the new one.
-
Insert the tab through the hole and use pliers to rotate it into the locked position.
-
Reattach the cover to expose screw holes for alignment.
-
Insert the housing and secure with three star-bit screws. Leave them slightly loose for adjustment.
-
Align the field of view to match the opposite mirror, then tighten screws evenly.
Warning: Do not over-tighten. It can crack plastic components.
Test Functions After Installation
Test the motorized adjustment using dashboard controls. Verify heating by turning on the ignition and touching the glass surface. Check image clarity by confirming you can see fine details clearly.
Replace Hood Spot Mirror on Any Freightliner

Hood spot mirrors are small but easy to damage during removal without proper technique.
Remove the Chrome Cover Safely
-
Apply two 4-6 inch strips of electrical tape to the top edge of the cover. This prevents it from falling and scratching your paint.
-
Remove three star-bit screws. Two are located at the bottom crack, one at the top.
-
Lower the cover slowly, letting the tape support it as you remove the final screw.
Why Tape Matters: Without it, the cover can drop and cause damage exceeding $1,000 in repairs.
Access and Remove the Mirror
-
Reach behind the mirror through gaps in the housing.
-
If broken, gently push fragments through the three front access holes.
-
Locate the vertical rubber grommet on the back of the mirror.
-
Grip firmly with needle-nose pliers and pull while rotating horizontally.
-
Catch the mirror as it may fall forward.
Install the New Mirror
-
Align the grommet horizontally and pass it through the housing hole.
-
Insert the mirror carefully while holding it in place.
-
Rotate the grommet back to vertical to create a compression fit that locks the mirror.
Visual Confirmation: When vertical, the mirror won’t move when gently tugged.
Reattach the Cover
-
Position the taped cover ensuring tape doesn’t block screw holes.
-
Insert three screws and leave them loose for alignment.
-
Tighten gradually in sequence. Do not over-tighten or you may crack the plastic.
Time Estimate: 15-20 minutes. Skill Level: Easy to intermediate.
Fix Common Freightliner Mirror Problems
Several issues frequently occur during or after mirror replacement. Knowing the causes helps you troubleshoot quickly.
Mirror Won’t Heat After Installation
This usually means a disconnected wire, blown fuse, or damaged heater element. Check all connections first, then test the fuse. If problems persist, the glass or back housing likely has a damaged heater circuit and needs replacement.
Tight Fit During Installation
On driver side M2 mirrors, wire bulk in the narrow channel causes difficult installation. Apply dielectric grease to wires and feed them slowly with gentle pressure. Lubrication makes a significant difference.
Mirror Falls After Installation
The rubber grommet wasn’t rotated to the vertical locked position. Pull the mirror out, rotate the grommet vertical, and reinsert. This creates the compression fit that holds it secure.
Blurry or Distorted View
Low-quality aftermarket glass often has incorrect curvature. Always use OEM-spec replacements. Test clarity before final tightening to catch this issue early.
Test Electrical Connections After Installation
Proper testing catches problems before they become safety issues.
Heating Function Test
Turn on the ignition and wait 1-2 minutes. Touch the mirror surface. It should feel noticeably warm. No heat means either a connection problem or damaged heating element.
Motorized Adjustment Test
Use dashboard controls to move the mirror through its full range. Listen for unusual sounds and verify smooth operation.
Visual Clarity Check
A quality mirror shows fine details clearly. If facial features or distant objects appear distorted, the glass quality is insufficient.
Key Takeaways for Replacing Your Freightliner Mirror
Replacing a Freightliner mirror is a practical DIY task that saves money and restores safety. Choose the right replacement scope for your damage type, use OEM-spec parts for clarity and durability, and always transfer critical components like the plastic ring on Cascadia mirrors. Apply tape when removing hood covers, test all electrical functions immediately after installation, and check warranty status before starting work on newer models. With proper tools and attention to detail, you can complete any mirror replacement efficiently and confidently.
Frequently Asked Questions About Replacing Freightliner Mirrors
How long does it take to replace a Freightliner side mirror?
Replacing a heated side mirror on an M2 takes 20-30 minutes per side. Motorized Cascadia mirrors take 30-45 minutes due to the plastic ring transfer and alignment process. Hood spot mirrors are the quickest at 15-20 minutes.
Can I replace just the mirror glass instead of the whole assembly?
Yes, mirror glass replacement works for cracked glass with intact housing. However, this risks damaging heater wiring during the swap. Consider replacing the back housing plus glass for better durability, or go with a complete assembly for simplest installation.
Why won’t my new Freightliner mirror heat up?
First, check that all electrical connections are secure. Then verify the fuse hasn’t blown. If connections and fuse are good, the heater element in the glass or back housing is likely damaged and requires replacement.
Do I need special tools to replace a hood spot mirror?
You need a star-bit screwdriver, needle-nose pliers, and electrical tape. The tape is critical to prevent the chrome cover from falling and causing damage. A T-wrench helps with torque in tight spaces.
Is the 2020 Cascadia mirror replacement under warranty?
Some 2020 Cascadia models have warranty coverage for hinge or motor failures. Check with your dealer before attempting DIY repair. Warranty may cover defects that could otherwise be your responsibility.
Can I use aftermarket mirrors on my Freightliner?
Aftermarket mirrors cost less but often lack vibration-dampening pads and precise curvature. This can result in mirror shake on rough roads and distorted visibility. OEM-spec replacements provide better weather sealing and optical clarity.