Cutting stained glass is both a craft and a science. Whether you’re creating a mosaic, restoring a vintage panel, or designing your own artwork, knowing how to cut stained glass properly is the foundation of every successful project. The process isn’t about slicing through glass like a knife through butter. It’s about creating a precise, controlled fracture that guides a clean break. Done right, the result is smooth, accurate edges that fit perfectly into your design. Done wrong, and you’ll face jagged pieces, wasted materials, and frustration.
You’ll learn how to apply the perfect amount of pressure, recognize a good score, and choose the right breaking method for any shape or size. We’ll also cover common mistakes and how to avoid them, ensuring your cuts are clean and consistent every time.
Safety First: Protect Yourself Before Cutting Stained Glass
Essential PPE for Glasswork
Always wear safety goggles when cutting or breaking glass. Tiny shards can fly unexpectedly and cause serious eye injury. Even a small nick from a snapped edge can become infected. Thick rubber or cut-resistant gloves are recommended when handling large or freshly cut pieces, especially those with sharp edges.
Work on a flat, stable surface covered with a cutting mat, linoleum scrap, or protective board. This prevents scratches on your table and helps stabilize the glass during scoring. Keep your workspace clean and well-lit to avoid accidents and ensure precision.
Maintain a Clean Work Zone
Glass dust is a real hazard. Work in a well-ventilated area and keep a dustpan and brush nearby to sweep up fragments immediately. Never use a vacuum unless it’s designed for fine particulates. Regular vacuums can blow dust into the air.
Store tools safely when not in use. A dropped glass cutter can chip its wheel or cause injury. Keep children and pets away from your workspace during and after cutting sessions.
Tools You Need to Start Cutting Stained Glass
Choose the Right Glass Cutter
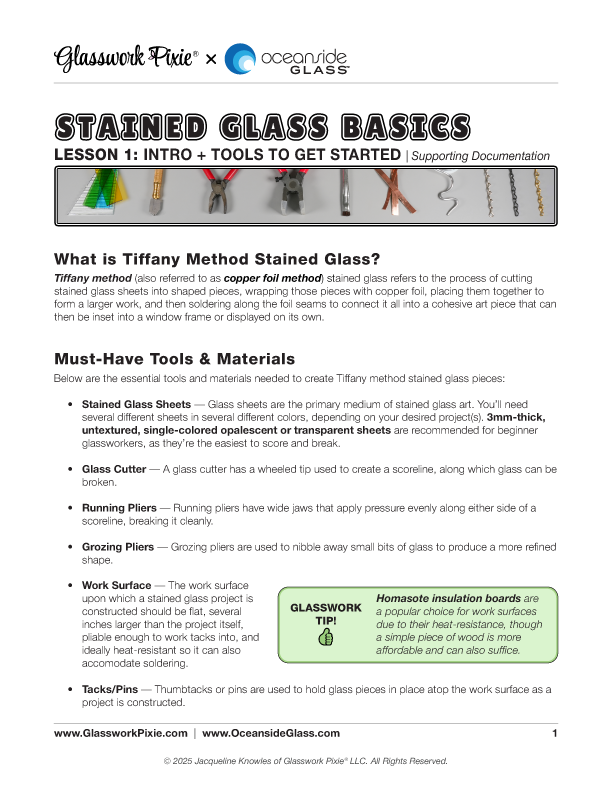
A carbide wheel glass cutter is the industry standard for stained and fused glass. These cutters last longer and score more cleanly than steel wheels. Two grip styles dominate:
- Pencil grip: Feels like holding a pen; ideal for detailed work.
- Pistol grip: Offers better leverage and control, especially for beginners or those with hand fatigue.
Popular models like the Toyo Custom Grip or Toyo Pistol Grip provide ergonomic advantages and consistent performance. If you struggle with pressure control, a pistol grip can make a big difference.
Lubrication Is Non-Negotiable
Use cutting oil, not water or household oils. Specialized glass oil, sewing machine oil, or light mineral oil works best. It lubricates the wheel, reduces friction heat, and ensures a smooth, uninterrupted score.
Oil-filled cutters have a built-in reservoir, but you can also apply oil manually with a dropper or oil pot. Always lubricate the wheel before each cut.
Breaking and Finishing Tools
- Running pliers (cut-runners): Align the center mark with your score line to snap glass cleanly.
- Grozing pliers: Use flat jaws to break small sections and serrated jaws to nibble away rough edges.
- Metal ruler with rubber grips: Prevents slipping during straight cuts.
- Glass grinder: Smooths edges after breaking; not for fixing bad cuts.
- Glass file or sandpaper: For final hand-finishing if no grinder is available.
The Science Behind the Score

What Happens When You Score Glass
Scoring doesn’t cut the glass. It creates a micro-fracture on the surface. This line becomes the weak point where tension concentrates when force is applied. The glass then splits cleanly along this path.
Unscored glass resists breaking because stress distributes evenly. But a proper score focuses stress, allowing a controlled break with minimal effort.
Pressure: The 6-Pound Rule
The ideal scoring pressure is 6 pounds (about 0.45 kg). Too little, and the glass won’t break. Too much, and you crush the surface, causing white, dusty lines and unpredictable breaks.
Pro Tip: Practice this pressure by pressing a pencil on a bathroom scale until it reads 6 lbs. Repeat this exercise to train your hand and memorize the sensation.
Signs of a Good Score
- Invisible or faint line visible only when tilting glass in light
- Smooth texture, not powdery or chipped
- Consistent sound, a light scraping or clicking noise
Avoid judging by sound alone. Opalescent glass is quieter than transparent glass, so relying on noise can lead to over-pressing.
Step-by-Step Process for Cutting Stained Glass
Prepare Your Workspace and Glass
Clear your table and cover it with a cutting mat or linoleum. Ensure good lighting. Shadow-free overhead light helps you see the score line.
Identify the smooth side of the glass. Always score on the smoothest surface for the cleanest break. If your design requires texture on the front, flip the pattern and score the back.
Measure and mark your cut line lightly with a pencil or marker. Press gently to avoid scratching.
Score with One Continuous Motion
Place the glass cutter just inside the edge, about 1/16 inch (2mm) from the end. Hold the cutter upright, with the oil reservoir facing forward in the direction of travel.
Apply steady 6-pound pressure and move in one smooth motion from start to finish. Never stop, lift, or retrace the line. Re-scoring ruins the fracture path.
For straight cuts using a ruler, pull the cutter toward you. For curves or freehand work, push the cutter so you can see the line ahead.
Break the Glass Correctly
Choose your breaking method based on size and shape.
Use Thumbs for Small Pieces
Place thumbs on either side of the score, underneath if possible. Press down and outward to snap the glass. If the break stalls, flip the glass and try from the other end.
Snap on Table Edge for Large Sheets
Align the score with the edge of a sturdy table. Hold both sides and bring the overhang down sharply in a quick snapping motion. Let gravity assist the break.
Use a Rule for Straight Medium Cuts
Lay a metal ruler directly over the score line. Hold the glass firmly and snap downward along the rule. The metal provides a clean breaking edge.
Running Pliers for Precision Control
Align the center line of the pliers with the score. Start at the end where you finished scoring. Squeeze gently to begin the break. For curves, work from both ends toward the middle.
Grozing Pliers for Tricky Shapes
Use the flat jaw to break small slivers or tight curves. Hold the glass underneath and snap the wrist sharply. For jagged edges, use the serrated jaw to nibble away imperfections.
Fix Common Cutting Mistakes

White or Dusty Score Line
This means too much pressure. You’re crushing the glass instead of scoring it. Reduce pressure and aim for an invisible line. Test your hand strength using the bathroom scale method.
Glass Won’t Break
Possible causes include a score that’s too light, misaligned pliers, or inconsistent pressure during scoring. Ensure the score is faintly visible. Align running pliers exactly on the line. Try breaking from the opposite end.
Break Wanders Off the Line
Caused by fluctuating pressure, re-scoring, or a crushed surface. Maintain steady pressure. Never go back over a score. Focus on smooth, continuous motion.
Jagged or Rough Edges
This results from poor scoring or incorrect breaking. Use grozing pliers to remove large bumps, then grind or file the edge smooth.
Cutter Skipping or Slipping
Causes include a dull wheel, no lubrication, or a cutter held at the wrong angle. Oil the wheel before each cut. Replace the wheel if it’s worn. Hold the cutter perfectly vertical.
Adjust for Glass Type and Texture

Transparent vs. Opalescent Glass
- Transparent glass: Easier to score, makes more noise (clicking), requires slightly less pressure.
- Opalescent glass: Denser, quieter, needs consistent pressure. Don’t increase force just because it’s silent.
Ignore sound differences. Judge your score by visual inspection, not noise.
Handling Textured Glass
Textured surfaces like rippled or hammered glass challenge consistent pressure. The wheel must ride over peaks and into valleys. Maintain firm, steady pressure and let the tool glide. Practice on scraps first.
Brand and Color Variations
Different manufacturers and colors cut differently. Some reds or blacks are more brittle. Experience teaches subtle adjustments. Keep test scraps on hand when starting with new glass.
Maintain Tools and Build Skill
Keep Cutters Sharp and Oiled
Carbide wheels last longer than steel, but they wear out. Signs of wear include needing more pressure, inconsistent scores, and skipping. Replace the wheel when performance drops. Clean tools after use and store them in a protective case.
Refill oil reservoirs regularly. A dry wheel scores poorly and wears faster.
Master the Learning Curve
Beginners often under-press out of fear, leading to failed breaks. Others over-press, thinking “harder is better,” and crush the glass.
Practice scoring straight lines on scrap glass. Focus only on pressure consistency. Break each piece and examine the edge. Smooth equals good. Chipped means adjust.
Ergonomics Matter
If you have hand fatigue, try a pistol grip cutter. It reduces strain and improves vertical alignment. Good lighting and a comfortable chair also help prevent mistakes from tired hands.
Know the Limits of Hand Tools
No Perfect 90-Degree Corners
Hand tools can’t cut sharp inside corners. You’ll need to groze or grind the final angle. Score up to the corner point, then use grozing pliers to remove the excess triangle.
Never Cut Tempered Glass
Tempered glass is heat-treated for strength and safety. If scored, it shatters unpredictably. Only annealed (non-tempered) glass can be cut.
No Re-Scoring
Once you’ve scored, do not go back. A second pass creates multiple fracture points and ruins break control. If a cut fails, discard the piece or repurpose it.
Frequently Asked Questions About Cutting Stained Glass
What Is the Ideal Pressure for Scoring Stained Glass?
The ideal scoring pressure is approximately 6 pounds (0.45 kg). Too little pressure won’t create a usable fracture, while too much crushes the glass surface and causes unpredictable breaks. Beginners can practice this by pressing a pencil on a bathroom scale until it reads 6 lbs.
Can You Cut Tempered Glass with a Standard Cutter?
No. Tempered glass is heat-treated for safety and strength, and it will shatter unpredictably if scored. Only annealed (non-tempered) glass can be cut with a carbide wheel cutter.
Why Does My Score Line Look White or Dusty?
A white or dusty score line indicates excessive pressure. You’re crushing the glass instead of creating a clean fracture. Reduce pressure and aim for a nearly invisible line that you can only see when tilting the glass in light.
How Do You Cut Tight Curves in Stained Glass?
For tight curves, use grozing pliers with the flat jaw. Hold the glass underneath and snap your wrist sharply along the score line. For complex shapes, break from both ends toward the middle, or use running pliers to ease the break gradually.
What Lubricant Should I Use on My Glass Cutter?
Use specialized cutting oil, sewing machine oil, or light mineral oil. Never use water or household oils. Lubrication reduces friction heat, ensures a smooth score, and extends the life of your cutting wheel.
Is It Possible to Get Perfect 90-Degree Corners by Hand?
No. Hand tools cannot produce perfect 90-degree inside corners. You’ll need to groze or grind the final angle after scoring up to the corner point. Use grozing pliers to remove the excess triangle, then finish with a grinder.
Key Takeaways for Mastering Stained Glass Cutting
Cutting stained glass is a skill built through practice, not perfection. Focus on consistent 6-pound pressure, use a carbide wheel cutter with proper lubrication, and always score in one continuous motion without stopping or retracing. Choose the right breaking method for each piece, whether thumbs for small sections, table-edge snapping for large sheets, or running pliers for precision control.
Protect yourself with safety goggles and gloves, work in a well-ventilated space, and keep your tools sharp and oiled. Start with simple shapes on scrap glass, inspect every break, and adjust your technique based on visual cues rather than sound alone.
Your next step: gather your tools, grab a piece of scrap glass, and practice scoring straight lines using the bathroom scale method. Within an hour, you’ll start developing the “feel” for a perfect score and enjoy cleaner, more accurate cuts in every project.