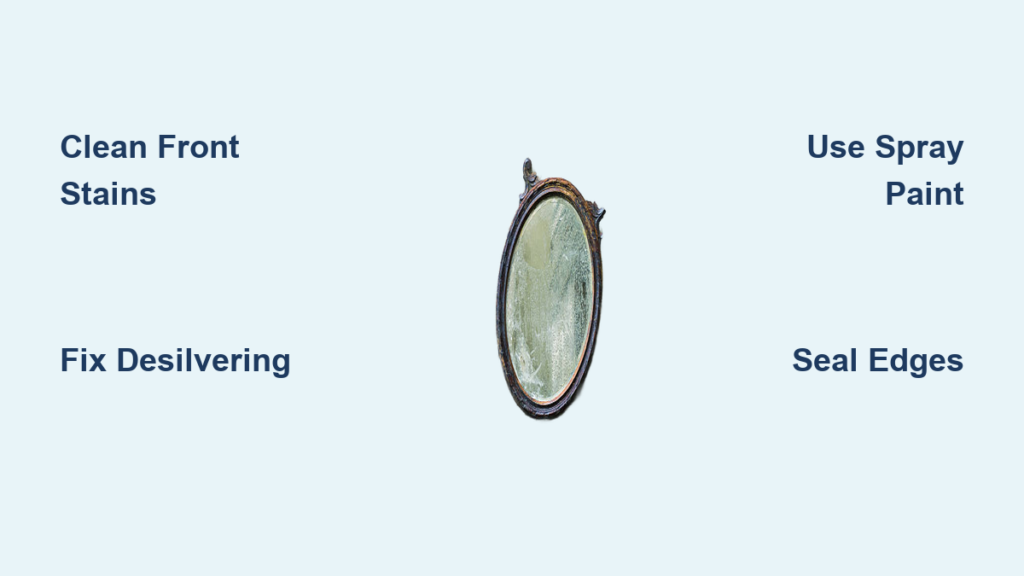
You’ve spotted brown, black, or amber spots creeping in from the edges of your mirror, and it looks like rust. But here’s the truth: true rust doesn’t form on glass. What you’re seeing is almost certainly mirror desilvering, the breakdown of the silver or aluminum backing due to moisture, age, or chemical exposure. This damage is common in bathrooms and high-humidity areas, and while it can’t be reversed completely, you can fix or conceal it effectively.
This guide covers every repair method, from simple cleaning to full DIY resilvering. You’ll learn how to diagnose the problem, choose the right solution for your situation, and prevent the damage from coming back.
What Actually Causes “Rust” on Mirrors
Before you can fix a rusty mirror, you need to understand what you’re dealing with. The brown or black discoloration spreading from mirror edges isn’t iron rust. It’s desilvering, which is the degradation of the reflective silver or aluminum backing layer.
How Desilvering Happens
Moisture is the primary culprit. Water vapor penetrates through the edges or back of the mirror, breaking down the adhesive and oxidizing the metal coating. This process creates that characteristic black, brown, or amber appearance that many people mistake for rust.
Other contributing factors include poor bathroom ventilation, harsh chemical cleaners degrading sealants, damaged backing paint, and general aging of the mirror materials. Bathrooms with steam showers, unvented spaces, or mirrors mounted directly against walls without airflow are particularly prone to this damage.
How to Diagnose Your Mirror’s Problem
Check the back of the mirror if it’s removable. Look for black or brown edges, flaking silver layers, or peeling paint. If you can scrape off black material that feels powdery or loose, the silvering has failed and needs reapplication.
If the discoloration is on the front of the glass, it may be iron-rich water deposits or hard water stains, which are often cleanable. True rust would only appear if ferrous metal components like screws or brackets were corroding and staining the glass.
Clean Rust-Like Stains from the Front of Your Mirror
If the staining appears on the front surface of the glass, you might be dealing with mineral deposits or hard water stains, not actual desilvering. These can often be removed safely.
Use a Razor Blade Safely
Hold a razor blade at a 45-degree angle and gently scrape the stained area. Apply light pressure and never press straight down. Test on a small spot first, especially with coated or antique glass.
User Tip: “You won’t damage the glass if you use the blade correctly.” – Em
Apply a Stain-Removing Paste
Mix baking soda and water into a paste using a 1:2 ratio. Apply to the stain, let sit for 30 minutes, then wipe with a damp cloth. For tougher stains, try vinegar and baking soda, but rinse immediately to avoid leaving residue.
Try Specialized Cleaners
Iron Out removes iron-based discoloration effectively. Bar Keepers Friend in its non-abrasive form is safe for glass and cuts through mineral deposits. Avoid abrasive pads or harsh scrubbing, as these can scratch the surface.
Repair Desilvering with Mirror Effect Spray Paint
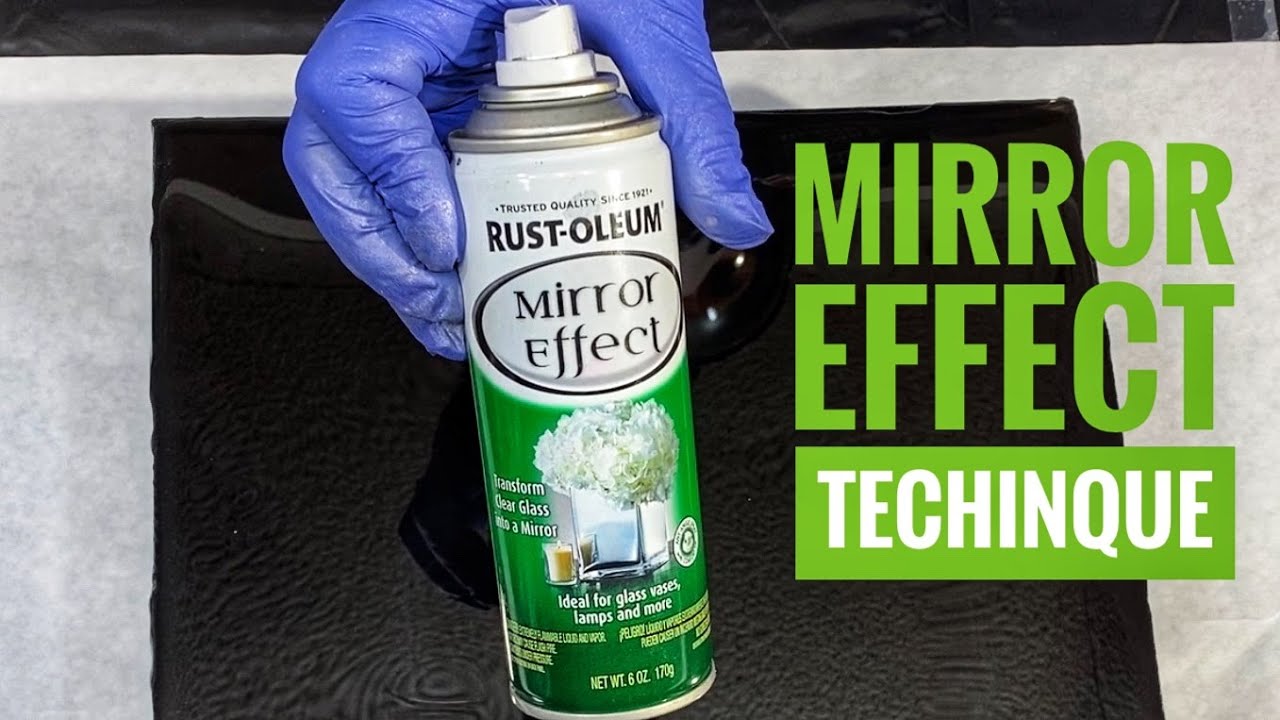
For removable mirrors with edge corrosion and accessible backs, spray-on mirror effect paint offers the simplest DIY solution.
Gather Your Supplies
You will need Rustoleum Mirror Effect Spray Paint, a razor blade, Goo Gone or adhesive remover, isopropyl alcohol at 90% or higher, a lint-free cloth, and a Phillips screwdriver.
Prepare the Mirror
Unscrew or unclip the mirror from its frame. Support the glass as you remove it to prevent flexing, which can cause cracking. Score and trim any flaking backing with a razor blade.
Clean the back thoroughly by wiping with Goo Gone to remove adhesive residue. Follow with glass cleaner, then finish with alcohol. Ensure the surface is completely dry and oil-free before proceeding.
Apply the Mirror Spray
Shake the can well. Spray light, even coats from 10 to 12 inches away. Wait 10 minutes between coats. Apply 2 to 3 coats for the best coverage.
Pro Tip: Light coats work better than one heavy spray. This prevents drips and achieves a smoother finish.
Reinstall carefully by sliding the mirror back into the frame. Do not overtighten the screws, as glass can crack under pressure. The black edges will still be visible up close but will be much less noticeable.
Use Liquid Silvering for a Smoother Finish
For a more professional-looking repair, consider Rolan Mirror Effect Solution instead of spray paint.
Why Liquid Beats Spray
Liquid silvering solutions provide higher reflectivity, a smoother finish, and better adhesion for small repairs. The results are more uniform and closer to the original factory finish.
Apply the Solution
Scrape off all loose backing until the surface feels smooth. Wipe lightly with a damp cloth, but don’t soak the surface. Spray the solution from 6 to 8 inches away in a fine mist. Wait 15 minutes, then apply a second coat if needed. Let the mirror cure for 50 minutes before reinstallation.
User Note: The finish won’t be perfect, but it looks way better than the damaged mirror.
Maintain the nozzle by wiping it with a wet tile or damp cloth after each use. This prevents clogging and ensures the solution works for future applications.
Full DIY Resilvering for Antique Mirrors
For valuable, beveled, or vintage mirrors that you want to save, full DIY resilvering is an advanced but rewarding project.
When Resilvering Makes Sense
Choose this method if the mirror is irreplaceable or sentimental, the glass is intact and smooth, and the damage is widespread but repairable. This process requires patience, precision, and proper ventilation.
Strip Old Coatings
Apply Multi-Strip to soften old paint and adhesive. Scrape off with a plastic scraper. Use Mirror Remover to dissolve copper and silver layers. Wipe with cotton balls until the glass is clean.
Deep Clean the Glass
Scrub both sides with powdered glass cleaner for at least 6 minutes. Rinse with tap water, then rinse twice with distilled water. Never skip the distilled water step, as it prevents spotting and mineral deposits.
Apply Tin Pre-Coat
Dilute tin solution in distilled water using 30 milliliters per approximately 2 square feet. Pour over the glass and rock gently for 30 seconds or more. The coating should be invisible when done correctly.
Deposit the Silver Layer
Mix equal parts silver solution, activator, and reducer in a disposable cup. Pour over the glass and set a timer for 3 to 5 minutes. Gently rock the glass to keep the solution moving. Watch closely as a reflective layer begins to form.
Rinse and Apply Backing Paint
Rinse with distilled water and dry in a dust-free area. Apply new backing paint using a foam roller for even coverage. Let dry overnight. Clean front edges with mirror remover to remove any silver overhang.
Expert Note: You can do it yourself, but it’s messy and requires precision. Consider practicing on a scrap piece of glass first.
Hide Mirror Damage Without Removal
For wall-mounted or glued mirrors where removal isn’t possible, concealment is your best option.
Frame It with Mirrored Tiles
Buy self-adhesive mirrored tiles. Cut to size and apply around the edges. This covers black borders and adds a modern, decorative look.
User Success: I used sticky vinyl planks as a border, and it looks a million times better.
Try the MirrorMate System
MirrorMate offers custom-fit reflective overlay panels that attach over your existing mirror. No removal or mess required. This is an ideal solution for large, wall-mounted bathroom mirrors.
User Result: I used mirrormate.com for two mirrors in my house and I’m happy with the results.
Aluminum Foil Patch as a Quick Fix
Cut foil slightly larger than the damaged area. Attach with clear, strong tape. Smooth out wrinkles carefully. This reflects light but may look tacky over time.
User Warning: It works, but not pretty long-term. This is best as a temporary solution.
Prevent Future Mirror Damage
Fixing the mirror is only half the battle. Stop it from happening again by addressing the root cause.
Improve Bathroom Ventilation
Run an exhaust fan during and after showers. Keep the door open or use a dehumidifier. Wipe down the mirror after use to remove moisture buildup.
Seal the Edges
If accessible, apply waterproof caulk around the perimeter. Use silicone sealant to block moisture entry at the edges where damage typically starts.
Clean Safely
Never spray cleaner directly on the mirror. Use a damp cloth instead and spray the cloth, not the glass. Avoid ammonia, vinegar, or alcohol-based cleaners near edges, as these can degrade sealants over time.
Install an Anti-Fog Mirror
Consider heated or anti-fog mirrors for high-moisture environments. These prevent condensation entirely, eliminating the conditions that cause desilvering.
When to Replace Your Mirror Instead of Repairing
Some mirrors aren’t worth fixing. Consider replacement if damage covers more than 30% of the surface, the glass is cracked, warped, or pitted, the mirror is cheap or mass-produced, repair cost exceeds 50% of replacement value, or you need perfect clarity for grooming or makeup purposes.
User Reality: There’s no way to make it look new again. Sometimes replacement is the more practical choice.
Product Guide for Rusty Mirror Repairs
| Product | Best For | Price Range |
|---|---|---|
| Rustoleum Mirror Effect Spray | Edge touch-ups on removable mirrors | $10–$15 |
| Rolan Mirror Effect Solution | Smoother, more professional silvering | ~$14 |
| Iron Out | Front surface rust stains | $10–$15 |
| Bar Keepers Friend (Non-Abrasive) | Mineral deposits and hard water | $5–$10 |
| MirrorMate | No-removal overlay fix | $50–$150 |
| Self-Adhesive Mirrored Tiles | Edge framing and concealment | $5–$20 each |
| Multi-Strip & Mirror Remover | Full restoration prep | $20–$40 |
Frequently Asked Questions About Fixing Rusty Mirrors
Can you remove rust stains from a mirror?
If the rust-like stain is on the front surface of the glass, it can likely be removed using a razor blade at a 45-degree angle, baking soda paste, or specialized cleaners like Iron Out. However, if the damage is on the back and appears as black or brown edges, cleaning won’t help because the silver backing has failed.
Why do bathroom mirrors turn black around the edges?
Bathroom mirrors turn black at the edges due to desilvering. Moisture from steam and humidity penetrates the backing, breaking down the adhesive and oxidizing the silver or aluminum layer. Poor ventilation accelerates this process significantly.
Does insurance cover mirror desilvering?
Most standard homeowner’s insurance policies consider mirror desilvering a maintenance issue rather than sudden damage. It’s typically not covered unless caused by a specific covered event like a sudden water leak.
How much does professional mirror resilvering cost?
Professional re-silvering typically costs $100 or more, depending on mirror size and complexity. This is often more than replacement for standard mirrors but worthwhile for antique or custom mirrors that can’t be replaced.
Can you paint over a desilvered mirror?
You can apply mirror effect spray paint or liquid silvering solutions to the back of a desilvered mirror. This creates a reflective surface but won’t restore factory-new quality. The results are cosmetic and can significantly improve appearance.
Key Takeaways for Fixing Your Rusty Mirror
The term “rusty mirror” is a misnomer. What looks like rust is almost always desilvering, which is the breakdown of the mirror’s reflective backing due to moisture. All repairs are cosmetic improvements rather than full restoration of factory-new quality. Fixing moisture problems first is essential, or the damage will simply return.
Choose your repair method based on mirror type. Removable mirrors can be resilvered with spray paint or liquid solutions. Wall-mounted or glued mirrors are best addressed through concealment methods like framing or overlay systems. For valuable antique mirrors, full DIY resilvering is an option for patient DIYers.
With the right approach and realistic expectations, you can restore function and beauty to a “rusty” mirror. Assess your specific situation, gather the appropriate materials, and tackle the repair with confidence.