
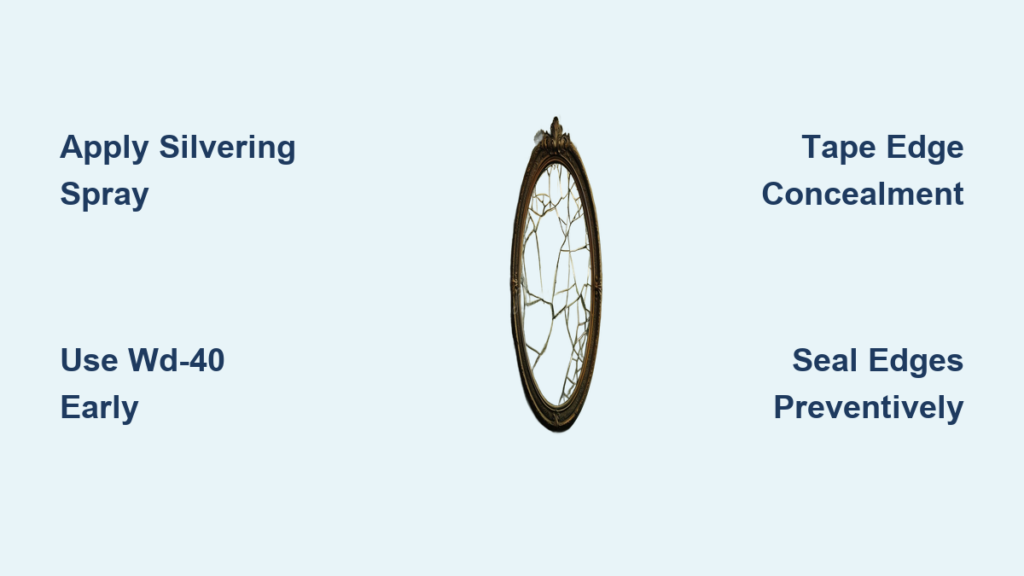
A peeling mirror isn’t just an eyesore. It’s a sign of deeper damage called mirror desilvering, where moisture seeps behind the glass and breaks down the reflective backing. Over time, you’ll see dark spots, cloudy patches, or brown edges spreading from the corners or bottom. While you can’t fully reverse this damage with DIY methods, you can restore appearance, stop further deterioration, and extend your mirror’s life.
This guide covers proven fixes ranging from quick concealments to long-term repairs. Whether your mirror is a vintage heirloom or a bathroom staple, you’ll learn exactly how to fix a peeling mirror without wasting time or money.
Identifying Mirror Desilvering
Before choosing a fix, confirm the problem is desilvering. True desilvering happens behind the glass and won’t wipe away, no matter how hard you clean.
Signs of Mirror Desilvering
Watch for these indicators that your mirror backing is deteriorating.
• Black, brown, or gray edges spreading from corners
• Patchy reflectivity where parts of the mirror look clear
• Foggy areas that don’t improve with cleaning
• Visible flaking on the back when you inspect with a flashlight
If water or cleaner runs down the mirror edge during cleaning, it’s likely accelerating the damage.
Why Damage Starts at the Bottom
Moisture follows gravity. Bathroom steam, shower splashes, and high humidity pool at the lowest point, usually the bottom edge, where the protective seal is weakest. Once moisture breaches this barrier, corrosion spreads inward toward the center of the mirror.
Repair Peeling Edges with Silvering Spray

For moderate edge damage, mirror-effect spray offers the best balance of cost, speed, and visual improvement.
Use Rustoleum Mirror Effect Spray
This aerosol coating mimics real silvering and bonds to glass. It’s the most popular DIY solution for edge peeling.
What You’ll Need
Gather these materials before starting your repair.
• Rustoleum Mirror Effect spray
• Razor blade or scraper
• Isopropyl alcohol (70% or higher)
• Lint-free cloth
• Goo Gone
• Gloves and eye protection
• Well-ventilated workspace
Remove and Prep the Mirror
Follow these steps to prepare the mirror for coating.
- Unscrew or unclip the mirror from its frame or wall.
- Lay it face-down on a soft towel.
- Work in a dust-free, dry area to ensure proper adhesion.
Trim and Clean the Backing
Proper surface preparation determines the success of your repair.
- Use a straight edge and razor to cut away flaking silver and black paint.
- Scrape only damaged areas. Leave intact backing undisturbed.
- Wipe with Goo Gone to remove adhesive residue.
- Clean with glass cleaner, then finish with isopropyl alcohol.
- Let dry completely before applying any coating.
Pro tip: Clean the nozzle after use. This spray clogs fast if left sitting.
Apply the Mirror Coating
Follow these application steps for best results.
- Shake the can for 30 to 60 seconds.
- Hold 8 to 10 inches from the surface.
- Spray light, even passes. Avoid heavy coats that drip.
- Apply 2 to 3 layers, waiting 10 to 15 minutes between coats.
- Let cure for at least 50 minutes before reinstallation.
Results and Limits
This method works well for specific situations but has boundaries.
• Cost: approximately $15
• Time: under 1 hour
• Best for: edge peeling up to 3/4 inch wide
• Drawback: slight tint difference possible, less shiny than factory finish
After treatment, the mirror looks dramatically brighter. From a distance, you can’t see the repair.
Stop Early Rust with WD-40
If you catch oxidation early, before it spreads, WD-40 can slow the progression.
How It Works
WD-40 displaces moisture and forms a temporary water-resistant barrier on affected areas.
Apply Correctly
Follow this simple procedure for early-stage rust.
- Insert the straw nozzle into the gap between glass and backing.
- Spray lightly along the affected edge.
- Let sit for 10 minutes.
- Wipe excess with a clean cloth.
What to Expect
Understand the limitations of this method.
• Improves appearance by reducing visible rust
• Does not restore reflectivity
• Is a temporary fix that requires reapplication every few months
After this treatment, the mirror looks so much better. From a distance, you can’t actually see the damage.
Conceal Damage with Aluminum Foil
For small holes or spots, aluminum foil offers a fast, nearly invisible fix.
Quick Patch Steps
Try this method for isolated damage.
- Cut foil slightly larger than the damaged area.
- Smooth out wrinkles thoroughly.
- Tape securely to the back with clear packing tape.
- Press edges flat against the backing.
Pros and Cons
Weigh these factors before choosing this method.
• Free and instant application
• Reflects well, nearly invisible from the front
• Not durable long-term
• Foil may wrinkle or detach over time
This works best for vintage or thrifted mirrors with sentimental value but minor damage.
Hide Edges with Black Electrical Tape
The cheapest and fastest solution is black electrical tape.
Apply in 5 Minutes
Follow these simple steps.
- Cut tape to match the width of the peeling edge, usually 1/4 to 1/2 inch.
- Press firmly along the back edge.
- Optionally apply to all four sides for a framed look.
Why It Works
This method succeeds because it creates a clean, finished border that completely hides blackened areas. It looks intentional, almost like a design choice.
Limitations
Keep these constraints in mind.
• Only masks damage without restoring reflectivity
• Not ideal for top edges if visible from above
This method has been used successfully on 20-plus-year-old bathroom mirrors. Cost is under $1, and time is less than 5 minutes.
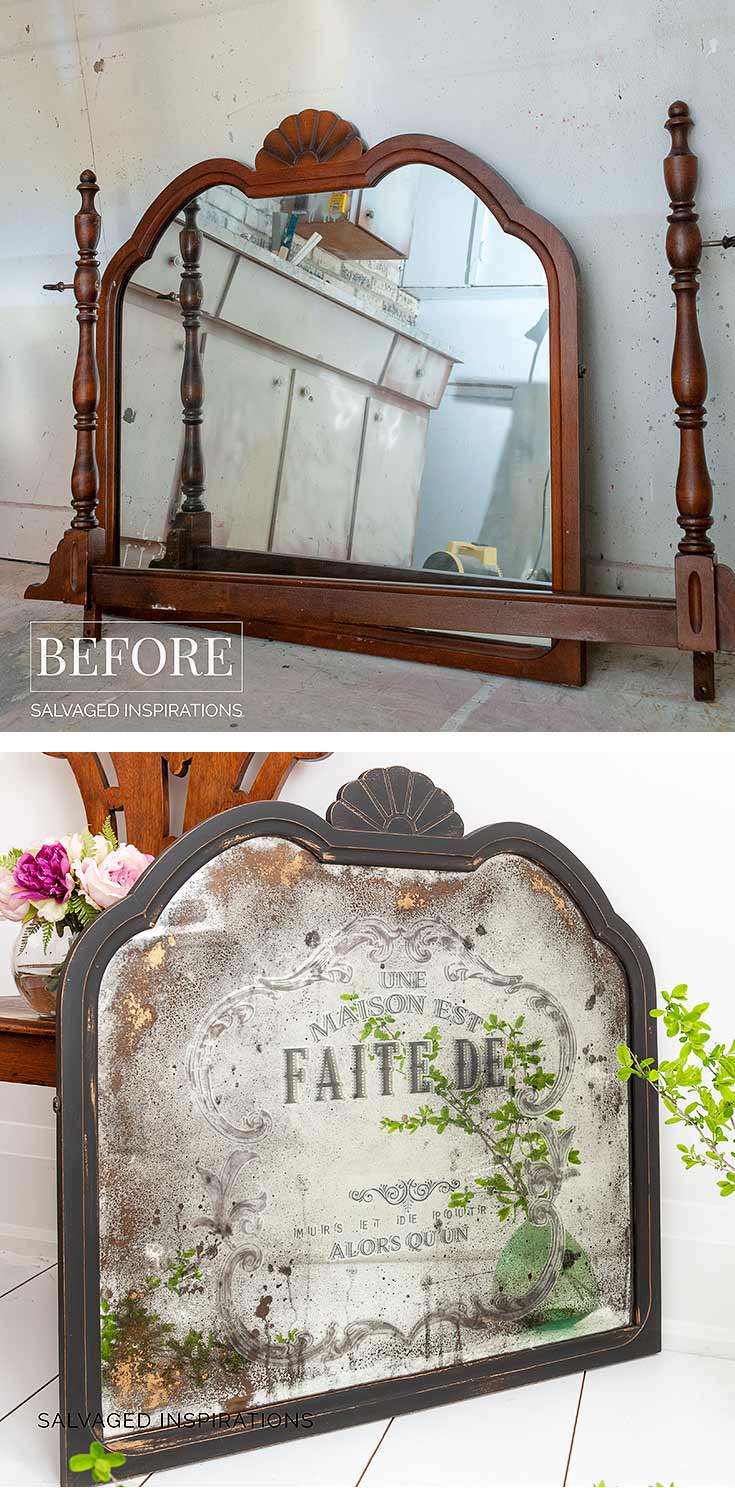
Paint a Decorative Border
Turn damage into design with metallic spray paint.
Option 1: Full Back Coating
Spray the entire back with chrome or silver mirror-effect paint.
• Use light, even coats
• Let dry 15 to 30 minutes between layers
• Cure for 1 to 2 hours before handling
Test on scrap glass first. Some paints look streaky.
Option 2: Frame-Style Edge Paint
Create a decorative border with these steps.
- Use painter’s tape to mark a 1 to 2 inch border.
- Spray 2 to 3 thin coats of brushed nickel, gold, or copper paint.
- Remove tape after drying completely.
- Seal with clear coat if desired.
This works especially well for mirrors with widespread edge damage. Users report it looks really good and doesn’t cost much but saves the mirror.
Decorative Cover-Ups
If you don’t want to repair, hide the flaw creatively.
Stick-On Vinyl Decals
Apply floral, geometric, or themed decals to the front of the mirror. They’re inexpensive, removable, and renter-friendly. They completely conceal damage.
Glass Paint and Outline Tubes
Use Gallery Glass-style kits to create artistic designs.
- Apply plastic outlines like vines or borders.
- Fill with colored paint.
- Let dry for 24 hours.
This adds artistic flair and turns a defect into a feature.
Add a Frame
Install a wood, metal, or molding frame over the mirror. It covers peeling edges and can match your bathroom decor. DIY frame kits are widely available.
Faux Stained Glass or Artificial Vines
Create a stained-glass effect with craft paint or drape artificial greenery around the mirror. These solutions work well for rental bathrooms or temporary fixes.
Replace the Mirror Panel
For severe peeling, replacing the glass is the most durable solution.
When to Choose This
Consider replacement when the mirror frame is intact, multiple panels are damaged, or you want a like-new look.
Steps to Replace
Follow this straightforward process.
- Remove mirror from frame or door.
- Measure exact dimensions.
- Order a sealed-edge mirror panel from a glass shop or online.
- Reinstall carefully.
Cost and Benefits
Weigh the investment against the results.
• Cost: $30 to $80 per panel
• Labor: $50 to $100 if outsourced
• Durability: 10 or more years
• Moisture-resistant edges
A customer replaced panels in 30-year-old bedroom doors and added decades of life to their mirrors.
Professional Resilvering for Valuable Mirrors
If your mirror is antique, beveled, or sentimental, professional resilvering is worth the cost.
What It Involves
This multi-step process restores your mirror completely.
- Remove old backing carefully.
- Clean glass thoroughly.
- Apply new silver nitrate solution.
- Re-seal with copper and paint layers.
Pros and Cons
Consider both sides before committing.
• Fully restores reflectivity
• Preserves original glass and frame
• Long-lasting results
• Cost: $100 to $500 or more
• Turnaround: weeks
• Must ship or drop off the mirror
I have had a few done. They’re a bit costly but well worth it. Restoration is the answer.
DIY Resilvering Kits
These kits cost $50 to $100 but require ventilation, gloves, and precision. They’re not recommended for beginners.
Safety: Watch for Mercury in Old Mirrors
Some antique mirrors, particularly those made before the 1800s, used mercury-based silvering.
Risks
Mercury is highly toxic if inhaled or touched. Never sand, scrape, or heat old mirror backs.
What to Do
Do not attempt DIY repair on suspected mercury-backed mirrors. Contact a professional restoration service instead.
If the mirror is old, the silver flakes are made of mercury. This needs to be professionally repaired.
Prevent Future Peeling
Once fixed, stop it from coming back.
Control Humidity
Run the bathroom fan during and after showers. Use it for 20 to 30 minutes post-shower. Consider installing a dehumidifier in damp rooms.
Improve Ventilation
Clean exhaust ducts annually. Use a humidity-sensing fan for automatic control.
Seal the Edges
Apply silicone caulk around the mirror perimeter. Reapply every few years. Spray WD-40 on edges monthly to repel water.
Clean Safely
Never spray cleaner directly on the mirror. Spray on a microfiber cloth first, then wipe. This prevents liquid from running down edges.
Wipe After Showers
Use a dry towel to wipe the mirror and wall after bathing. This stops water from pooling at the bottom edge.
Add Humidity-Absorbing Plants
Peace lilies and Boston ferns reduce moisture naturally. Place them near but not touching the mirror.
I put plants by the mirror to grab most of the humidity. They love it in the winter.
Cost Comparison of Fixes
| Method | Cost | Skill Level | Durability | Best For |
|---|---|---|---|---|
| Silvering Spray | $14–$20 | Low-Medium | 1–3 years | Edge peeling, cosmetic fix |
| Aluminum Foil | Under $1 | Low | 6–12 months | Small spots, temporary |
| Black Tape | Under $1 | Low | Replaceable | Bottom edge concealment |
| Spray Paint | $5–$15 | Low | Medium | Full back or border |
| Vinyl Decals | $10–$30 | Low | Medium | Renter-friendly |
| Replace Panel | $30–$80 | Low-Medium | 10+ years | Severe damage, intact frame |
| Professional Resilvering | $100–$500+ | N/A | High | Antique or valuable mirrors |
Choose the Right Fix for Your Mirror
Match your solution to your specific situation.
Minor Edge Peeling
Try black electrical tape or aluminum foil. Low cost, instant, and nearly invisible. Perfect for rentals or temporary fixes.
Moderate Damage
Use mirror-effect spray. It restores reflectivity and looks professional with minimal effort.
Vintage or Heirloom Mirror
Go professional with resilvering. It preserves value and is worth the investment.
Bathroom with Moisture Problems
Replace the panel. New sealed-edge glass resists humidity and offers the most durable long-term solution.
Want a Design Upgrade
Paint or frame it. Turn damage into decor with custom paint, decals, or molding.
Key Takeaways for Fixing Your Peeling Mirror
Mirror peeling is caused by moisture, age, and chemical exposure. It happens behind the glass, so wiping won’t help. You can’t fully reverse desilvering at home, but you can make significant improvements.
Your best options depend on damage severity and budget. For minor edge issues, black tape or aluminum foil work instantly. For moderate damage, silvering spray restores appearance effectively. For severe cases or valuable mirrors, replacement or professional resilvering delivers lasting results.
The most critical step is prevention. Control humidity, seal edges, and never spray cleaner directly on the glass. With the right approach, your peeling mirror can look sharp for years to come.
Frequently Asked Questions About Fixing a Peeling Mirror
Can I fix a peeling mirror without removing it?
You can conceal damage without removal using black electrical tape, decals, or decorative frames. However, spray repairs require removing the mirror to access the back.
Does mirror silvering spray actually work?
Yes, mirror-effect sprays like Rustoleum work well for edge peeling up to 3/4 inch wide. Results aren’t as reflective as factory finish, but improvement is dramatic and noticeable from normal viewing distance.
How long does mirror desilvering repair last?
Durability varies by method. Silvering spray lasts 1 to 3 years. Black tape is replaceable as needed. New sealed-edge panels last 10 years or more with proper prevention.
Can I prevent my mirror from peeling again?
Yes. Control bathroom humidity with fans, seal edges with silicone caulk, apply WD-40 monthly, and never spray cleaner directly on glass. Wipe the mirror dry after showers.
Is professional resilvering worth the cost?
For antique, beveled, or sentimental mirrors, professional resilvering is worth every penny. For standard modern mirrors, replacement is usually more cost-effective.
Are old mirrors with mercury dangerous?
Some antique mirrors made before the 1800s used mercury-based silvering. Mercury is toxic. Do not sand, scrape, or heat old mirror backs. Contact a professional restoration service.


