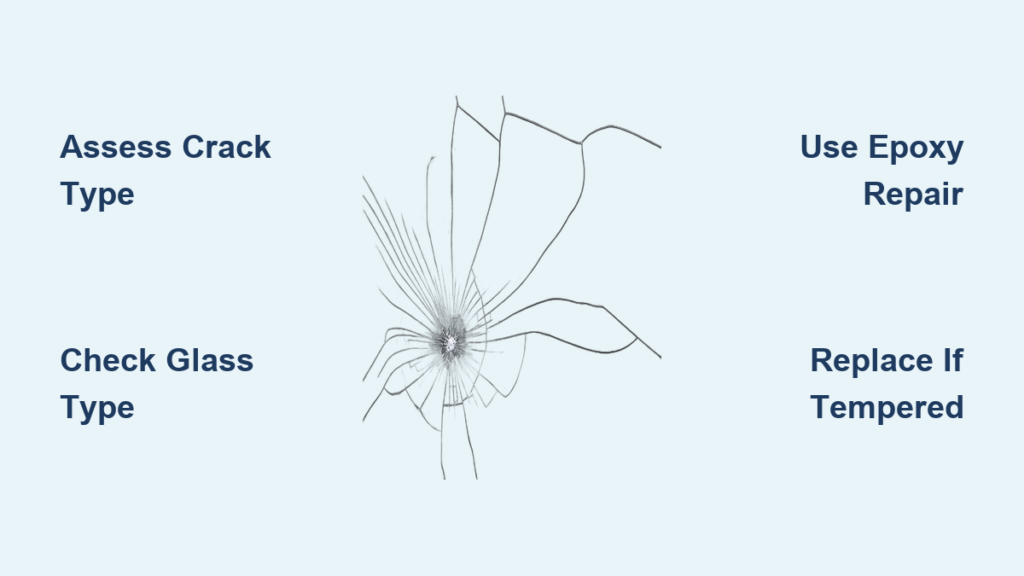
A cracked glass surface on a window, mirror, or picture frame can feel like an urgent problem. The first question most people ask is whether the damage can be fixed or if full replacement is the only option. The honest answer depends on three factors: the type of glass, the size and shape of the crack, and where the damage is located. Minor cracks in single-pane glass can often be stabilized with a DIY epoxy repair, while tempered, laminated, or double-pane glass must be replaced entirely.
This guide walks you through how to assess cracked glass damage, choose the right repair method, and recognize when professional help is non-negotiable. You will learn how to stop a crack from spreading, improve appearance, and avoid dangerous mistakes that could lead to injury or costly rework.
Assess the Crack Type and Severity
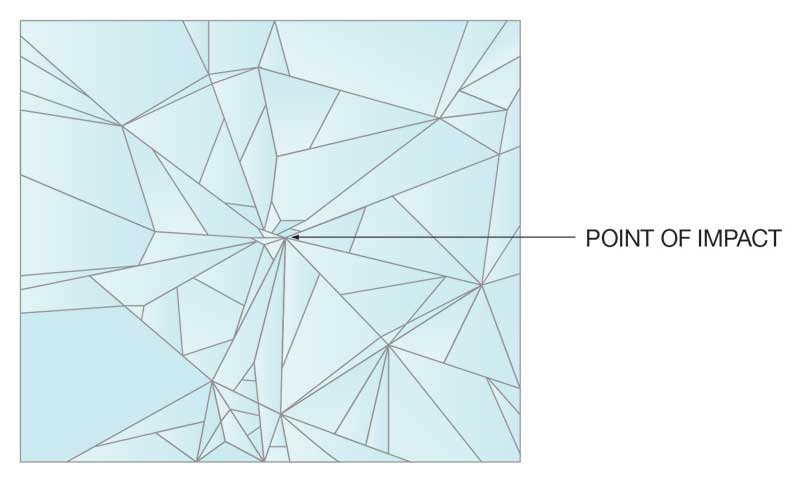
Before touching the glass, identify what kind of crack you are dealing with. This single step determines whether repair is realistic or if replacement is your only safe path forward.
Identify Common Crack Patterns
Different crack patterns signal different underlying problems and carry different repair possibilities.
- Hairline cracks: Thin, faint lines caused by minor stress or temperature shifts. These are ideal candidates for DIY repair.
- Impact (starburst) cracks: Radiate outward from a central point where a hard object struck the glass. Repairable if under 1 inch and not near edges.
- Stress cracks: Curved lines that typically start at the edge due to thermal expansion. Often require replacement.
- Edge cracks: Begin at the glass boundary where it meets the frame. These compromise structural integrity and demand immediate replacement.
- Spiderweb cracks: Dense, branching fractures covering a large area. Replacement is the only option because the glass is too weak to repair.
Check the Glass Type First
Not all glass can be repaired, regardless of how small the crack appears.
- Repairable: Single-pane windows, mirrors, and non-tempered door glass.
- Replace only: Tempered glass (shower doors, tabletops), laminated glass (doors, railings), and double-pane insulated units.
Warning: Attempting to repair tempered glass can cause sudden shattering. It is unsafe and ineffective.
Determine Repair vs. Replacement

Use this decision framework to choose your next step with confidence.
When DIY Repair Makes Sense
Repair is possible when all of the following conditions apply:
- Glass is single-pane and non-tempered.
- Crack is less than 12 inches long.
- Damage does not touch the edge.
- No spiderweb pattern or multiple fracture points are present.
The expected outcome is a stabilized crack with reduced visibility and a smoother surface. The damage will not disappear, but it will stop spreading.
When Replacement Is Required
Replace the glass immediately if any of these conditions apply:
- Glass is tempered, laminated, or insulated (double-pane).
- Crack extends to the edge of the pane.
- Condensation appears between panes (seal failure).
- Damage is larger than 12 inches or shows a spiderweb pattern.
- The item is a microwave door, windshield, or overhead skylight.
Pro Tip: For double-pane windows, even a small outer crack breaks the seal. Moisture will eventually fog the space, making replacement the only lasting fix.
Gather Tools and Safety Gear
The right materials make the difference between a clean repair and a frustrating redo.
Essential Repair Supplies
- Two-part epoxy or glass repair resin with a syringe applicator
- Acetone for cleaning and residue removal
- Ammonia-free glass cleaner (especially for mirrors)
- Dish soap and water
- Painter’s tape or clear packing tape
- A disposable mixing surface like cardboard or a paper plate
Required Tools
- Utility knife or razor blade with a fresh edge
- Wooden craft stick or toothpick for mixing and applying
- Flashlight for checking crack penetration
- Lightweight clamps for holding pieces in alignment
Safety Equipment
- Nitrile gloves to protect skin from epoxy and sharp edges
- Safety glasses to prevent shard injury
- A ventilated workspace because epoxy fumes are toxic
Never skip safety gear. Glass shards are razor-sharp, and epoxy can irritate skin and eyes on contact.
Apply a Permanent Epoxy Repair
This method works best for minor cracks in mirrors, single-pane windows, and decorative glass.
Clean and Prepare the Surface
- Lay the glass on a soft, clean surface.
- Wash the area with soapy water to remove grease and debris.
- Dry completely, because any moisture prevents bonding.
- Wipe with acetone to remove residual oils, then dry again.
Visual Check: Shine a flashlight behind the glass to see crack depth and confirm cleanliness.
Mix and Inject the Epoxy
- Cut the tips of both epoxy tubes (resin and hardener).
- Squeeze equal amounts onto a cardboard surface.
- Mix thoroughly for 1 to 2 minutes until the color is uniform.
- Use a toothpick or syringe to force epoxy into the crack.
- Apply slight pressure to ensure full penetration through the depth.
Pro Tip: Hold a flashlight behind the glass as you work. You should see the resin fill the entire depth of the crack.
Cure and Trim Excess
- Let the epoxy cure undisturbed for 15 minutes to 48 hours, following product instructions.
- Use clamps if pieces need alignment during curing.
- Once fully hardened, hold a razor blade at a 15-degree angle and gently slice off excess epoxy.
- Wipe with glass cleaner and inspect the result.
Avoid: Using a dull blade. It will tear the epoxy and scratch the glass beneath.
Use Temporary Emergency Fixes

These stop-gap methods stabilize damage before a permanent repair or professional replacement.
Seal with Nail Polish or Super Glue
- Best for hairline cracks or small starbursts.
- Clean and dry the area thoroughly.
- Apply clear nail polish or cyanoacrylate (super glue) directly into the crack.
- Let dry for 10 to 15 minutes.
Warning: This is not a permanent fix. Remove it with acetone before attempting an epoxy repair.
Tape Over the Crack
- Apply clear packing tape on both sides of the glass.
- Prevents moisture, dirt, and further spreading.
- Useful for windows during storms or while waiting for professional service.
Cover with Plastic Sheeting
- For broken or missing panes, cut plastic sheeting to size.
- Tape or staple it around the frame.
- Keeps out weather and pests until replacement.
Note: These are short-term solutions only. UV light degrades tape and glue quickly.
Optimize Results and Avoid Common Mistakes
Small errors can ruin an otherwise solid repair. Follow these best practices.
Mistakes to Avoid
- Rushing the cure time leads to weak bonds and re-cracking.
- Overfilling the crack creates bumps that are hard to trim smoothly.
- Underfilling leaves air pockets that look cloudy.
- Dirty or damp glass causes poor adhesion and hazy results.
- Ignoring edge cracks is dangerous because they are structurally unsound.
Improve the Aesthetic Outcome
- Apply epoxy in low-light conditions to better see air pockets.
- Use a credit card edge to smooth large epoxy patches.
- Polish the surface lightly with non-abrasive glass cleaner after trimming.
Reality Check: No repair makes a crack completely invisible. Success means the damage is less noticeable from 3 or more feet away.
Know When to Call a Professional

Some situations require expert assessment, specialized tools, or legal compliance.
Call a Glass Pro If:
- Glass is tempered or laminated (doors, showers, railings).
- You see condensation between panes.
- The crack is larger than 12 inches or reaches the edge.
- The item is a windshield, skylight, or overhead glass.
- The piece is valuable or sentimental, such as an antique mirror.
Benefits of Professional Service
- Less visible repairs using industrial-grade resins.
- Accurate assessment of structural safety.
- Fast replacement, often within 24 to 48 hours.
- Warranty coverage on both work and materials.
Legal Note: In most regions, DIY fixes on windshields are not legal. Only certified repairs meet safety standards.
Prevent Future Cracks
A few simple precautions can keep your glass intact longer.
Reduce Thermal Stress
- Close blinds or curtains during extreme temperature swings.
- Avoid sudden blasts of heat or cold near glass surfaces.
Ensure Proper Installation
- Windows should be mounted without frame pressure.
- Use flexible sealants to absorb building movement.
- Check for frame warping or settling that stresses glass.
Protect High-Risk Areas
- Keep heavy objects away from glass tables or shelves.
- Install window guards or storm panels in hail-prone regions.
- Apply safety film to large glass doors to contain shards if broken.
Troubleshoot Common Repair Issues
Quick fixes for typical problems that arise during or after repair.
Epoxy Won’t Bond
- Cause: Dirty, greasy, or damp surface.
- Fix: Clean with acetone, dry completely, and reapply.
Crack Still Spreading
- Cause: Edge crack or structural weakness.
- Fix: Stop use immediately and replace the glass.
Cloudy or Bubbly Appearance
- Cause: Air pockets or trapped dirt.
- Fix: Remove old epoxy with acetone, clean deeply, and reapply slowly.
Can’t Remove Super Glue Residue
- Use acetone on a cotton swab to dissolve the glue.
- Wipe gently to avoid scratching the glass.
Frequently Asked Questions About Fixing Cracked Glass
Can I repair cracked glass myself or do I need a professional?
You can repair cracked glass yourself only if it is single-pane, non-tempered, and the crack is under 12 inches without reaching the edge. Tempered, laminated, or double-pane glass requires professional replacement.
Will a DIY repair make the crack invisible?
No. DIY epoxy repair stabilizes the crack and reduces visibility, but it never disappears completely. Success means the damage is hard to notice from 3 or more feet away.
Is it safe to repair tempered glass at home?
No. Attempting to repair tempered glass can cause sudden shattering and serious injury. Tempered glass must be replaced by a professional.
How long does an epoxy glass repair last?
A properly applied epoxy repair can last months to years. Temporary fixes like nail polish or tape last only days to weeks before UV exposure degrades them.
Can I use super glue as a permanent fix for cracked glass?
No. Super glue is a temporary measure only. It must be removed with acetone before any permanent epoxy repair, because epoxy will not bond over it.
Is it legal to drive with a DIY windshield repair?
In most regions, no. Windshield repair requires certified professional service to meet safety standards. DIY epoxy is generally not sufficient for legal compliance.
Key Takeaways for Fixing Cracked Glass Successfully
Fixing cracked glass is realistic for minor damage in non-safety, single-pane surfaces. Use two-part epoxy for stabilization and cosmetic improvement, and always prioritize safety by wearing gloves and goggles in a ventilated space. Remember that tempered, laminated, and double-pane glass must be replaced, not repaired. With the right assessment, tools, and patience during curing, you can extend the life of your glass and avoid costly replacements for minor damage. For anything beyond a small, contained crack, contact a glass professional to ensure structural safety and a clean finish.