
You’ve noticed dark, smoky edges creeping into your bathroom mirror. No amount of cleaning removes that discoloration. That’s mirror desilvering, a common problem where moisture breaches the reflective backing and causes the silver or aluminum layer to oxidize. Left unchecked, black edges spread inward, ruining your mirror’s appearance. But you don’t need an expensive replacement. With the right method, you can repair, conceal, or prevent edge damage for years. This guide covers proven DIY fixes from budget-friendly solutions to professional-grade restoration so you can choose the best approach based on your mirror’s condition, budget, and skill level.
How to Spot Mirror Desilvering Before It Spreads
Recognizing Early Warning Signs
Look for dark spots, brown or black borders, or foggy patches along the mirror’s perimeter, especially at the bottom. These are early signs of delamination where moisture has breached the edge seal and oxidized the reflective coating. Unlike surface grime, this discoloration won’t wipe away. If cleaning doesn’t help, the damage is underneath the glass.
Other telltale clues include jagged spreading edges, peeling or flaking on the back, and clear spots where reflectivity is gone. Since the issue starts at the edge and moves inward, catching it early can save your mirror from extensive damage.
What Causes Mirror Edges to Blacken
Moisture is the primary enemy. Bathrooms, steam, and condensation create perfect conditions for water vapor to seep into the gap between glass and backing. Once inside, it corrodes the metal layer. But other factors speed this up including poor ventilation with no exhaust fan trapping humidity, mirrors over 10 years old lacking modern edge sealing, harsh cleaners like ammonia or acid-based sprays eating protective layers, improper installation with glued mirrors or punctured backs inviting water, and direct spray letting liquid run down edges. Fixing the root cause is just as important as repairing the visible damage.
How to Stop Mirror Edge Oxidation with WD-40

Apply WD-40 to Displace Trapped Moisture
WD-40 isn’t a permanent fix, but it displaces trapped moisture and slows further oxidation. It’s ideal for mild edge blackening and costs less than five dollars.
What You Need:
• WD-40 with straw attachment
• Microfiber cloth
• Old toothbrush
Steps:
1. Insert the straw into the edge gap between glass and backing
2. Spray lightly along discolored areas
3. Wait 10 minutes for penetration
4. Gently scrub the edge with a toothbrush
5. Wipe clean with a microfiber cloth
Results:
This treatment reduces visible darkness especially from a distance and creates a temporary water-repellent barrier. Reapply every few months to maintain protection in high-humidity areas. This won’t restore reflectivity, but users report the mirror looks significantly better after treatment.
How to Seal Mirror Edges with Black Electrical Tape
Apply Black Tape for Instant Concealment
For less than one dollar, black electrical tape seals the edge and hides blackening permanently. It’s durable, easy to apply, and lasts for years.
How to Apply:
1. Clean the edge with isopropyl alcohol
2. Cut tape to length with scissors
3. Press firmly along the damaged edge
4. Smooth out any air bubbles
5. Optional: Tape all four edges for a framed look
Why It Works:
Black electrical tape blocks moisture from entering the backing, matches the dark backing for a seamless appearance, and requires no tools or special skills. Users confirm this method restores visual integrity without replacing the mirror.
How to Restore Mirror Edges with Reflective Paint
Prep the Mirror Surface First
When you want to actually repair rather than hide damage, mirror effect spray paint mimics the original silver backing. This method works best for older mirrors with edge-specific damage.
What You Need:
• Screwdriver or Allen wrench
• Single-edge razor blade
• Goo Gone adhesive remover
• Isopropyl alcohol 70% or higher
• Rust-Oleum Mirror Effect Spray
• Protective gloves and mask
Prep Steps:
1. Unscrew the mirror and lay it flat on a soft surface
2. Inspect how far the backing has peeled, typically a quarter to three-quarters inch
3. Use a razor blade to trim loose material
4. Clean residue with Goo Gone, then wipe with isopropyl alcohol
5. Ensure the surface is completely dry and grease-free
Apply Mirror Effect Coating
- Shake the spray paint for one full minute
- Hold the can 8 to 12 inches away from the edge
- Apply light, even coats with three or more layers recommended
- Wait 10 minutes between coats
- Cure for 24 hours before reinstalling
Outcome:
This covers black edges with a shiny silver finish. It may show a slight shadow under bright light but costs only about $15 and significantly improves the mirror’s appearance.
How to Conceal Mirror Edge Damage with Trim or Film
Choose the Right Concealment Product
Mirror repair tape, edge trim, or decorative film instantly hides damage while adding style. Choose based on your aesthetic preference and budget.
Available Options:
• Mirror repair tape: Reflective adhesive tape that blends with the surface
• Edge trim: Plastic, metal, or vinyl strips in chrome, black, brushed nickel, or gold finishes
• Decorative film: Frosted, etched, or patterned peel-and-stick vinyl
Application Steps:
1. Clean and dry the edge thoroughly
2. Measure and cut to size
3. Peel backing and align with damaged area
4. Press firmly for strong adhesion
Where to Buy:
Find these products at Home Depot, Lowe’s, Amazon, or specialty sites like Mirrormate.com. Users report satisfaction with Mirrormate products on multiple mirrors in their homes.
How to Cover Mirror Edges with Custom Frame Kits
Install a Peel-and-Stick Frame
Brands like MirrorMate and MirrorChic offer peel-and-stick frame kits that cover damaged edges and modernize your mirror in under one hour. With over 65 designs available including modern, glam, coastal, and classic styles, you can find an option to match your bathroom decor.
Why Choose Frame Kits:
These kits use moisture-resistant materials, require no tools for basic installation, act as a secondary seal against humidity, and prevent functional mirrors from ending up in landfills.
Installation Steps:
1. Measure mirror outer dimensions precisely
2. Order custom-fit kit online with free samples available from some companies
3. Clean the mirror surface where the frame will adhere
4. Peel backing and align frame around the mirror edge
5. Press firmly into place or secure with included fasteners
6. Wait 24 hours for full adhesive adhesion
Result:
A like-new mirror with added protection and a stylish upgrade that transforms outdated mirrors into design focal points.
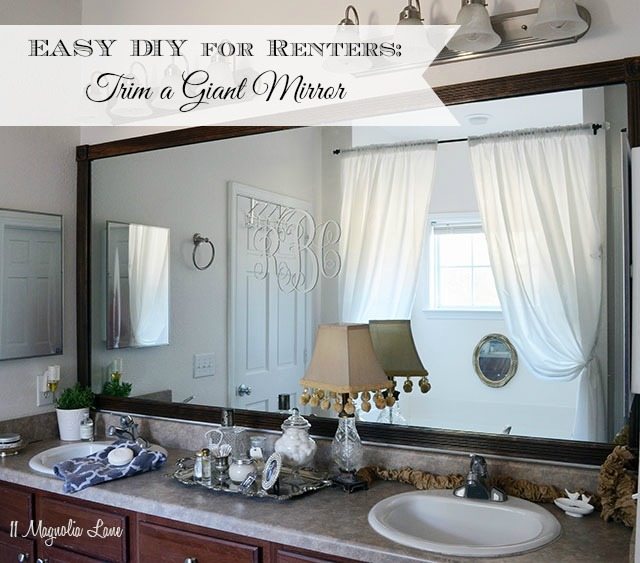
How to Build a Permanent Wooden Frame for Your Mirror
Select and Prepare Waterproof Wood
For a long-term, high-quality fix, install wooden moldings around the mirror. This custom approach provides lasting durability and a personalized look.
Wood Selection:
• Pine: Affordable and easy to paint or stain
• Mahogany or Redwood: Rich tone adds warmth but may darken smaller spaces
Measure the mirror’s outer edges and choose wood wide enough to cover damaged areas. Test fit by holding wood scraps around the mirror before purchasing.
Use Marine-Grade Waterproof Adhesive
In bathrooms, standard glue fails. Use marine-grade adhesive including Multi-Grip, Probond Ultimate, Elmer’s Stixall, or Household Goop. Test bond strength before full application.
Installation Steps:
1. Cut four pieces to size with a handsaw
2. Make relief cuts to fit over mounting brackets
3. Sand, stain, and apply at least one coat of varnish
4. Apply zigzag glue pattern to the back of each piece
5. Install bottom first, then sides resting on bottom, then top resting on sides
6. Hold each piece for 10 minutes until initial bond forms
7. Allow 1 to 2 hours for full curing
Pro Result:
One user installed a wooden frame two years ago and reports it’s still secure with no complaints from the tenant.
Quick Fixes for Mirror Edge Damage
Vinyl Plank Border Application
When you need a quick or temporary fix, self-adhesive vinyl planks work fast. Cut to length, peel and stick along the bottom or all edges, and press firmly for strong adhesion. Users report this looks significantly better at a fraction of the cost of other solutions.
Aluminum Foil Patch Method
If you can access the back of the mirror, cut foil to cover the damaged area and tape in place. This blocks light transmission and reduces visibility of black edges from the front. Reddit users confirm that foil under the frame hides the damage effectively.
Frosted or Decorative Film Cover
For a full-face transformation, apply frosted film for privacy and soft reflection, etched glass effect film for elegance, or patterned or tinted films for decorative appeal. These films are removable, protect the surface, and can be easily updated to change your bathroom’s look.
Professional Solutions for Severely Damaged Mirrors
When to Consider Professional Resilvering
Professional resilvering is the only way to truly restore original reflectivity. This process strips the old backing and applies a new silver or aluminum layer in a controlled laboratory environment. It’s best for antiques, sentimental pieces, or bevelled mirrors where replacement would be costly. Expect to pay $100 to $300 or more and allow days for the process.
Replacing Just the Mirror Panel
If your frame is intact but the glass is damaged, replace only the panel. Remove the mirror from the frame, measure and order a new panel from a local glass shop, request sealed edges for moisture resistance, and reinstall. This costs $50 to $150 and preserves your original frame while preventing future issues.
When Full Mirror Replacement Makes Sense
Choose full replacement if the mirror is cracked or warped, desilvering covers over 50% of the surface, there’s no sentimental value, or you’re renovating anyway. Large bathroom mirrors like 43 by 65 inches require careful handling and professional removal. This costs $200 or more but provides a completely new start with modern edge sealing.
How to Prevent Mirror Edge Damage Long-Term
Seal Edges Against Moisture
Apply silicone-based sealant or mirror edge sealer during installation or after any repair. This creates a waterproof barrier that blocks vapor from reaching the backing. Reapply every 1 to 2 years in high-humidity bathrooms.
Improve Bathroom Ventilation
Run the exhaust fan during and after showers, open windows when possible, use a dehumidifier, and wipe down mirrors after use to prevent water pooling. The goal is keeping humidity below 60%.
Use Safe Cleaning Methods
Avoid ammonia, acetone, and acidic cleaners. Spray cleaner on a microfiber cloth rather than directly on the mirror. Wipe vertically and never let liquid run down edges where it can seep behind the backing.
Add Protective Frames
Install wooden, metal, or plastic frames that cover edges completely. Even a DIY bobbin frame adds protection and style. The key to preventing mirror desilvering is stopping moisture from penetrating the edge in the first place.
Inspect Regularly
Check mirror edges every 6 to 12 months for early black spots, peeling at corners, or foggy edges. Fix minor issues before they spread across the entire surface.
Best Mirror Edge Fix by Situation
| Damage Level | Best Solution | Cost | Durability |
|---|---|---|---|
| Mild discoloration | WD-40 treatment | Under $5 | Months |
| Visible black edges | Black electrical tape | Under $1 | Years |
| Cosmetic concern | Edge trim or film | $10–$30 | 1–5 years |
| Full surface damage | Frosted or decorative film | $20–$50 | Removable |
| Back accessible | Aluminum foil patch | Under $1 | Permanent |
| Valuable mirror | Professional resilvering | $100–$300+ | Permanent |
| Reusable frame | Replace panel | $50–$150 | Permanent |
| Severe damage | Full replacement | $200+ | Permanent |
Frequently Asked Questions About Fixing Mirror Edges
Can You Fix Black Mirror Edges Without Replacing the Mirror?
Yes, several methods can fix or conceal black edges without replacement. Black electrical tape seals and hides damage permanently for under $1. Mirror effect paint restores reflectivity for about $15. Edge trim, custom frames, and decorative films also conceal damage while improving the mirror’s appearance.
What Is the Best DIY Method for Mirror Edge Repair?
Black electrical tape offers the best balance of cost, effectiveness, and ease for most homeowners. It costs less than $1, requires no tools, creates a moisture barrier, and lasts for years. For a more cosmetic approach, MirrorMate or MirrorChic frame kits provide stylish upgrades in under one hour.
Does WD-40 Actually Help with Mirror Desilvering?
WD-40 displaces trapped moisture and slows further oxidation. It doesn’t restore the reflective backing but significantly reduces visible discoloration, especially from a distance. Reapply every few months in high-humidity areas for best results.
How Much Does Professional Mirror Resilvering Cost?
Professional resilvering costs $100 to $300 or more depending on mirror size and complexity. This is the only method that truly restores original reflectivity, making it worthwhile for antique or sentimental mirrors but not cost-effective for standard residential mirrors.
Can You Prevent Mirror Edge Damage?
Yes, apply silicone-based edge sealant during installation, improve bathroom ventilation, avoid harsh cleaners that damage protective layers, and inspect mirrors every 6 to 12 months. The key is stopping moisture from reaching the edge where it can oxidize the backing.
Key Takeaways for Fixing Mirror Edges
Most homeowners can successfully fix mirror edges using black electrical tape or mirror edge trim. These budget-friendly options cost under $30, require no special skills, and last for years. For sentimental or high-value mirrors, professional resilvering or panel replacement offers permanent restoration. Quick cosmetic fixes like vinyl borders, aluminum foil patches, or decorative films work well for temporary or rental situations. Regardless of which method you choose, addressing the root cause by improving ventilation and sealing edges prevents future damage. With proper prevention, your mirror can stay clear and reflective for years to come.


