
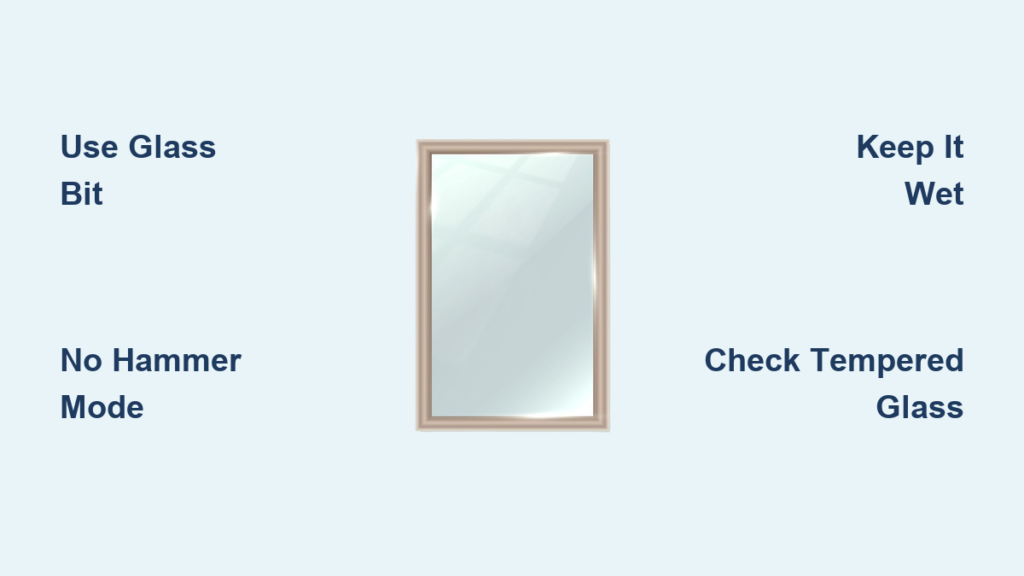
Drilling into a mirror requires precision, patience, and the right approach. Many DIY enthusiasts attempt this task without proper preparation, only to watch their mirror crack or shatter. The good news is that with the correct drill bit, careful surface preparation, and controlled drilling technique, you can create clean holes in glass mirrors without damage. This guide covers every essential step, from selecting the proper tungsten carbide or diamond-tipped bit to executing a crack-free penetration. You’ll learn exactly how to protect the surface, secure the glass, maintain cooling, and avoid the mistakes that lead to costly breakage.
Choose the Right Drill Bit for Glass
Using the correct drill bit is the most critical decision you’ll make when learning how to drill into a mirror. Standard metal or masonry bits will instantly crack or chip glass, making your project a failure before it begins.
Use Glass-Specific Drill Bits Only
You must use a drill bit engineered specifically for glass or tile. Two types prove most effective for mirror drilling:
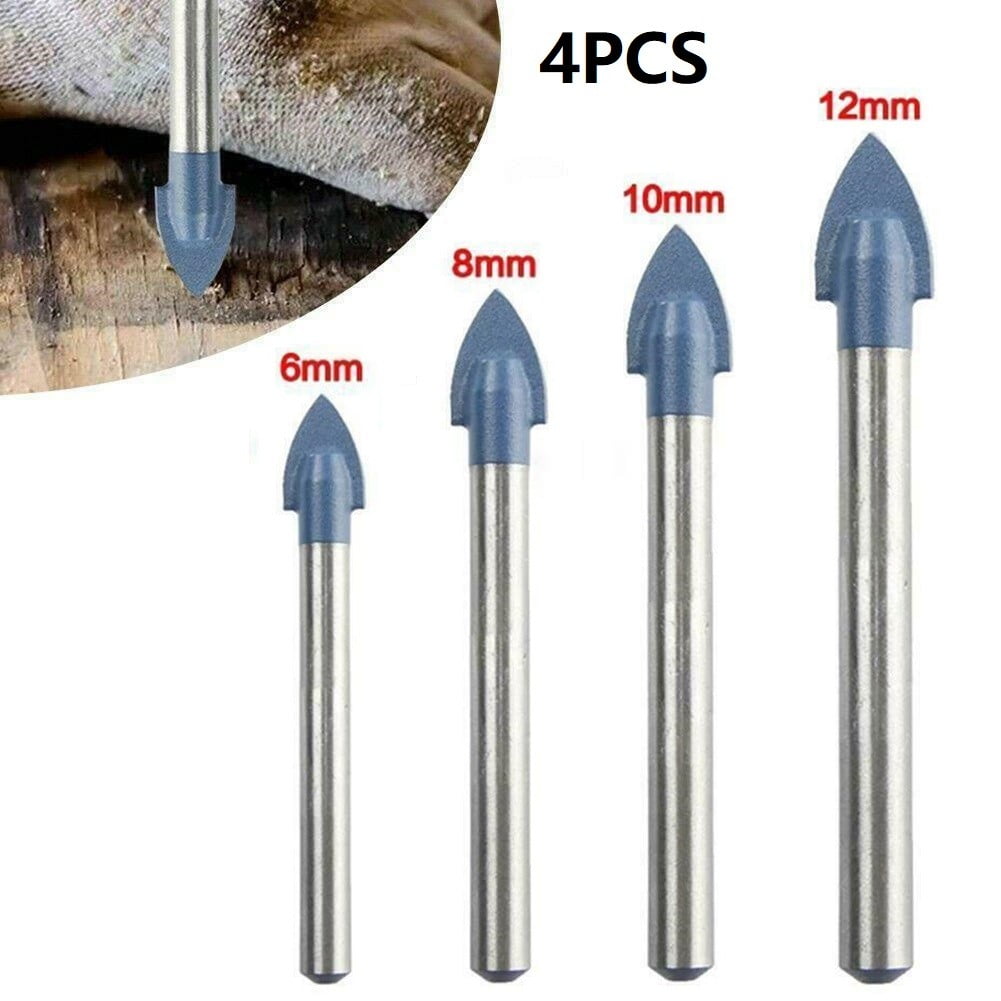
• Tungsten carbide-tipped bits: Ideal for small holes between 3mm and 10mm. The cross-ground tip grips smooth glass surfaces without skidding, creating precise entry points.
• Diamond-tipped bits or hole saws: Best for larger diameter holes. Diamond bits last longer and cut cleaner when used with continuous water cooling.
Reliable options include TIMco Addax range bits (available in 5mm to 10mm sizes) and Builder brand glass-drill bits (commonly 3mm to 8mm). The 5mm size works well for most standard mounting brackets and sensor installations.
Disable Hammer Mode on Your Drill
Set your drill to rotary-only mode. Hammer action creates vibrations that easily fracture glass, even during initial penetration. One accidental tap can propagate invisible cracks throughout the mirror, causing sudden failure days later.
Mark and Protect the Drilling Surface
Proper surface preparation prevents slippage and contains micro-cracks during drilling. This step takes only minutes but dramatically increases your success rate.
Apply Masking Tape Before Marking
Cover the intended drilling spot with masking tape. This simple addition serves three important purposes:
• Reduces risk of surface scratches from bit slippage
• Minimizes spread of micro-cracks during penetration
• Helps the bit grip the smooth glass surface
After applying tape, mark the exact center of your hole using a fine-tip marker or scribe.
Create a Starter Dimple with a Center Punch
Use a center punch to create a small indentation at your marked point. This guides the drill bit and prevents wandering across the surface. As glass expert Gregg Cutting notes, “It’s critical to use a center punch first, just one good hit—don’t tap.” Hold the punch steady and strike firmly with a hammer. One clean strike is sufficient.
Secure the Mirror Before Drilling
Glass moves during drilling, and that movement causes fractures. Proper securing eliminates vibration and gives you complete control over the process.
Remove the Mirror If Possible
Drilling an installed mirror increases risk significantly due to limited access and vibration transfer through the wall. Always remove the mirror when feasible. This provides full control over support, angle, and stability throughout the drilling process.
Clamp the Mirror Firmly in Place
Place the mirror on a soft, non-slip surface such as a towel or rubber mat. Then use bar clamps or enlist a helper to hold the glass firmly. Ensure no part overhangs or flexs, and support both sides near the drilling area to prevent stress fractures. Never let the mirror move during drilling—vibration is the top cause of cracks.
Set Up Water Cooling System
Heat is the enemy when drilling glass. Without cooling, friction overheats the bit and the mirror, leading to thermal shock and cracking.
Maintain Continuous Water Flow
Keep a steady drip of water on the drilling site throughout the entire process. You can achieve this by:
• Taping a drip bottle above the hole position
• Applying water with a sponge or spray bottle every few seconds
• Building a simple water dam with clay or tape to pool water around the area
Water also flushes away glass dust, improving visibility and bit efficiency. Expert Dave Spencer emphasizes, “Keep it wet, drill slow with light pressure, and don’t use hammer mode.”
Drill the Hole with Proper Technique
With preparation complete, the actual drilling requires patience and precision. Rushing guarantees failure.
Start Slow with Gentle Pressure
Insert your glass-specific bit into a three-jaw chuck and set the drill to low speed, ideally 400 to 600 RPM. Position the tip directly over the punched dimple and begin drilling with light, consistent pressure. Let the bit do the work—do not force it through the glass.
Complete the Penetration Carefully
Keep the drill perpendicular to the surface at all times. Feed gradually; rushing increases heat and stress on the glass. Pause if you feel resistance, reapply water, and realign before continuing. As the bit nears the back side, reduce pressure further. Sudden breakthrough causes chipping on the exit side. When drilling thick glass, flip the mirror and finish from the opposite side once you see the tip emerge.
Understand What Mirrors Cannot Be Drilled
Not all mirrors can be safely drilled. Understanding the difference between glass types protects you from dangerous failures.
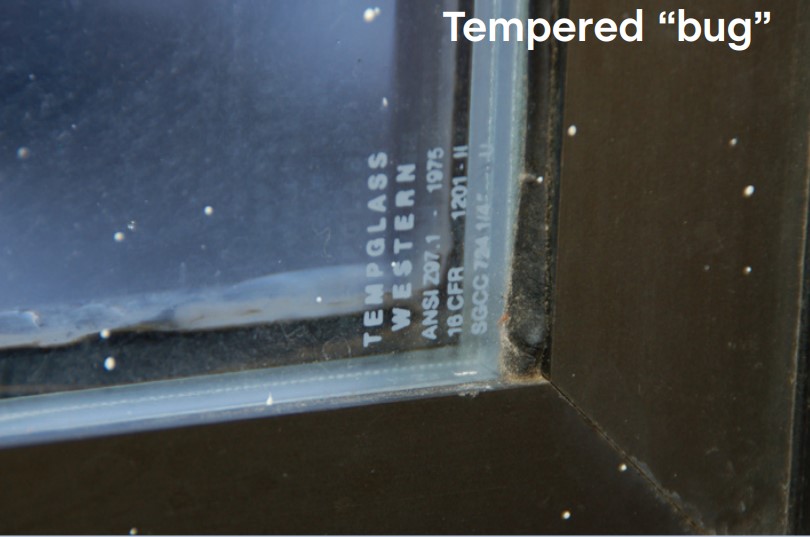
Never Drill Tempered Glass
Tempered mirrors are under internal tension. Attempting to drill one may cause it to shatter completely and instantly. Signs your mirror is tempered include a small etched logo in the corner (such as “Temp” or “TG”), smooth edges with no drillable surface, and a tendency to shatter into small cubes rather than sharp shards when broken. The critical rule is this: do not drill tempered glass, especially if it’s already mounted.
Stick to Annealed Glass Only
Only annealed (regular) glass mirrors should be attempted, and always with caution. Confirm your mirror type before starting. As professional Jim Moody advises, “Don’t try it. Hire a glass technician—more than likely, they’ll take it down to do it.”
Select the Correct Hole Size for Your Project
Matching bit size to your application ensures clean results and prevents unnecessary stress on the glass.
Match Bit Size to Application
Most mirror drilling jobs require small holes. Common sizes include 5mm for mounting brackets or sensors, 3mm to 8mm for wiring or anchors, and anything larger than 10mm requiring diamond core bits with wet drilling. Builder bits cover the 3mm to 8mm range effectively, while TIMco offers dry and wet diamond core bits suitable for larger ceramic and tile applications that can adapt to thick glass with proper cooling.
Avoid Common Drilling Mistakes
Understanding what not to do protects your mirror as much as following correct procedures.
Learn from These Common Errors
Standard metal or masonry bits cause immediate cracking. Using hammer mode guarantees fracture. Applying too much pressure leads to overheating and chipping. Skipping the center punch allows the bit to slip and spread cracks. Drilling without water causes rapid bit wear and glass heating. Working on an unstable surface transfers vibration that creates fractures. Never rush the process—drilling glass takes patience, not power.
Maintain Your Drill Bits After Use
Proper tool care extends lifespan and ensures consistent performance on future projects.
Clean and Store Bits Properly
After drilling, rinse diamond or carbide bits under water to remove glass residue. Dry thoroughly to prevent corrosion, then store in a protective case. Tungsten carbide tips can be resharpened using a diamond file or bench grinder to restore the cross-ground edge. Replace bits if they show visible wear or fail to bite after sharpening.
When to Call a Professional Glass Technician
Some situations demand professional expertise. Knowing when to step back prevents costly mistakes.
Hire a Professional for High-Risk Jobs
Consider professional help if the mirror is large or expensive, if it’s already installed and difficult to remove, if you need multiple or large-diameter holes, or if you lack experience with glass drilling. A certified glass technician has specialized equipment and training to remove, drill, and reinstall mirrors safely. For permanent installations, professional service often saves money and prevents costly breakage.
Frequently Asked Questions About Drilling into Mirrors
Can you drill a hole in a mirror without breaking it?
Yes, you can drill a hole in a mirror without breaking it by using a glass-specific drill bit (tungsten carbide or diamond-tipped), securing the mirror firmly, drilling in rotary-only mode at low speed, and maintaining continuous water cooling throughout the process.
What drill bit is best for drilling into glass mirrors?
Tungsten carbide-tipped bits with cross-ground tips work best for small holes (3mm to 10mm) in smooth glass surfaces. Diamond-tipped hole saws are better for larger diameter holes when used with water cooling.
Why does my mirror crack when I drill into it?
Mirrors crack during drilling due to several common mistakes: using hammer mode instead of rotary-only, applying excessive pressure, skipping the center punch, drilling without water cooling, or working on an unstable surface. Vibration and heat are the primary causes of cracking.
Can you drill into a tempered mirror?
No, you should never attempt to drill into a tempered mirror. Tempered glass is under internal stress and will shatter completely if penetrated. Look for etched markings like “Temp” or “TG” in the corner to identify tempered glass.
How do I prevent the drill bit from slipping on the mirror?
Apply masking tape over the drilling location before marking the spot. Then use a center punch to create a starter dimple at the marked center. These two steps prevent bit slippage and ensure accurate entry.
Key Takeaways for Drilling into Mirrors Successfully
Drilling into a mirror is doable but risky, and success depends entirely on preparation and technique. Always use a glass-specific drill bit (tungsten carbide or diamond-tipped), never use hammer mode, and maintain continuous water cooling throughout the drilling process. Secure the mirror firmly on a stable surface, ideally removed from the wall, and apply gentle pressure letting the bit cut naturally. Most importantly, never attempt to drill tempered glass—it cannot be done safely. For valuable or complex installations, hiring a professional glass technician is the smartest investment you can make. With the right approach, you can achieve clean, functional holes without turning your mirror into a hazard.


