
A shattered mirror isn’t just an inconvenience. It’s a safety hazard that can cause serious injuries and costly damage. Whether you’re moving a full-length mirror, installing a bathroom vanity, or safeguarding a decorative piece in a high-traffic gym, knowing how to protect a mirror from breaking is essential for every homeowner and business owner. Mirrors are fragile items vulnerable to impact, moisture, heat, and improper handling, but with the right strategies, you can drastically reduce the risk of cracks, shattering, or long-term degradation.
This guide reveals proven, expert-backed methods to keep mirrors intact, from installation to transport and daily use. You’ll learn how to reinforce glass with safety film, avoid common mistakes during mounting and packing, and maintain reflectivity and structural integrity over time, especially in humid or high-impact environments.
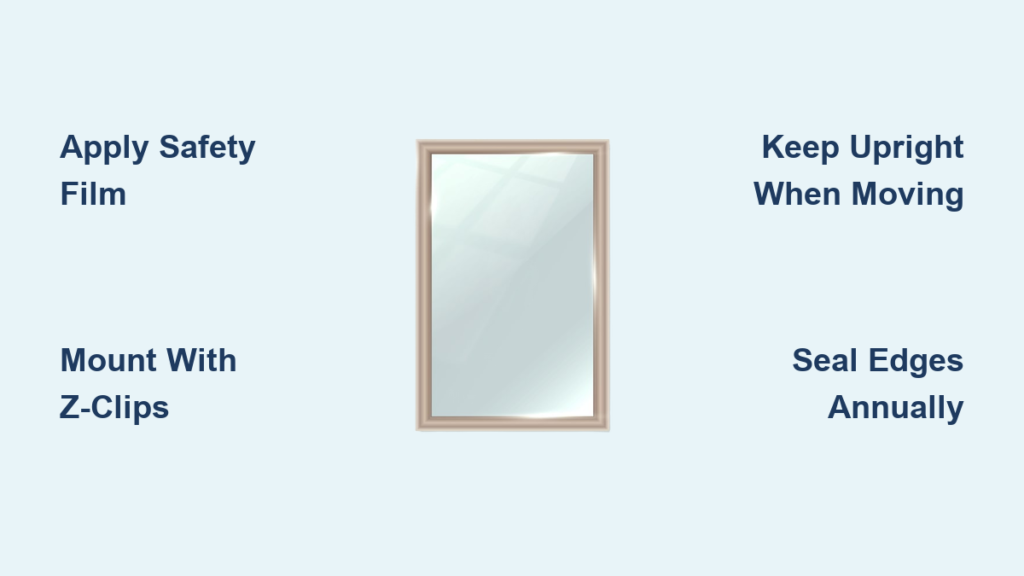
Apply Mirror Safety Film for Maximum Protection

Reinforcing your mirror with a clear, durable film is one of the most effective ways to prevent shattering and contain glass if damage occurs.
Why Safety Film Works
Mirror safety film acts like a net that holds shattered pieces together on impact. When a mirror cracks, the film keeps broken glass in place, forming a spiderweb pattern instead of dangerous, sharp fragments flying across the room. This protection is critical in gyms, dance studios, and homes with children where accidents are more likely to happen.
The film also increases impact resistance by absorbing shock from bumps or flying objects. It delays crack spread across the surface, making it ideal for mirrors near doors, in hallways, or in sports centers. High-quality films meet safety standards required in public facilities and eliminate the need for optically distorted tempered glass.
How to Apply Safety Film Using the Wet Method
Follow these steps for bubble-free adhesion and professional results.
- Clean the mirror thoroughly, removing all dust, grease, and fingerprints.
- Spray the glass with soapy water (a few drops of dish soap mixed with water) to allow repositioning.
- Peel the liner and align the film, starting from one edge.
- Squeegee from the center outward to push out water and air bubbles.
- Wait 24 hours before touching or cleaning the mirror. Full bonding takes time.
Pro Tip: Inspect edges every 6 months and reapply if peeling, especially in humid bathrooms.
Use Protective Backing Treatments
Boost your mirror’s durability with factory-applied or DIY coatings that resist moisture and corrosion over time.
Choose the Right Backing for Your Environment
Epoxy or polyurethane back coatings seal the mirror against humidity and oxidation. Factory-applied treatments offer the best results, though DIY versions are available but less durable. These coatings are critical for bathroom, sauna, or outdoor mirrors where moisture exposure is constant.
For wet areas, install copper-free coated mirrors. Standard copper layers can corrode in high humidity, leading to desilvering, which appears as a cloudy, flaky edge effect. Copper-free mirrors prevent this galvanic corrosion and are ideal for spas, pools, and humid climates.
Safety-backed mirrors come pre-laminated with shatter-resistant vinyl or PET film. They contain glass on breakage, enhance moisture resistance, and are required by code in many gyms, schools, and clinics.
Mount Mirrors Correctly to Prevent Cracks
Improper installation is one of the top causes of mirror cracks and falls. Proper mounting distributes weight evenly and prevents stress points.
Use the Right Hardware
Use mirror clips or Z-bars instead of weak adhesives. Z-clips or J-channels secure the top and bottom without creating pressure points that can crack glass. This method works best on drywall or wood and allows for natural expansion and contraction.
Apply neutral-cure silicone rather than standard caulk. Standard caulk can eat through mirror backing and damage the reflective layer. Mirror-safe mastic is chemically inert and won’t degrade paint or silver. Let it cure fully for 24 to 48 hours before using the mirror.
Avoid torsional stress from warped walls or uneven mounting. Use shims to level the frame and mount on flat, stable surfaces. For large mirrors over 36 inches, consider hiring a professional to ensure proper installation.
Add Vibration Dampening in High-Traffic Areas
Reduce stress on mirrors in gyms, hallways, and other high-traffic zones where door slams and foot traffic create constant vibration.
Use Padding Behind the Mirror
Place rubber or foam padding behind the mirror to act as a shock absorber. Cut foam strips to fit corners and edges for maximum protection. This prevents edge chipping over time and is especially useful for floor-to-ceiling installations that receive regular bumps.
For removable mounts where you might take the mirror down later, use carpet protector film. Apply self-adhesive plastic film to the back first, then mount the mirror on top. When removing later, the film pulls off cleanly without leaving stuck adhesive or causing cracks.
Note: Don’t leave protector film on floors. Use it only as a mounting buffer between the mirror and wall.
Avoid High Humidity and Heat Damage

Moisture and temperature swings degrade mirrors from the edges inward, causing permanent damage if left unchecked.
Control Humidity Levels
Keep humidity below 60% to prevent desilvering, flaking, and foggy reflections. Install exhaust fans in bathrooms and use dehumidifiers in basements or saunas. Never place mirrors directly over showers or tubs where constant steam creates extreme moisture exposure.
Seal mirror edges with neutral-cure silicone to block moisture entry at vulnerable points. Reapply every 1 to 2 years in humid rooms and let dry 24 hours before exposing the mirror to water.
For bathrooms, consider installing heated demister pads behind the mirror. These stick to the back and plug into an outlet to keep the surface warm and dry after showers, preventing condensation and slowing corrosion. This feature is common in luxury bathrooms and hotels.
Block Direct Sunlight and UV Exposure
Sunlight fades coatings and causes thermal stress that can crack mirrors over time.
Position Mirrors Away from Windows
Avoid placing mirrors near south- or west-facing windows where UV radiation is strongest. UV breaks down reflective layers, causing yellowing, loss of clarity, and edge flaking. It also leads to uneven expansion and cracking from repeated thermal cycling.
Apply UV-filtering window film to nearby glass to reduce exposure. These films block up to 99% of UV rays and preserve both your mirror and nearby furniture. They’re affordable and easy to install.
Maintain 6 to 12 inches between mirrors and heat sources like radiators, vents, and recessed lighting. Sudden temperature changes cause stress fractures. If relocation isn’t possible, use non-reflective barriers to shield the mirror.
Handle Mirrors Safely During Transport
Most breakages happen during handling, especially at edges and corners. Following proper techniques prevents accidents.
Carry Vertically, Not Flat
Always hold mirrors upright by the sides, never flat. This reduces flexing and edge stress that can cause cracks. For mirrors over 36 inches, use two people to distribute weight evenly.
Wear nitrile or cotton gloves to prevent oils from skin transferring to the glass. These oils can degrade coatings over time. Use glass suction cups for secure hold without finger pressure. Suction lifters are essential for beveled or antique mirrors that have more fragile edges.
Never lift by corners. Corners are weak points where concentrated stress causes chipping or cracking. Always support the full vertical edges with both hands.
Pack Mirrors Properly for Moving or Storage
Poor packing causes most transport-related breakages. Following proper techniques protects your mirror during moves.
Protect Every Surface
Wrap corners with foam guards first. Edges take the brunt of impacts during handling and transport. Use plastic or foam corner protectors and tape only to the wrap, never directly to the glass.
Wrap the mirror in bubble wrap and acid-free paper to prevent scratches and moisture damage. Lay the mirror face-up on a soft surface, then wrap in acid-free tissue or glassine paper. Add 2 to 3 layers of bubble wrap, focusing heavily on edges. Seal seams with tape but never apply tape directly to glass.
Sandwich the wrapped mirror between rigid boards like MDF, plywood, or thick cardboard to prevent flexing during transit. Secure with stretch wrap or straps. Never rely on tape alone for support.
Use a mirror box or wooden crate for the best protection on long moves or with valuable mirrors. Custom boxes fit snugly without shifting. Line with padding and fill voids with crumpled paper. Label the box with “Fragile,” “This Side Up,” and “DO NOT LAY FLAT.”
Real-World Tip: Professional movers consistently report that laying mirrors flat is the number one cause of breakage in transit.
Always Transport Mirrors Upright
Position matters more than padding when moving mirrors. Keeping them vertical prevents flexing and stress fractures.
Load Securely in the Vehicle
Keep the mirror on its edge when loading. Wedge it between soft, stable items like a mattress or sofa. Secure with moving straps, not ropes, and never stack heavy items nearby that could fall onto the mirror.
Use A-frames if transporting multiple mirrors. These frames prevent scratching and impact while keeping each mirror upright and separated from others.
Store Mirrors in Ideal Conditions
Long-term storage demands climate control and correct positioning to prevent warping and damage.
Position and Environment Matter
Store mirrors vertically at a 5 to 10 degree angle to prevent warping and edge pressure. Use padded A-frames or mirror carts for support. Never lay mirrors flat for more than 24 hours.
Control temperature and humidity in storage areas. Ideal conditions are 60 to 75°F with 40 to 60% humidity. Avoid garages, attics, or basements unless they are climate-controlled. Use desiccant packs or dehumidifiers in storage units to maintain proper conditions.
Avoid storing mirrors near off-gassing materials like fresh paint, adhesives, and untreated wood. These vapors can corrode mirror backing over time. Keep mirrors away from renovations or new furniture.
Inspect mirrors every 3 to 6 months during storage. Check for edge discoloration, flaking paint, or cloudiness that indicates early moisture damage. Re-seal edges if needed and rotate stock periodically.
Clean Mirrors Without Causing Damage
Harsh cleaners destroy protective layers and accelerate desilvering. Using the right products extends mirror life.
Choose Safe Cleaning Solutions
Avoid ammonia, bleach, and acids. Common sprays like Windex strip protective paint and cause permanent edge corrosion. Never use these products on bathroom or vintage mirrors.
Use pH-neutral cleaners instead. Safe options include a 50/50 mix of distilled water and white vinegar, mild dish soap diluted in distilled water, or commercial cleaners labeled ammonia-free. Always spray the cloth, not the mirror directly, to prevent liquid from seeping into edges.
Wipe with microfiber cloth or squeegee for streak-free results. Use lint-free microfiber in circular motions, then straight strokes. For large mirrors, use a soft rubber squeegee starting at the top and pulling down in smooth strokes.
Remove stubborn spots gently without abrasives. For dried toothpaste or hairspray, soften with a warm cloth and dab with rubbing alcohol. For mineral deposits, use a baking soda and water paste, rub gently, and rinse. Never use razor blades or steel wool.
Seal Edges and Inspect Regularly
Small fixes prevent big failures. Regular maintenance catches problems before they become serious.
Annual Maintenance Routine
Reapply edge sealant annually in humid areas. Use polyurethane or neutral-cure silicone to block moisture and cleaning agents from penetrating edges. This simple step can extend mirror life by years.
Inspect mirrors every 3 to 6 months for early signs of damage. Look for edge discoloration (an early moisture sign), loose mounts, flaking paint, or fading reflectivity. In commercial spaces, maintain a maintenance log to track conditions and repairs.
Tailor Protection to Mirror Type
Different mirrors require different protection strategies based on their use and design.
Wall Mirrors
Use Z-clips or safety mastic for secure mounting. Seal edges if the mirror is near a sink or stove. Avoid hanging wall mirrors near doors where bumps are likely.
Full-Length Mirrors
Always move these upright with two people. Pack with rigid supports and corner guards. Anchor tall mirrors to the wall to prevent tipping accidents.
Framed Mirrors
Wrap the frame separately with padding. Use cardboard corner protectors on frame edges. Avoid pressing on the glass during handling.
Antique Mirrors
Never use DIY cleaners or vinegar on these valuable pieces. Store in climate-controlled spaces and hire professionals for moving or restoration.
Bathroom and Vanity Mirrors
Use epoxy-backed, humidity-rated mirrors. Install demister pads to prevent condensation. Seal edges and clean with ammonia-free products only.
Comply with Safety Regulations in Public Spaces
In public spaces, mirror safety is often the law. Following regulations protects people and prevents liability.
Required Safety Measures
Use safety film or tempered glass in gyms, dance studios, pools, medical clinics, elevators, and nightclubs. These installations must meet impact-resistance standards. Failure to comply creates liability if injury occurs.
Choose fire-rated safety films for commercial buildings. High-quality films resist flames and prevent glass fallout during fires. They won’t ignite or spread fire and keep mirrors intact during thermal stress.
Debunk Common Mirror Protection Myths
Avoid outdated or dangerous practices that waste time and money.
Skip the X Tape Trick
Taping an X on a mirror does not prevent breakage. It only holds shards together after breaking and makes cleanup harder. Use proper safety film instead for real protection.
Don’t Rely on Moving Blankets Alone
A moving blanket compresses and allows movement, providing minimal protection. Use blankets only as an outer layer over bubble wrap and cardboard. Never substitute a blanket for proper packing materials.
Frequently Asked Questions About Protecting Mirrors
Does putting tape on a mirror prevent it from breaking?
No. Tape does not strengthen glass or prevent breakage. Its only purpose is to hold shards together after a mirror already shattered, which makes cleanup slightly safer but offers no real protection.
What is the best way to transport a mirror during a move?
Always transport mirrors upright (on edge), never flat. Lay flat positioning allows flexing with vehicle motion and is the number one cause of transport-related breakage. Secure with moving straps and wedge between soft items.
How often should I reseal mirror edges in a bathroom?
Reseal bathroom mirror edges every 1 to 2 years. Moisture constantly attacks edges, and sealant breaks down over time. Annual reapplication prevents desilvering and extends mirror life significantly.
Can I use regular glass cleaner on my mirror?
Avoid ammonia-based cleaners like Windex. These strip protective paint and accelerate desilvering. Use pH-neutral solutions like distilled water mixed with white vinegar or ammonia-free commercial cleaners.
What humidity level is safe for mirrors?
Keep relative humidity below 60% to prevent moisture damage. Use exhaust fans in bathrooms and dehumidifiers in basements. High humidity causes desilvering, flaking, and loss of reflectivity.
Is safety film necessary for home mirrors?
Safety film is highly recommended, especially in homes with children or pets. It prevents shards from flying if the mirror breaks, significantly reducing injury risk. It’s an affordable safety upgrade for any mirror.
Key Takeaways for Protecting Your Mirror from Breaking
Protecting a mirror from breaking requires a layered approach that addresses every stage of its lifecycle. Apply safety film to reinforce glass and contain shards if damage occurs. Mount mirrors correctly using proper hardware like Z-clips and neutral-cure silicone to prevent stress cracks. Control the environment by keeping humidity below 60% and blocking UV exposure from direct sunlight.
Handle mirrors vertically during transport and pack them with corner guards, bubble wrap, and rigid supports. Never lay them flat during moving or storage. Clean mirrors with pH-neutral solutions and avoid ammonia-based products that degrade coatings. Inspect and reseal edges annually to block moisture intrusion.
Whether protecting a family heirloom or installing mirrors in a commercial gym, these proven methods ensure durability and safety. Take time to assess your mirrors, implement these strategies, and enjoy peace of mind knowing your mirrors are protected against the most common causes of breakage.


