You’re prepping a batch of homemade jam or fermented kombucha, and you need spotless jars. Sterilizing glass jars is a critical step in safe canning, and many home preservers wonder if the oven offers a shortcut. The short answer: oven sterilization is not recommended. Dry heat creates real risks of shattering glass and uneven sterilization. This guide explains why the oven falls short, walks you through safer proven methods, and shares expert tips to keep your preserves safe and shelf-stable.
Why Oven Sterilization Puts Your Jars at Risk
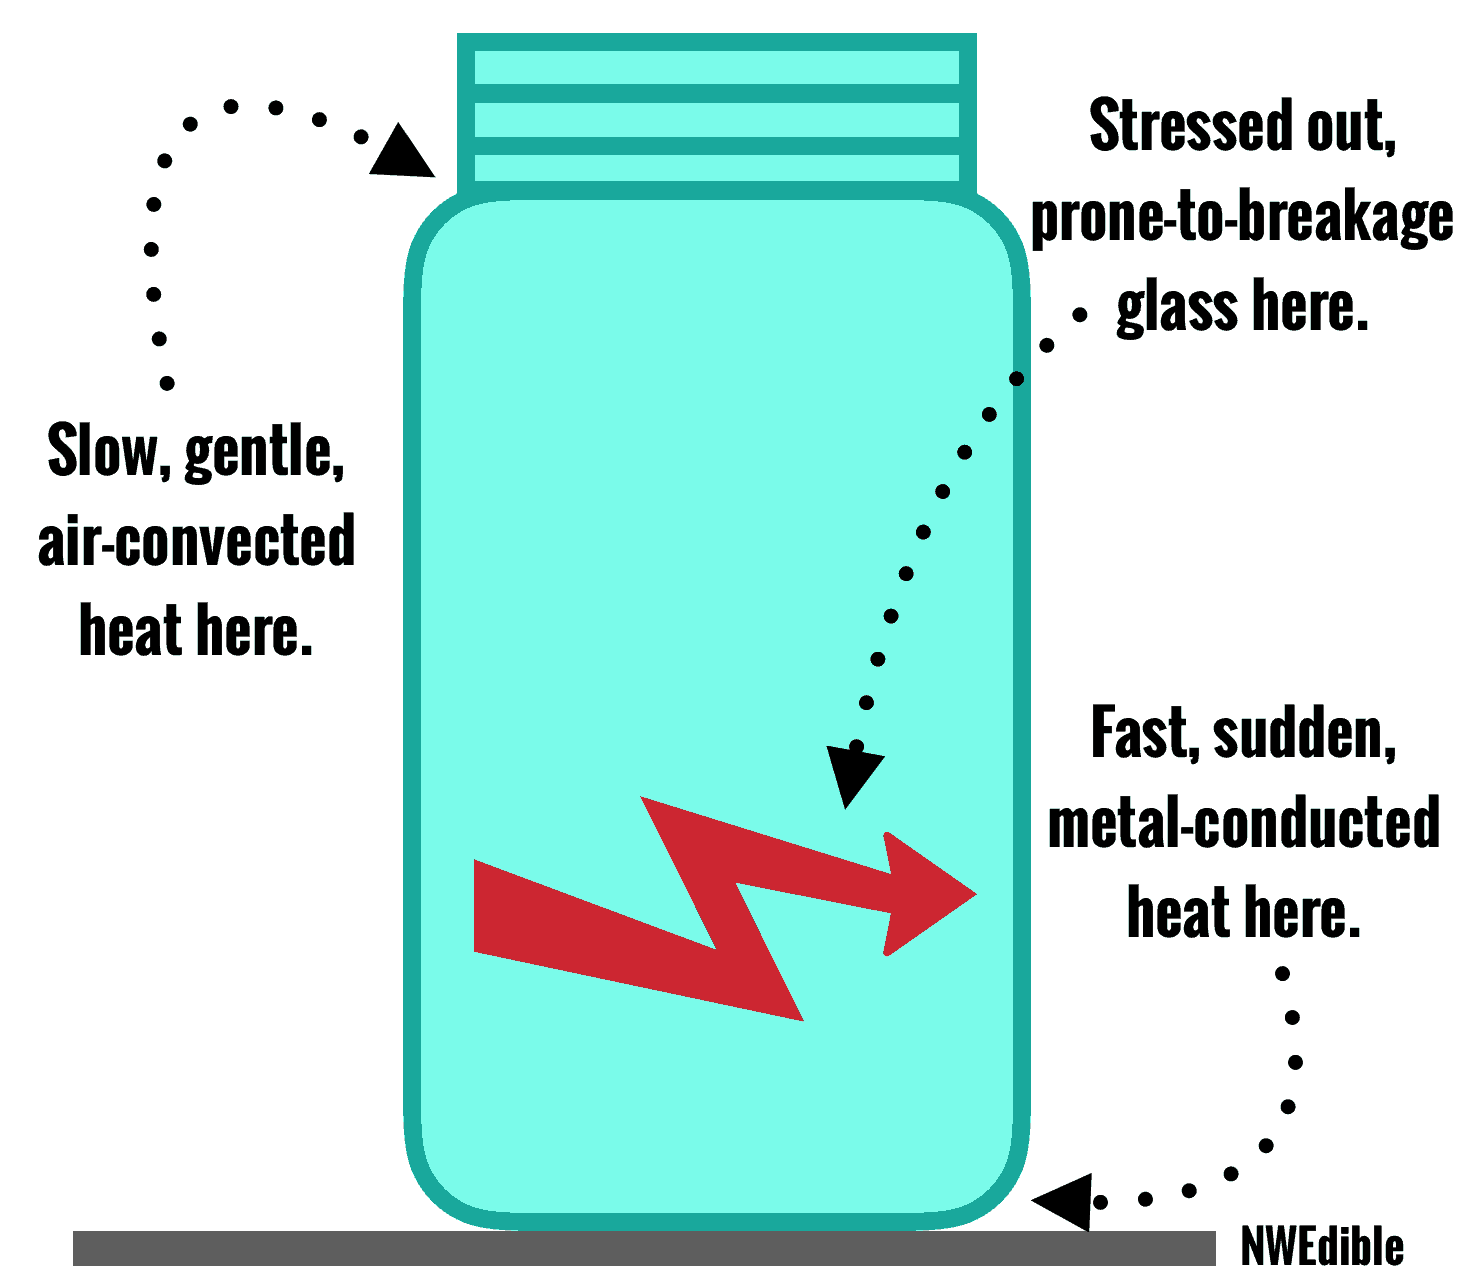
Glass Shatters Easily in Dry Heat
Ovens produce hot spots and rapid temperature swings that glass cannot handle. Even Mason or Ball jars marketed as oven-safe can crack from thermal shock, especially if they start cold, damp, or touch a hot rack directly.
Heat Distribution Stays Uneven
Moist heat from boiling water penetrates evenly and destroys bacteria, yeasts, and molds. Dry oven heat requires higher temperatures and longer exposure to achieve the same effect, pushing beyond what most home ovens and jars can safely handle.
No Food Safety Authority Endorses It
The National Center for Home Food Preservation and the USDA do not recommend oven sterilization. The risk of jar failure and incomplete sterilization far outweighs the convenience.
Safer Methods That Actually Work
Boil Jars for Reliable Sterilization
Boiling water remains the gold standard for sterilizing glass jars before canning.
What You’ll Need:
- Large stockpot or water bath canner
- Canning rack
- Jar lifter or tongs
- Clean kitchen towels
- Timer
Step-by-Step Boiling Method
- Wash jars in hot, soapy water and rinse thoroughly.
- Place jars upright on the rack inside the pot. Cover with cold water until jars sit submerged by at least one inch.
- Bring water to a rolling boil. Never drop cold jars into already boiling water.
- Boil for 10 minutes at sea level. Add one extra minute for every 1,000 feet of elevation.
- Lift jars out one at a time with a jar lifter. Drain upside down on a clean towel.
- Fill while still hot to prevent cracking from temperature swings.
✅ Best for: High-acid foods like jams, jellies, pickles, and acidified tomatoes.
⏱️ Total time: Roughly 20 minutes including prep and boiling.
Run Jars Through a Dishwasher Sanitize Cycle

Modern dishwashers with a sanitize setting can sterilize jars effectively.
When This Method Works:
- Your dishwasher has a sanitize cycle that reaches at least 71°C (160°F) for a sustained period.
- Jars are free of cracks or chips.
- You plan to fill the jars immediately after the cycle ends.
How to Do It
- Load jars upside down on both racks.
- Run the sanitize cycle with no detergent if jars are already clean.
- Keep the door closed until you’re ready to fill. Opening early cools the jars fast.
- Remove jars with clean hands or tools and fill directly.
⚠️ Note: Standard wash cycles do not sterilize. Only certified sanitize cycles meet safety standards.
Can You Sterilize Jars in the Microwave?
No, microwaving glass jars is unsafe and ineffective. Microwaves heat unevenly, and any metal lids or bands can spark or ignite. Even if the jar survives, you cannot confirm full sterilization. Skip this method entirely.
Prep Jars the Right Way Before Sterilizing
Wash Every Jar Thoroughly First
Residue shields bacteria from heat. Scrub interiors with hot water, mild detergent, and a bottle brush. Discard any jar with cracks, chips, or worn threads, since damage traps microbes and weakens seals.
Remove Hard Water Film With Vinegar
Vinegar does not sterilize, but it removes mineral buildup that can interfere with sealing.
Vinegar Soak Recipe:
- Mix 1 cup white vinegar per gallon of water
- Soak jars for 1 to 2 hours
- Rinse well before sterilizing
💡 Pro Tip: Cloudy hard water film is cosmetic, not dangerous, but clearing it helps lids seal properly.
When Sterilization Is Optional
Skip Pre-Sterilization for Long Processing Times
If your recipe calls for processing filled jars in boiling water for 10 minutes or more, pre-sterilization becomes optional. The processing step itself kills microbes.
✅ Examples:
- Dill pickles (15 minutes)
- Tomato sauce (40 minutes)
- Green beans (25 minutes)
Just make sure jars are clean and warm before filling to avoid breakage.
Handle Sterilized Jars the Right Way

Avoid Touching Inside Surfaces
Even freshly washed hands carry bacteria. Never touch the rim, interior walls, or lid sealing surface. Use jar lifters, funnels, and clean utensils only.
Work Within 15 to 20 Minutes
Sterilized jars lose their sterile state quickly. Fill them within 15 to 20 minutes of removal. Letting them cool too long invites contamination and increases the risk of thermal shock when hot food is added.
Simmer Lids, Don’t Boil
Metal lids with sealing compound should be simmered at 70–80°C (160–180°F) for 10 minutes. Boiling can damage the sealant and cause seal failures.
Common Sterilization Mistakes to Avoid
❌ Starting With Hot Water or a Hot Oven
Dropping cold jars into boiling water or a preheated oven causes thermal stress. Always begin with cold water and cold jars.
❌ Reusing Cracked or Chipped Jars
Hairline cracks harbor bacteria and shatter under heat. Discard any damaged jar, even if the flaw looks minor.
❌ Ignoring Altitude Adjustments
Water boils at lower temperatures at elevation. Add one minute of sterilization or processing time for every 1,000 feet above sea level.
❌ Air Drying Jars After Washing
Air drying exposes jars to dust and airborne microbes. Sterilize immediately after washing or towel dry with a lint-free cloth.
Best Practices for Canning Success

Match Your Method to the Recipe
| Canning Type | Sterilize Jars? | Processing Time |
|---|---|---|
| Jams and jellies | Yes | Under 10 minutes |
| Pickles | Optional | 10 to 15 minutes |
| Tomatoes | No (if processed 10+ min) | 35 to 40 minutes |
| Vegetables | No | 20 to 55 minutes |
Invest in Quality Canning Tools
- A canning rack keeps jars off the pot bottom.
- A jar lifter grips safely without slipping.
- New lids each season ensure reliable seals.
Label and Store Properly
After processing, wipe rims clean, label with contents and date, and store in a cool, dark, dry place. For best quality, use within one year.
Frequently Asked Questions About Sterilizing Glass Jars
Can you sterilize glass jars in the oven?
No. Oven sterilization is not recommended because dry heat causes uneven heating and increases the risk of glass shattering. Food safety authorities like the USDA advise using boiling water or a dishwasher sanitize cycle instead.
How long do you boil glass jars to sterilize them?
Boil jars in a covered pot for 10 minutes at sea level. Add one extra minute for every 1,000 feet of elevation above sea level.
Does a dishwasher sanitize cycle actually sterilize jars?
Yes, but only if your dishwasher has a certified sanitize setting that reaches at least 71°C (160°F) for a sustained period. Standard wash cycles do not achieve sterilization.
Do I need to sterilize jars if I’m processing them for more than 10 minutes?
No. When filled jars are processed in boiling water for 10 minutes or longer, pre-sterilization is optional. Just make sure jars are clean and warm before filling.
Can I sterilize glass jars in the microwave?
No. Microwaving glass jars is unsafe and ineffective. Heat distributes unevenly, and metal lids or bands can spark or catch fire.
What happens if I skip sterilizing jars?
Unsterilized jars can harbor bacteria, yeasts, and molds that cause spoilage or serious illness, including botulism. Always sterilize jars for short-process recipes and keep all jars clean for longer processes.
Key Takeaways for Sterilizing Glass Jars Safely
While the oven might seem like a convenient shortcut, dry heat puts your jars and your food at risk. Boiling water and dishwasher sanitize cycles remain the only methods endorsed by food safety experts. Prep jars carefully, adjust for altitude, handle sterilized jars with clean tools, and fill them quickly to lock in safety and flavor.
Bottom Line:
- ❌ Skip the oven and microwave entirely
- ✅ Use boiling water or a sanitize-cycle dishwasher
- ✅ Inspect, clean, and handle jars properly
- ✅ Adjust timing for altitude and recipe requirements
Your jars, your preserves, and your pantry will stay safe, sealed, and delicious all year long.