
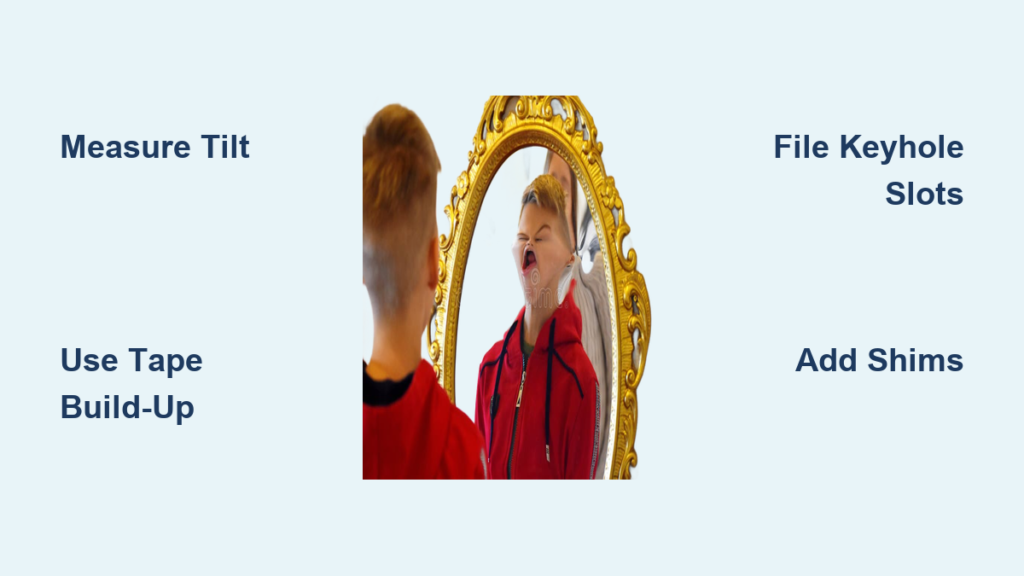
A crooked mirror can ruin the look of any room. Even a slight tilt is instantly noticeable, especially on large wall mirrors in bathrooms or hallways. If your mirror leans to one side, you are not alone. Misalignment often happens during installation when people use sinks, baseboards, or light fixtures as level references, only to realize later that those features are not perfectly straight. The good news is you do not need to take it all down and start over. With the right technique, you can fix a crooked mirror without damaging your walls or buying new hardware. This guide covers proven, step-by-step fixes from quick tape tricks to precise bracket adjustments so you can correct the tilt safely and permanently.
Diagnose the Tilt First
Before grabbing tools, assess how crooked your mirror really is. A small tilt might just need a tweak, while a major lean could require repositioning. Understanding the extent of the problem helps you choose the right solution.
Measure the Misalignment
Use a tape measure to check the vertical gap between the top corners of the mirror. If one side is more than five millimeters higher, the tilt will be visible, especially on mirrors over one meter long. Note the direction: is it leaning left, right, forward, or backward? This measurement guides your fix method.
Check the Wall and Mount Type
Different walls respond differently to fixes. Identify your wall material first: drywall, concrete, plaster, or tile. Then identify how your mirror is mounted. Common mounting types include keyhole hangers that hook over screws, Z-brackets or cleats holding the mirror from below, wire hangers that allow some swing, and adhesive pads used for lightweight mirrors. More mounting points mean less room for error but better stability.
Verify Your Level Tool
A faulty spirit level is a common cause of crooked installations. Test yours by placing it on a surface, noting the bubble position, then flipping it 180 degrees. If the bubble shifts, your level is inaccurate. Replace it before proceeding.
Tape Build-Up for Small Adjustments
If your mirror is only slightly off, you can raise one side using tape around the screw. This non-destructive method works fast and costs nothing.
Apply Tape to the Screw Shaft
Remove the mirror carefully. On the side that is too low, wrap duct tape or electrical tape around the screw shaft in thin layers. Each layer adds about 0.5 to one millimeter of height. Rehang the mirror and check alignment. Add more tape if needed.
Pro Tip: Do not cover the screw head. Leave it exposed for tightening. The tape fills the gap between the screw and the keyhole, lifting that side of the mirror.
Best for Minor Gaps
This method works best for one to three millimeter corrections and lighter mirrors. It is non-destructive, reversible, and requires no new tools. Users report success with bathroom mirrors up to eight kilograms. Watch out: tape can compress over time, especially under heavy loads. This method is not ideal for large or thick glass mirrors.
File Holes Into Vertical Slots

If the mirror has a solid frame, you can modify the hanging hardware for more flexibility. This gives you fine control without new wall damage.
Convert Keyholes to Slides
Take the mirror down and inspect the back. If the keyhole slots are horizontal, use a flat file or Dremel tool to extend them vertically. This turns them into slides, letting the mirror move up or down on one side when rehung. Work slowly. File two to three millimeters at a time. Avoid over-filing, which can weaken wooden or metal frames.
Rehang and Level
Once slotted, remount the mirror. Now you can nudge one side higher or lower until it is level. Use a spirit level across the top edge to confirm. This fix preserves original wall holes and gives you precise adjustment control. It is ideal for mirrors with metal or hardwood backing where the hardware can be modified.
Caution: Do not use this method on plastic or brittle frames. They can crack under filing pressure.
Use Shims Behind the Frame
Sometimes the wall itself is not flat. Shims can tilt the mirror back into alignment without anyone noticing.
Insert Thin Rigid Shims
Place a plastic, wooden, or metal shim between the wall and the back of the mirror frame on the side that is too high. This pushes that edge forward, tilting the mirror down on that side and leveling the top. For example, if the left top corner is high, place a shim at the top-left rear of the frame.
Secure to Prevent Shifting
Use a dab of construction adhesive or double-sided tape to hold the shim in place. Stack thin shims for precise adjustment. Shims are invisible once the mirror is back up. This method works great for flush-mounted mirrors with brackets. Limitation: only corrects small tilts. Too thick a shim may cause the mirror to wobble or look detached from the wall.
Install an Offset Mounting Strip
For larger corrections of five to ten millimeters, a mounting strip can shift the entire mirror position. This method handles heavy mirrors better than tape or shims.
Attach a Rigid Strip to the Wall
Cut a narrow strip of aluminum, hard plastic, or thin plywood. Pre-drill holes that align with your existing wall screws. Screw the strip to the wall so it is level. This becomes your new mounting platform. Then reattach the mirror to the strip. Because the strip is level, the mirror will be too, even if the original holes were misaligned.
Distribute the Weight
Use two screws and consider adding construction adhesive behind the strip for extra support, especially with heavy mirrors. Paint the strip to match the wall if it will be visible. Most people will not notice a five millimeter protrusion unless viewing from a sharp angle.
Best For: Heavy mirrors or situations where tape and shims are not enough. This method keeps original wall holes and adds strength.
Fill and Relocate Wall Holes

When the mirror is way off, sometimes you need to move the fixings. This method involves some wall repair but gives you precise control.
Patch Old Anchor Holes
Remove the mirror and screws. For concrete or plaster walls, insert the anchor partially into the hole and fill it with epoxy putty or polyfilla. Leave the screw slightly in to help guide the filler and maintain hole shape. Let it cure completely, usually 24 hours.
Drill New Holes Nearby
Use a thinner masonry bit to drill a new hole one to two inches away. This gives you room to correct the alignment while avoiding weak, filled areas. Anchor with a new wall plug and screw. Repeat for the second fixing point, ensuring both are level.
User Insight: Most agree that filled holes are strong enough if only one of multiple anchors is repaired. Never rely on filler alone. Always use a mechanical fastener. Avoid clustering new holes. Keep them at least one inch from filled ones to prevent cracking.
Reposition to Match Fixtures, Not Level
Sometimes geometric level is not what looks right. In bathrooms, people often prefer the mirror to line up with the sink, even if the sink is not level.
Align With Sink or Countertop
If your spouse says it looks crooked with the light, they might mean it clashes visually, not geometrically. Use a level to mark a new position that aligns the mirror’s base with the sink edge. It may not be perfectly horizontal, but it will look balanced in the space.
Mark Both Points at Once
After deciding the new position, use the level to mark both mounting points simultaneously. Fix the top bracket first, then align the bottom to match. This prevents twisting and ensures consistent alignment.
Tools You Will Actually Need
You do not need a full toolbox. Just a few key items handle most crooked mirror jobs.
Essential Repair Kit
A spirit level is critical, but test it first. You also need a measuring tape, a flat file or Dremel for slot modification, duct or electrical tape for quick fixes, wall filler like epoxy or polyfilla for hole repair, wall plugs and screws for new fixings, a thin metal or wood strip for offset mounting, shims in plastic, wood, or metal for fine adjustments, and a masonry drill bit if redrilling into concrete. Keep this kit handy for future fixes. Most items cost under $20 and last for years.
Safety and Stability Checks
Never skip the final test. Your mirror could fall if the fix is not secure.
Confirm Weight Support
A ten kilogram mirror needs strong anchors. If using filler, ensure screws still bite into solid wall material. Use nylon or metal wall plugs rated for the mirror’s weight. Never rely on adhesive alone for heavy mirrors. Mechanical fasteners are mandatory.
Test for Wobble
Once mounted, gently push the top and sides of the mirror. If it moves, check that screws are tight, anchors are secure, and shims or strips are not compressing. Address any movement immediately.
Choose the Right Fix for Your Case
Not every solution works for every mirror. Match the method to your situation for the best results.
Light Mirror, Tiny Gap? Use Tape
For misalignments under three millimeters and mirrors under five kilograms, tape build-up is fast, free, and effective.
Sturdy Frame, Need More Play? File the Holes
If the back allows access, filing keyholes into slots gives you control without new wall damage.
Heavy Mirror, Big Tilt? Add a Mounting Strip
A rigid offset strip corrects up to ten millimeters of tilt and supports weight better than tape or shims.
Concrete Wall, Wrong Holes? Fill and Redrill
Use epoxy filler and a thinner drill bit to relocate holes by one to two inches. This method is strong and precise.
Must Match Sink? Reposition Mounting Points
Forget perfect level. Align with fixtures for better visual harmony. Use a level to mark new holes correctly.
Final Tips for a Perfect Finish
Get it right the first time with these expert habits.
Double-Check Before Final Mounting
Hang the mirror temporarily and step back. View it from across the room. Small tilts are harder to spot up close.
Communicate With Household Members
Ask: should it be level or match the sink? Avoid redoing work because of mismatched expectations.
Prevent Future Issues
When installing a new mirror, use a laser level for accuracy. Avoid referencing sinks, lights, or baseboards. Drill pilot holes slowly to prevent drift. Even pros make small errors. What matters is knowing how to fix them.
Frequently Asked Questions About Fixing a Crooked Mirror
How do I know if my mirror is crooked or if it is just the wall?
Stand back and use your phone camera to take a straight-on photo. Compare the mirror edges to a true vertical line on the screen. You can also place a spirit level directly against the mirror surface to check.
Can I fix a crooked mirror without taking it down?
Yes. For small adjustments under three millimeters, you can add tape around the screw shaft without removing the mirror. For larger fixes, you may need to unhook it temporarily, but you often reuse the same holes.
What is the easiest DIY method for a slightly crooked bathroom mirror?
Tape build-up on the screw is the easiest. Wrap electrical tape around the screw on the low side in thin layers. Rehang and check. Add more layers until level.
How much weight can tape hold for supporting a mirror?
Tape works well for mirrors up to eight kilograms. For heavier mirrors, use a mounting strip or bracket system instead. Tape can compress over time under heavy loads.
Should I use a laser level or a spirit level to check mirror alignment?
A laser level is more accurate for long distances and hands-free checking. However, a spirit level works fine for standard bathroom mirrors. Always test your level first by flipping it 180 degrees.
Is it better to align my mirror with the sink or make it perfectly level?
In bathrooms, many people prefer visual alignment with the sink over geometric level. If the sink is not level, the mirror matching it often looks better than a mathematically straight mirror that conflicts with the fixture.
Key Takeaways for Fixing Your Crooked Mirror
Fixing a crooked mirror does not require a renovation. With simple tools and smart techniques, you can correct the tilt in under an hour without new holes or replacement parts. Start by measuring the misalignment and checking your mount type. For small gaps under three millimeters, tape build-up works fast. For moderate corrections, file keyholes into vertical slots or add shims behind the frame. Heavy mirrors with large tilts need an offset mounting strip for permanent support. Always verify your level tool is accurate before proceeding, and test the mirror for wobble after any fix. Now that you know the most effective methods from DIY tricks to structural fixes, you can restore balance to your space confidently. The next time a mirror looks off, do not ignore it. Fix it fast, fix it right.


