
A foggy car mirror isn’t just annoying, it’s a safety hazard. Whether you’re dealing with a hazy side mirror that won’t wipe clean or an interior rear-view clouded by condensation, the root cause determines the right fix. The good news? Most issues can be resolved quickly and affordably with the right approach. From simple DIY cleaning hacks to advanced repairs for internal damage, this guide walks you through every scenario.
You’ll learn how to diagnose the problem, apply proven fixes, and prevent future fogging so you can see clearly and drive safely in all weather conditions.
Diagnose the Cause First
Before grabbing a cloth or cleaner, identify what’s really causing the fog. Treating surface grime like internal delamination will waste time and effort. The four main causes are surface contamination, internal delamination, external condensation, and physical damage. Each requires a different strategy.
Surface Haze vs. Internal Cloudiness
Run this quick test. Wipe the mirror with a dry microfiber cloth. If the haze remains, it’s likely not dirt. Now spray with glass cleaner and wipe again. If it clears, the issue is surface level, probably oils, wax overspray, or mineral deposits. If the cloudiness persists beneath the surface, especially with visible bubbles or peeling edges, you’re dealing with internal delamination. This means moisture has seeped between bonded glass layers, common in heated side mirrors.
Check for Condensation Patterns
Fog that appears only in cold or rainy weather is usually external condensation. It forms when warm, humid air hits a cooler mirror surface. This type clears temporarily with airflow or defogger use but returns in wet conditions. If you see water droplets inside the mirror housing, the seal is broken. Moisture is trapped and won’t evaporate on its own.
Inspect for Scratches and Etching
Run a fingernail lightly across the hazy area. If it feels rough or catches, micro-scratches or chemical etching may be the culprit. Acidic rain, bird droppings, or harsh cleaners can etch glass over time, creating a permanently dull appearance. These won’t wipe away and require polishing or coating to correct.
Clean Surface Contamination Effectively
Most foggy mirrors are simply dirty. Environmental grime, car wash chemicals, or household cleaners leave behind invisible films that scatter light and create haze. The right cleaning method breaks down these residues without damaging the glass.
Use White Vinegar and Newspaper
Spray undiluted white vinegar directly onto the mirror. Let it sit for 30 seconds to dissolve mineral deposits and oily films. Wipe with crumpled newspaper in a circular motion. Its low lint texture prevents streaks. Work in the shade to avoid premature drying. This method is especially effective on hard water spots and wax overspray, common after automatic car washes.
Apply Bar Keepers Friend Safely
For stubborn haze, mix Bar Keepers Friend powder with water into a paste. Using a soft cloth, gently rub it onto the glass in small circles. Let it dwell for 60 seconds. Oxalic acid lifts oxidation and mineral buildup. Rinse thoroughly with water and dry with a clean microfiber towel. Users report near total clarity restoration, even on neglected mirrors. Safe for glass when used as directed. Avoid gel versions which may contain abrasives.
Try Toothpaste for Light Scratches
Use non gel, whitening toothpaste containing silica. Apply a small amount to the mirror and rub gently with a soft cloth. Rinse completely. Residue attracts dust and worsens fogging. This works best on light surface scratches and minor etching. Reapply every one to two weeks in harsh conditions. Avoid gel or colored toothpastes. They streak and degrade mirror coatings.
Repair Internal Delamination
If the cloudiness is under the surface, you’re facing delamination. This is a failure of the adhesive bond in heated mirrors. The top glass layer separates, trapping moisture or gel. Cleaning won’t help, but a DIY repair can restore clarity. Warning. This disables the defroster function but saves $35 to $70 compared to replacement.
Disassemble the Mirror Housing
Pull the mirror glass to one corner to expose the edge. Insert a flat head screwdriver or steak knife and gently pry out the snap in clips around the perimeter. Work slowly. Force can crack the glass. Once loose, disconnect the electrical harness for the motor and defroster. Set aside safely.
Separate the Laminated Glass Layers
Locate the seam between the front plastic film and housing. Slide a knife in and release retaining tabs. Carefully separate the two glass layers. The top layer contains the heating circuit. This will be destroyed during removal. Use a razor blade at a shallow angle to scrape off dried gel or glitter like residue from both surfaces. Wipe clean with Windex and dry completely.
Reassemble Without Defroster
Reattach the plastic housing, aligning slots with rear tabs. Press firmly around the edges until all clips engage. Snap the unit back into the door panel. Do not reconnect the electrical plug. The heating element is gone. The mirror will function visually but no longer defog. Repair time is 15 to 20 minutes. Success rate is 85%, with a 15% risk of breakage.
Prevent External Fogging in Rain
Even clean mirrors fog during rain due to temperature differences and water splash. The goal here isn’t cleaning. It’s repelling water and reducing surface tension so droplets sheet off instead of clinging.
Apply Ceramic Hydrophobic Coating
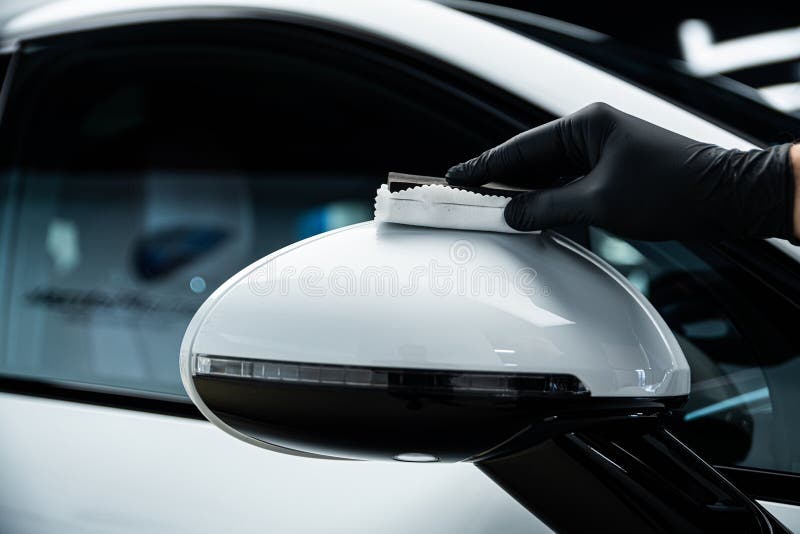
After cleaning, spray a nano ceramic coating evenly on the mirror. Spread with a microfiber cloth and let cure for 10 to 15 minutes. This creates a slick surface that causes water to bead and roll off instantly. Lasts three to six months. Reapply every 90 days for best results. Users in tropical climates report crystal clear visibility during monsoon rains.
Use Rain-X for Quick Water Beading
Clean the mirror thoroughly, then apply Rain-X Original Treatment with the included cloth. Let it haze, then buff off. The formula forms a hydrophobic barrier that reduces fogging by up to 70% in real world tests. Works on both side and rear view mirrors. Avoid applying in direct sunlight. Reapply after every three to four car washes.
Replace Worn Wiper Blades
Old or damaged wipers don’t just streak. They spray water sideways onto mirrors. Replace blades every 12 to 24 months. Opt for beam blade or silicone wipers. They seal better and reduce splash drift. Drivers in Southeast Asia report significantly less mirror fogging after upgrading wipers.
Try Natural Anti-Fog Home Remedies
When commercial products aren’t available, household items can provide temporary relief. These aren’t permanent fixes but work well for short term clarity.
Rub With Raw Potato
Cut a potato in half and rub the cut side firmly over the mirror. Let the starchy residue dry for 5 to 10 minutes, then wipe off with a dry cloth. The natural starch reduces surface tension, preventing fog droplets from forming. Effective for two to three days. Best for interior mirrors or short commutes. Avoid on exterior mirrors in dusty areas. Starch can attract dirt.
Apply Hair Shampoo
Use a drop of clear, dye free shampoo. Baby shampoo works well. Rub it across the mirror with your fingers. No water needed. Wipe off completely with a microfiber cloth or newspaper. Surfactants in shampoo act like anti fog agents, spreading moisture into a thin, transparent film. Lasts three to seven days. Comparable to store bought sprays at a fraction of the cost.
Use Commercial Anti-Fog Products
For reliable, long lasting results, invest in proven anti-fog solutions designed for automotive use.
Spray With Rain-X Anti-Fog
Apply Rain-X Anti-Fog Spray directly to the mirror. Spread evenly with a microfiber cloth and buff to clarity. One application lasts over a month, even in constant rain. Rated 4.5 out of 5 on Amazon for durability and effectiveness. Works by creating a hydrophilic layer that prevents droplet formation.
Wipe With Anti-Fog Towelettes
Use pre-treated wipes like ZEISS Lens Wipes or Optix 55 for quick touch-ups. Ideal for interior mirrors during road trips. Single-use format makes them less economical for daily use but perfect for emergencies. Keep a pack in the glove box.
Fix Moisture Inside the Mirror Housing
If water droplets form inside the sealed mirror unit, the rubber gasket is compromised. This isn’t surface fog. It’s trapped moisture that won’t go away without intervention.
Dry Out With Silica Gel
Remove the mirror assembly if accessible. Place it under sunlight or use a hairdryer on low heat to evaporate moisture. Insert two to three silica gel packets inside the housing before reassembly. These absorb residual humidity and prevent re-fogging. Seal edges with automotive silicone if the gasket is cracked.
Replace Damaged Seals
Inspect the rubber gasket for cracks or brittleness. Replace it with an OEM or aftermarket seal. Apply a thin bead of silicone around the edge to ensure a watertight fit. If the housing is cracked, replace the entire unit. Aftermarket mirrors cost $50 to $150.
Install Heated Mirrors for All-Weather Clarity
For drivers in cold, rainy, or humid climates, heated mirrors are the ultimate solution. They prevent fog and ice by warming the surface just enough to stop condensation.
Retrofit a Heated Mirror Kit
If your car lacks factory heated mirrors, install a retrofit kit. These cost $100 to $300 and include heating pads, wiring, and a dashboard switch. Installation requires basic electrical skills. Connect to the 12V system and route wires through the door. Activation clears fog in two to five minutes. Rated 4.1 out of 5 on Amazon for snow and rain performance.
Use Built-In Defogger Correctly
If your car has heated mirrors, activate them via the climate control or mirror button. The symbol is a rectangle with wavy lines. Turn on the A/C to reduce cabin humidity. This enhances defogger effectiveness. Combine with rear defroster for maximum visibility. Note. Some users report ineffectiveness in heavy rain. Supplement with hydrophobic coating.
Maintain Mirrors Long-Term
Prevention beats repair. A few simple habits keep mirrors clear and extend the life of treatments.
Clean Weekly in Wet Seasons
Wash mirrors with pH-neutral glass cleaner and a microfiber cloth. Avoid ammonia-based products. They degrade anti-fog and hydrophobic coatings. Clean weekly during monsoon or winter months.
Reapply Protective Coatings Quarterly
Ceramic sprays and Rain-X lose effectiveness after repeated washing. Reapply every 90 days. Do a quick water test. If droplets no longer bead, it’s time to re-treat.
Inspect Seals and Housing
Check mirror gaskets every three months, especially before rainy or winter seasons. Look for cracks, gaps, or loose fittings. Early detection prevents moisture ingress and costly repairs.
Frequently Asked Questions About Fixing a Foggy Car Mirror
Why does my car mirror get foggy even when it’s clean?
Fog that appears on a clean mirror is usually external condensation, not surface contamination. It happens when warm, humid air contacts a cooler mirror surface. This is common during rain, cold mornings, or high humidity. The solution is to use hydrophobic coatings like Rain-X or activate heated mirrors if equipped.
Can I fix a foggy mirror without replacing it?
Yes, most foggy mirrors can be fixed without replacement. Surface contamination responds to cleaning with vinegar, Bar Keepers Friend, or glass polish. Internal delamination can be repaired with a DIY layer separation technique. Only cracked housings or severely damaged mirrors require replacement.
How do I know if my mirror has internal delamination?
Run this test. Wipe the mirror with a dry microfiber cloth, then spray with glass cleaner and wipe again. If cloudiness remains beneath the surface, it’s delamination. You may also see bubbles, peeling edges, or visible separation between glass layers. This is common in heated side mirrors where moisture has seeped between bonded layers.
What is the cheapest way to fix a foggy mirror?
The cheapest solutions are household items. White vinegar and newspaper cost less than $2 and work on surface films. Bar Keepers Friend costs $5 to $10 and removes stubborn haze. For rain fogging, a cheap shampoo treatment lasts three to seven days. The most expensive option is replacing the mirror, which costs $50 to $150 for aftermarket parts.
How long do anti-fog treatments last?
It depends on the product. Rain-X Original Treatment lasts three to four car washes. Ceramic hydrophobic coatings last three to six months with quarterly reapplication. Commercial anti-fog sprays like Rain-X Anti-Fog last over a month. Natural remedies like potato or shampoo last two to seven days.
Does toothpaste really fix foggy mirrors?
Toothpaste can help with light surface haze and minor scratches. Use non-gel, whitening toothpaste containing silica. Apply a small amount, rub gently, rinse thoroughly, and dry. It works best on light etching and surface contamination. It won’t fix internal delamination or deep scratches. Reapply every one to two weeks in harsh conditions.
Key Takeaways for Fixing Your Foggy Car Mirror
A foggy car mirror is fixable in nearly every case. The key is diagnosing the cause first. Surface haze? Clean it with vinegar, Bar Keepers Friend, or glass polish. Internal cloudiness? Repair the delamination or replace the mirror. Rain fogging? Apply hydrophobic coating and replace worn wiper blades.
Combine regular maintenance with smart upgrades and you’ll never struggle with poor mirror visibility again. Clean mirrors weekly in wet seasons, reapply protective coatings quarterly, and inspect seals before rainy weather. For permanent solutions in harsh climates, consider retrofitting heated mirrors or investing in quality hydrophobic treatments.
Your safety depends on clear visibility. Take five minutes to diagnose the issue, apply the appropriate fix, and enjoy crystal clear mirrors in any weather.


