
A loose rear view mirror isn’t just annoying, it’s a safety hazard. Every bump on the road can shift your view, forcing constant readjustment and distracting you from driving. Whether it sags downward, wobbles at the base, or clicks when you turn, the root cause is likely mechanical wear, adhesive failure, or a design flaw. The good news? Most issues can be fixed in under an hour with basic tools and the right technique. This guide covers proven fixes from quick tightening tricks to permanent engineering upgrades so you can restore stability and drive with confidence.
We’ll walk through model-specific solutions, compare long-term durability, and help you choose the best fix based on your vehicle, climate, and skill level. Whether you’re a weekend DIYer or just need a fast fix before your commute, you’ll find a reliable method here.
Diagnose the Problem First
Before grabbing tools, identify where the looseness occurs. Misdiagnosis leads to wasted effort and temporary results.
Check the Mirror Base
Push the mirror gently from side to side and top to bottom.
• If the entire assembly wobbles on the windshield: The mounting base has lost adhesion or screws are loose.
• If only the mirror head moves but the base is stable: The internal ball joint or pivot mechanism is worn.
Look for gaps between the mounting plate and glass. A visible gap often means the adhesive failed or the bracket is not seated properly.
Test the Adjustment Resistance
Try rotating the mirror.
• Mirror spins freely and will not stay put: Internal tension ring or plastic detents are worn.
• Mirror holds briefly but drifts down: Ball joint has lost friction, common in older vehicles.
• Clicking or creaking noise: Loose pivot pin or broken plastic gear inside.
Use a flashlight to inspect hidden screws or clips. Some models hide fasteners under rubber caps or behind trim.
Tighten the Mounting Screw

For many vehicles, a loose central screw is the culprit, especially in Subarus and Toyotas.
Access the Mirror Housing
Insert a small flathead screwdriver into the seam between the two housing halves. Gently twist to release clips. Some models slide apart, others require slight twisting. Work slowly to avoid cracking plastic.
Once open, locate the T20 Torx screw at the mirror’s base. This screw holds the mirror to the windshield-mounted bracket.
Secure the Central Screw
Using a T20 Torx driver, tighten the screw until snug. Do not over-tighten the mounting plate is often made of soft aluminum that strips easily.
If the screw spins without tightening, the threads are likely stripped. Skip to a permanent fix like thread-locking or screw replacement.
Reassemble and Test
Press the housing halves back together until all clips click. Ensure the bottom edge is fully seated.
Gently shake the mirror. If no wobble remains, test it on a bumpy road. If it loosens again within days, proceed to a more durable solution.
Time required: 10 minutes. Best for: Minor looseness in Subaru BRZ, FRS, WRX, or Toyota 86.
Replace Screws with Thread Locker

When the OEM screw keeps loosening, upgrade to stronger hardware and lock it in place.
Remove the Mirror Assembly
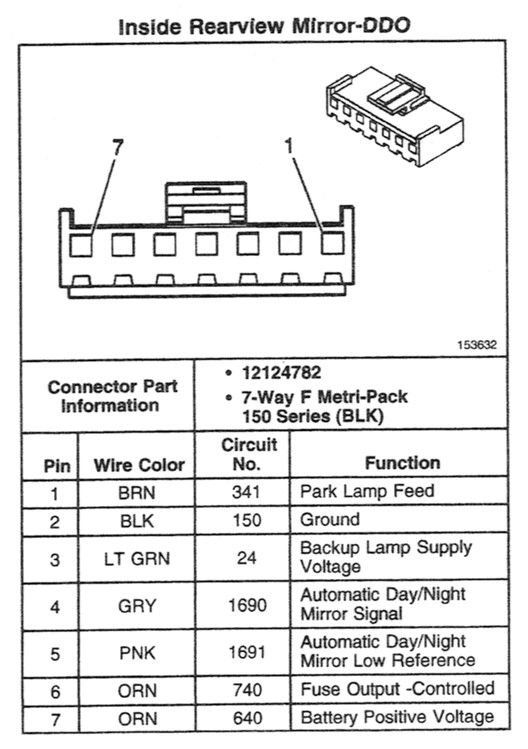
Unscrew the T20 fastener and slide the mirror off the bracket. If your mirror has wiring, disconnect the plug before removing.
Remove the two screws securing the mounting bracket to the windshield retainer. Set aside the bracket and plate.
Upgrade to Stainless Steel Screws
Replace the original tapered screws with 8-32 X 1/2 inch flat-top machine screws or 1 inch stainless steel screws for deeper thread engagement.
Test-fit the screws through the mounting plate. If they protrude too far, trim the ends with a Dremel or wire cutters.
Add a Shimming Spacer
Cut a 1mm aluminum shim to 18mm x 24mm and place it between the windshield and mounting plate. This eliminates play and ensures even pressure.
Factory plates often do not sit flush, creating stress points. The shim distributes load and prevents wobble.
Apply Red Loctite and Reinstall
Apply one drop of Loctite 271 red to each screw tip, not the plate. This allows alignment during installation while locking threads permanently.
Hand-thread the screws, then tighten gently. Over-torquing damages soft metal.
Let cure overnight for full strength. Reattach the mirror, reconnect wiring, and test.
Durability: Holds for 1+ year, even in high-vibration conditions. Best for: Subaru BRZ/FRS, Toyota 86, and models with recurring screw loosening.
Fix a Sagging Ball Joint with Super Glue
If the mirror head droops but the base is secure, the internal ball joint has lost friction.
Remove the Mirror from the Ball
Unscrew the T20 fastener and slide the mirror off the ball stud. Inspect the steel ball and plastic socket for worn teeth or missing tension rings.
If parts are broken, this method will not work. Consider replacement instead.
Coat the Ball with Super Glue
Apply cyanoacrylate evenly over the entire ball surface. Insert it into the socket and rotate slightly to spread the glue. Remove and inspect. The socket should have a thin glue coating.
Let dry completely before reassembly.
Cure Overnight for Full Strength
Leave the ball joint suspended upright for 8+ hours. This ensures a hard, durable bond.
Reattach the mirror and test resistance. If still loose, repeat with a second layer.
Glue slightly increases ball diameter, boosting friction. Avoid latex glove tips. They fail under heat and vibration.
Best for: Sagging mirrors in sedans and SUVs with intact mounts.
Upgrade Plastic Pins to Metal Dowels
Common in C6 Corvettes, plastic pins in the ball joint wear out fast.
Open the Mirror Base
Use a T10 or T15 Torx bit to remove screws from the mirror base. Carefully disassemble to access the internal joint.
Locate the three plastic dowel pins connecting the ball halves.
Cut Drill Bits into Metal Pins
Take three 5/64 inch high-speed steel drill bits and cut them to 1 inch using a Dremel or wire cutters.
These hardened steel pieces will replace the plastic pins.
Install and Reassemble
Insert the metal pins into the joint holes. Ensure smooth alignment with no binding.
Reassemble the mirror base and reattach to the windshield.
Result: Rock solid stability with zero play. User feedback: Fixes lasting over a decade reported on Corvette forums.
Best for: C6 Corvettes and similar pin-based mirror systems.
Reattach a Twist-Lock Housing
VW Atlas and some Audi models use a rotating housing system that can unlock over time.
Remove the Retaining Screw
Use a Phillips screwdriver to remove the small screw on the housing’s inner side.
This allows the housing to rotate freely.
Rotate to Reconnect
Press the housing inward to seat it fully against the mount. Rotate clockwise until you hear a distinct click. This confirms the twist-lock is engaged.
Snap Covers Back Into Place
Reinstall the front cover by snapping it upward. Slide side covers into their slots.
Time required: Under 5 minutes. Best for: VW Atlas, Audi Q5, and other twist-lock designs.
Try Shimming Hacks (No Disassembly)
If you are not ready to take the mirror apart, try these quick friction fixes.
Wrap the Ball with a Gum Wrapper
Pop the mirror off the ball joint using firm, even pressure. Wrap the foil side of a gum wrapper around the ball, shiny side out.
Reinsert into the socket. The aluminum foil increases friction and holds the mirror in place.
Durability: May need reapplication over time. Best for: Temporary fix in a pinch.
Insert a Cellophane Shim
Cut a small piece of stiff cellophane from a cigarette pack. Slide it between the ball and socket before reassembly.
This reduces play without permanent modification.
Use Non-Hardening Gasket Sealer
Apply a tacky, non-hardening gasket maker into the knuckle joint. Reassemble and adjust. This resists vibration while allowing repositioning.
Avoid super glue or Gorilla Glue here. They can lock the mirror permanently.
Install a Suction-Cup Replacement Mirror
When the adhesive base fails repeatedly, switch to a reliable backup.
Choose the Right Model
Pick a suction-cup mirror with anti-glare coating, wide-angle view, and rubberized grip to resist slipping.
Top-rated models stay secure from -20°F to +120°F.
Install Properly
Clean the windshield with isopropyl alcohol. Press the suction cup firmly for 30 seconds. Pull the lever to lock the vacuum seal.
Adjust the mirror angle for optimal rear visibility.
User experience: Amazon-sold mirrors reported to stay firm through summer heat and winter cold. Best for: Failed adhesive pads, cracked bases, or temporary use.
Use the Correct OEM Part
Some manufacturers offer upgraded kits that fix known design flaws.
Subaru’s Updated Mounting Kit
Part number H501SSA041 for auto-dimming mirrors without Homelink includes reinforced mounting plate, improved thread design, and vibration-resistant adapter.
Dealers may provide it free under service bulletins.
User feedback: First replacement failed. Second-gen version is rock solid. Subaru BRZ Forum
Request It Before DIY
If your vehicle is under warranty, visit the dealer first. They will install the updated part with no risk to you.
Best for: Warranty-eligible Subaru owners with recurring failures.
Prevent Future Looseness
A one-time fix is not enough if conditions accelerate wear.
Inspect Every 3-6 Months
Check mirror stability after off-road driving or rough roads. Catch small issues before they become dangerous.
Avoid Forceful Adjustments
Frequent, aggressive repositioning wears out joints. Adjust gently and only when necessary.
Store an Onboard Tool
Keep a T20 Torx driver or 7/64 inch Allen wrench in your glove box. Toyota Tacoma owners use the Allen wrench to tighten a hidden swivel screw. Store it for quick fixes.
Use Blue Loctite for Removable Security
Apply Loctite 222 blue on screws if you plan to adjust later. It resists vibration but allows disassembly.
Best for: Drivers in moderate climates who want serviceable hardware.
Choose the Right Fix for Your Climate
Materials behave differently in extreme temperatures.
Hot Climates (Arizona, Texas)
Avoid superglue, Gorilla Glue, and latex. They soften and fail in heat. Stick to mechanical fixes: metal screws, spacers, or OEM upgrades.
Suction cups perform well if installed in cool conditions.
Cold Climates
Ensure adhesives are rated below freezing. Suction cups remain effective down to -20°F. Press firmly to activate the seal.
Warm the suction cup with your hand before installing in winter.
When to Replace the Entire Mirror
Some damage cannot be repaired.
Replace If
• Mounting base is cracked.
• Adhesive pad will not re-bond.
• Internal gears are broken.
• Electrical functions (auto-dimming, camera) are dead.
Options
• OEM Assembly: Best fit and function. Buy from dealer or online.
• Aftermarket Mirror: Cheaper, but verify compatibility.
• Used Assembly: Salvage yard or eBay. Ideal for older models.
Cost-saver: Used C6 Corvette mirrors often include intact metal joints.
Compare Fix Durability and Cost
| Fix Method | Cost | Time | Durability | Best Use Case |
|---|---|---|---|---|
| Tighten OEM Screw | $0 | 10 min | Low (weeks) | First check, minor wobble |
| Replace Screws + Loctite | <$2 | 30 min | High (1+ year) | Recurring looseness |
| Super Glue Ball Joint | <$5 | 1 hour | Medium (6+ months) | Sagging head |
| Metal Dowel Upgrade | <$10 | 1 hour | Very High | C6 Corvette, frequent use |
| Aluminum Spacer | <$10 | 45 min | High | Poor factory fit |
| OEM Updated Kit | $0 (warranty) | 20 min | Very High | Reliable long-term fix |
| Suction-Cup Mirror | $10-$20 | 5 min | High | Failed adhesive, backup |
Final Recommendations
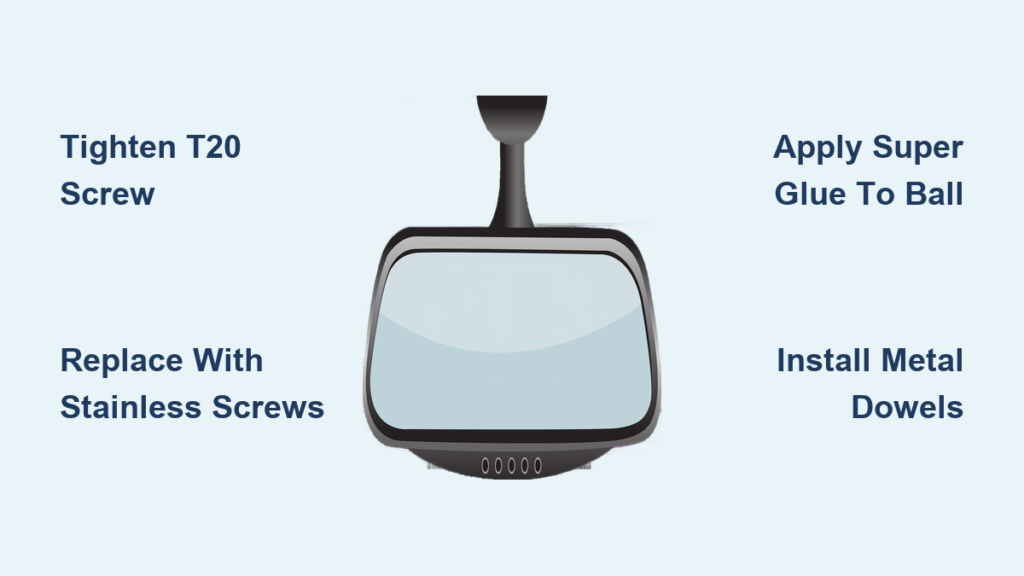
- Start simple: Tighten the T20 screw. Many issues resolve in minutes.
- For lasting results: Replace screws with stainless steel, add a 1mm aluminum shim, and use red Loctite.
- Sagging mirror: Apply super glue to the ball joint and cure overnight.
- Own a C6 Corvette: Swap plastic pins for 5/64 inch drill bit pieces. Engineered for life.
- Under warranty: Demand the updated OEM kit like Subaru H501SSA041.
- Adhesive failed: Install a high-quality suction-cup mirror as a reliable backup.
Always support the mounting bracket when adjusting the mirror post-repair. This prevents re-damaging threads or joints.
Frequently Asked Questions About How to Fix a Loose Rear View Mirror
Why does my rear view mirror keep getting loose?
The most common causes are worn internal ball joints, loose mounting screws, adhesive failure, or design flaws specific to your vehicle model. Road vibration gradually works hardware loose, and plastic components degrade over time from heat and movement.
Can I fix a loose rear view mirror myself without special tools?
Yes. Many issues resolve with a simple T20 Torx screwdriver to tighten the mounting screw. For more permanent fixes, you will need basic tools like screwdrivers, pliers, and optionally a Dremel for trimming screws. No professional experience is required.
How long does a DIY mirror fix last?
It depends on the method. Simple screw tightening may last weeks. Using stainless steel screws with red Loctite and an aluminum spacer can last over a year. Metal pin upgrades on C6 Corvettes have lasted over a decade in user reports.
Is super glue safe for fixing a sagging mirror head?
Yes, cyanoacrylate works well to rebuild friction in a worn ball joint. Apply a thin coat to the ball, assemble, and cure overnight. Avoid latex glove tips as they fail under heat and vibration.
Should I go to the dealer for a loose mirror fix?
If your vehicle is under warranty, yes. Many manufacturers like Subaru offer updated mounting kits free under service bulletins. These address known design flaws and provide the most reliable long-term fix.
When should I replace the entire mirror instead of repairing it?
Replace if the mounting base is cracked, adhesive will not bond, internal gears are broken, or electrical functions like auto-dimming are dead. OEM replacements ensure proper fit and function.
Key Takeaways for Fixing Your Loose Rear View Mirror
A stable rear view mirror is essential for safe driving. Start by diagnosing where the looseness occurs, whether at the mounting base or in the internal ball joint. Simple fixes like tightening a T20 screw take minutes and work for minor wobble. For recurring problems, upgrade to stainless steel screws with red Loctite and add a 1mm aluminum shim for permanent results. Sagging mirrors respond well to super glue applied to the ball joint and cured overnight. C6 Corvette owners should replace plastic pins with cut drill bits for a rock-solid fix that lasts over a decade. If your vehicle is under warranty, request the updated OEM kit from your dealer. With the right fix, you can eliminate wobble for good with no more constant readjustment, just clear, reliable visibility behind you.


