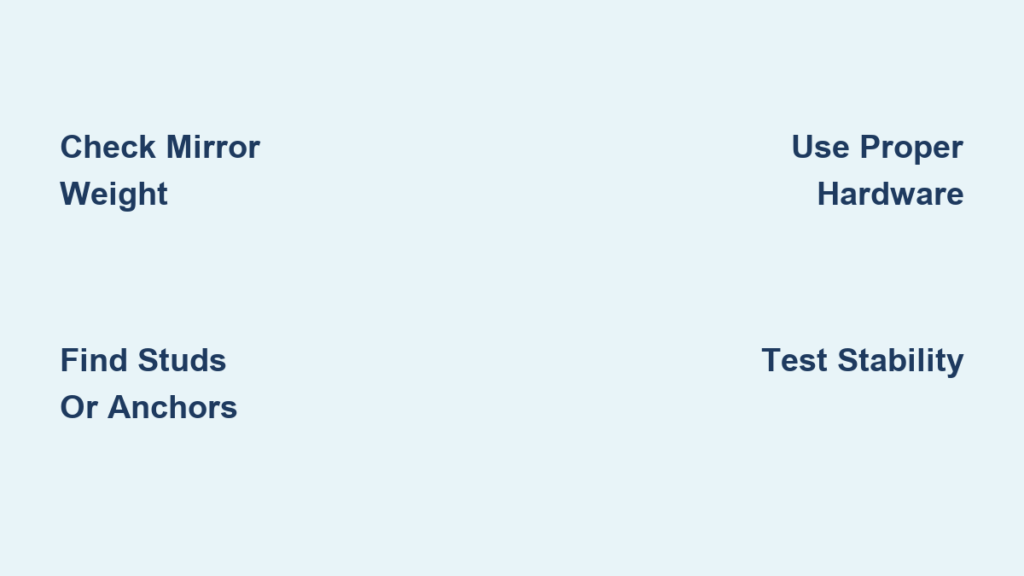
Hanging a mirror seems simple until it slips, tilts, or crashes down. Whether you’re installing a sleek frameless piece in your bathroom or a grand full-length mirror in your living room, how to fix a mirror to the wall safely and securely matters more than it looks. A poorly mounted mirror risks damage, injury, and frustration. The right method depends on your wall type, mirror weight, and desired finish.
This guide walks you through every step: identifying your wall, choosing the correct hardware, and selecting between mechanical fasteners, adhesives, or hybrid systems. You’ll learn how to avoid common mistakes like using regular silicone that destroys mirror backing, and discover pro tips from real users who’ve installed large mirrors with confidence.
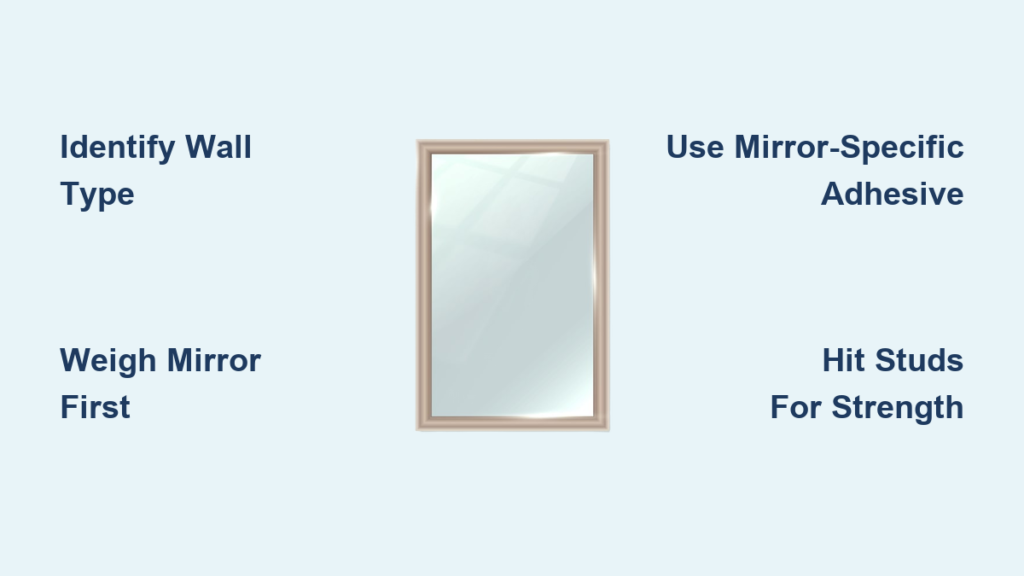
Identify Your Wall Type for Secure Mirror Mounting
Choosing the wrong fastener for your wall is the top reason mirrors fail. Before lifting a tool, determine your wall type—it dictates everything from anchor choice to installation difficulty.
Test Your Wall Material
Push a thumbtack into the wall to identify the surface. If it slides in easily, you have drywall. If it resists but eventually penetrates, it’s plaster. If it won’t go in at all, you have masonry like brick, concrete, or block. Each requires different tools and hardware.
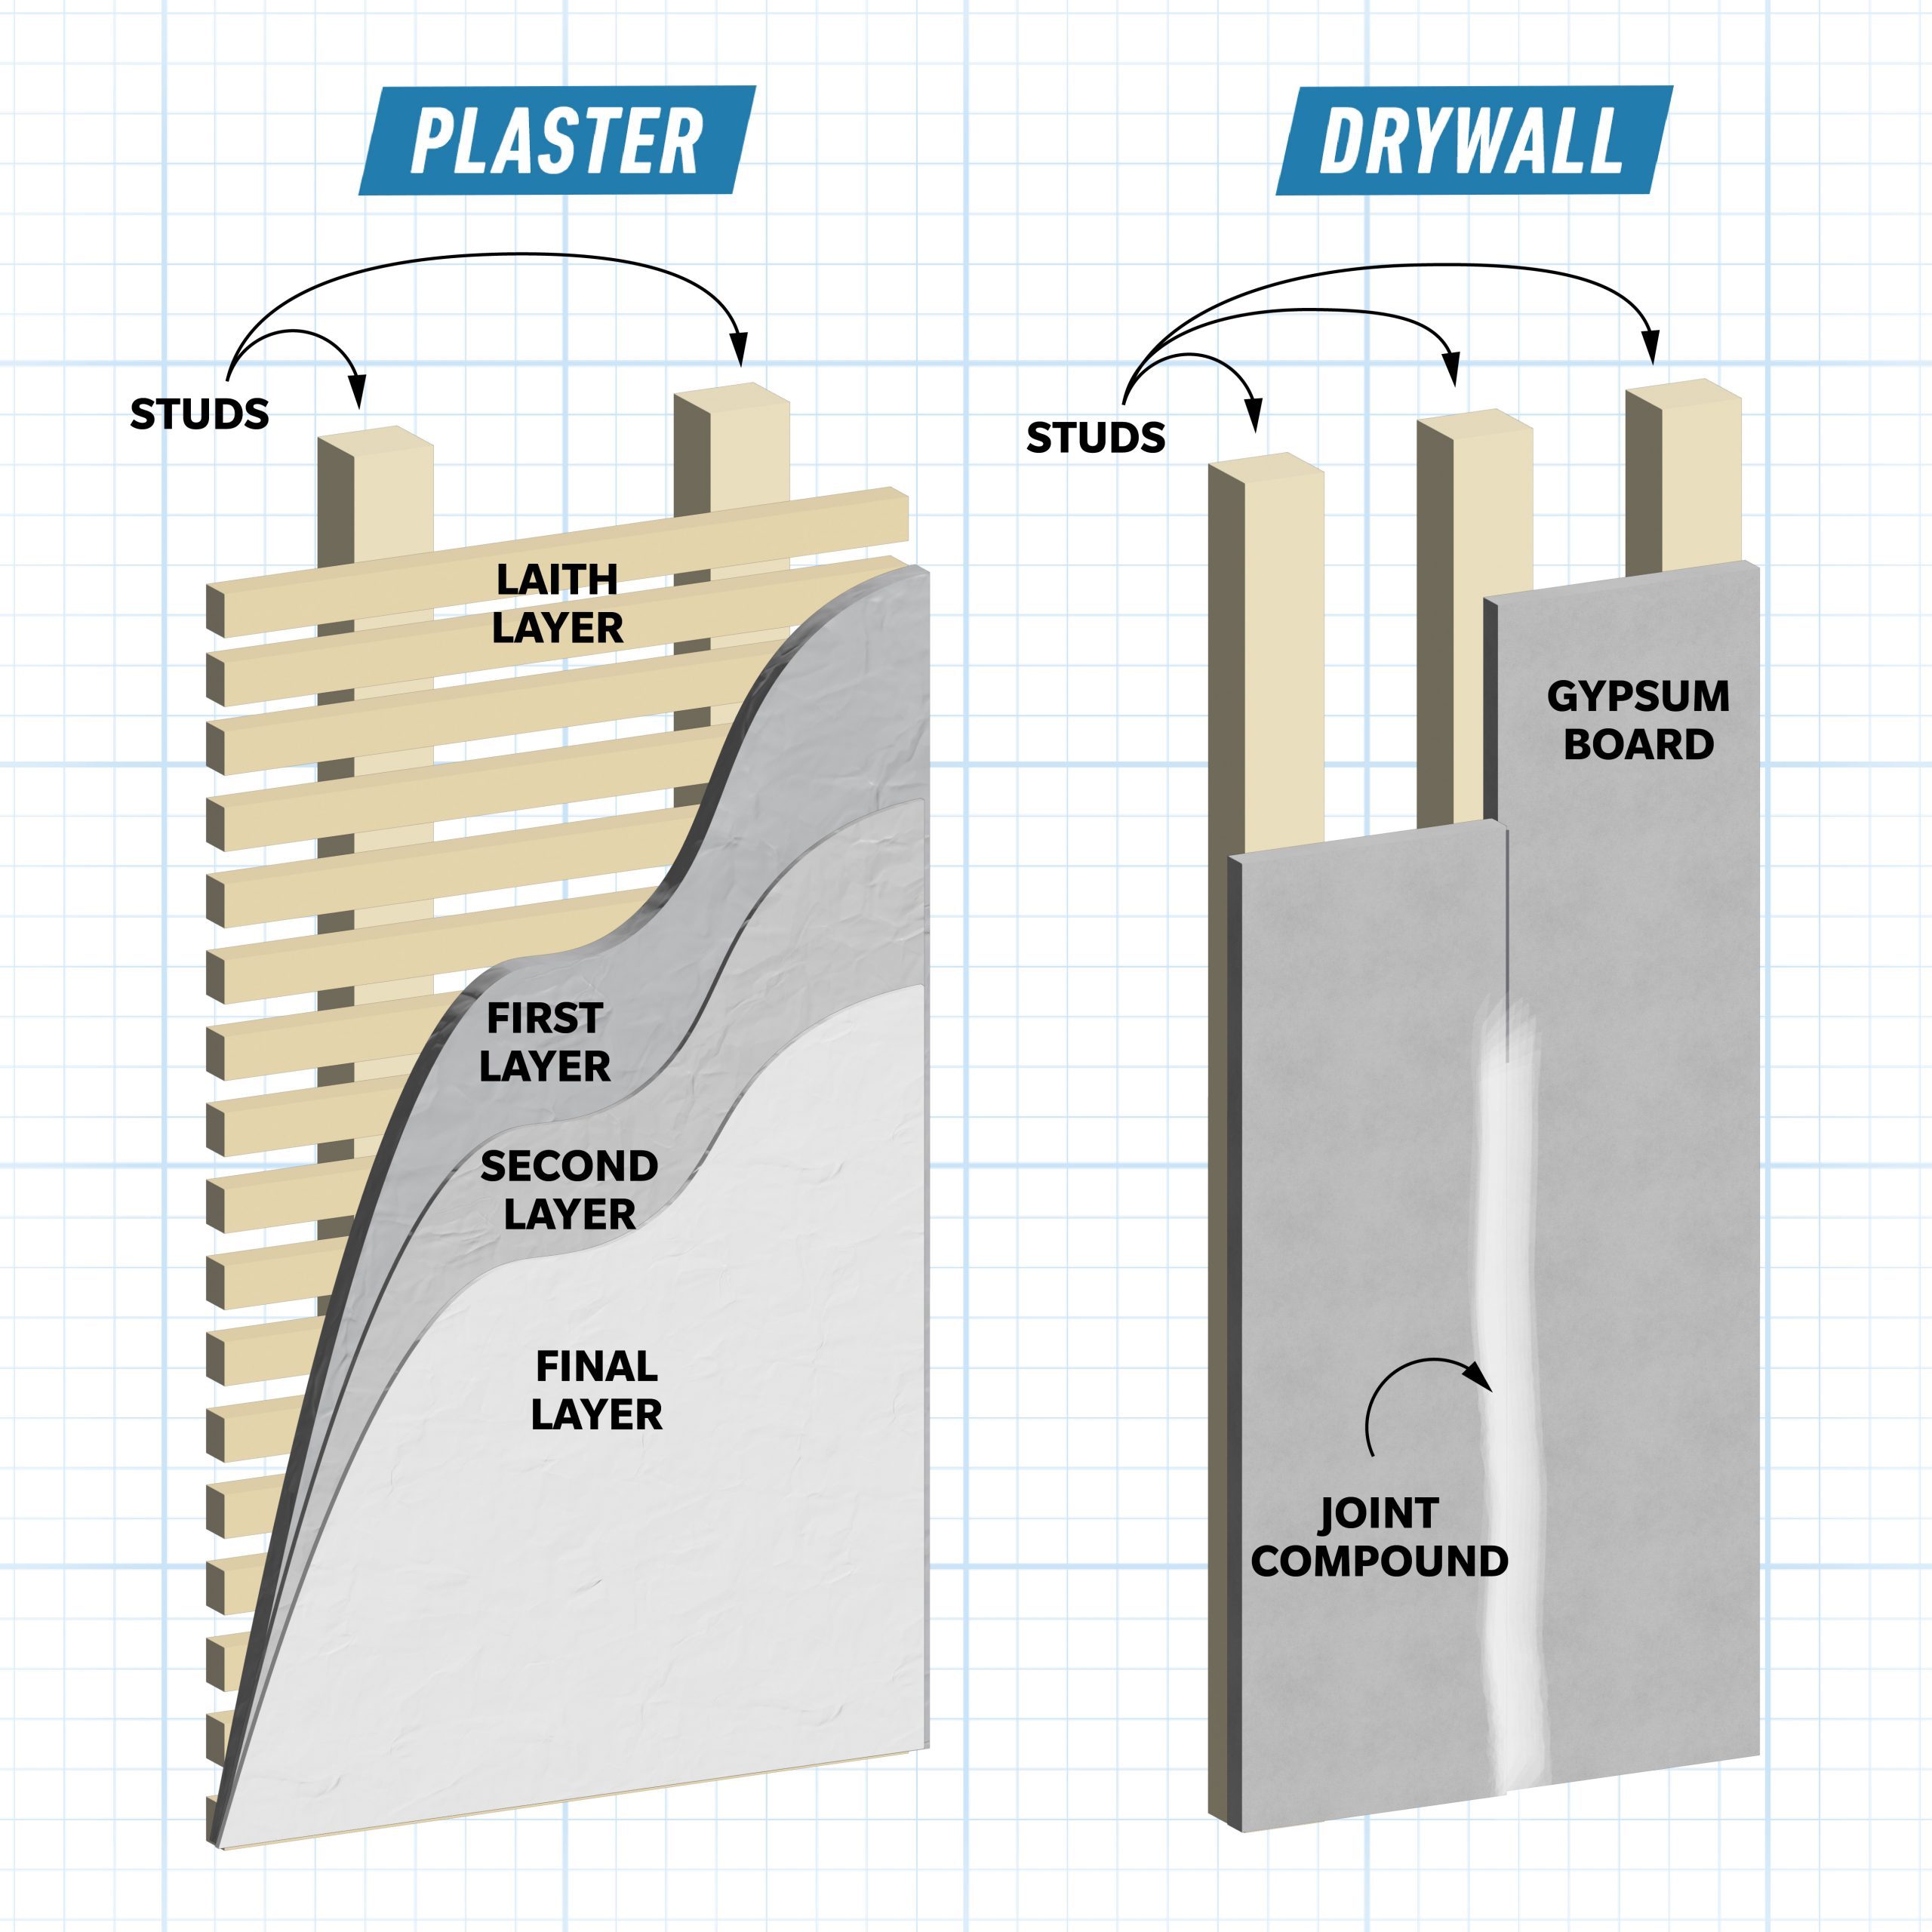
What Drywall Requires
Drywall is common in modern homes but can’t support heavy loads alone. You must use wall anchors or hit a stud for secure mounting. Use a stud finder to locate wooden studs behind the drywall, which are typically spaced 16 inches apart.
Handling Plaster Walls
Plaster is found in older homes and is harder than drywall but prone to cracking. Drill pilot holes slowly and use anchors rated for plaster, like toggle bolts. Avoid overtightening screws or the surface may crack.
Working with Masonry
Concrete, brick, or cinder block walls need a masonry bit and concrete screws or anchors. These require a hammer drill for efficient installation. Once secured, masonry offers the strongest hold of all wall types.
Match Hardware to Mirror Weight
The mirror’s weight determines your mounting method. A small mirror under 10 pounds has options a 100-pound mirror doesn’t.
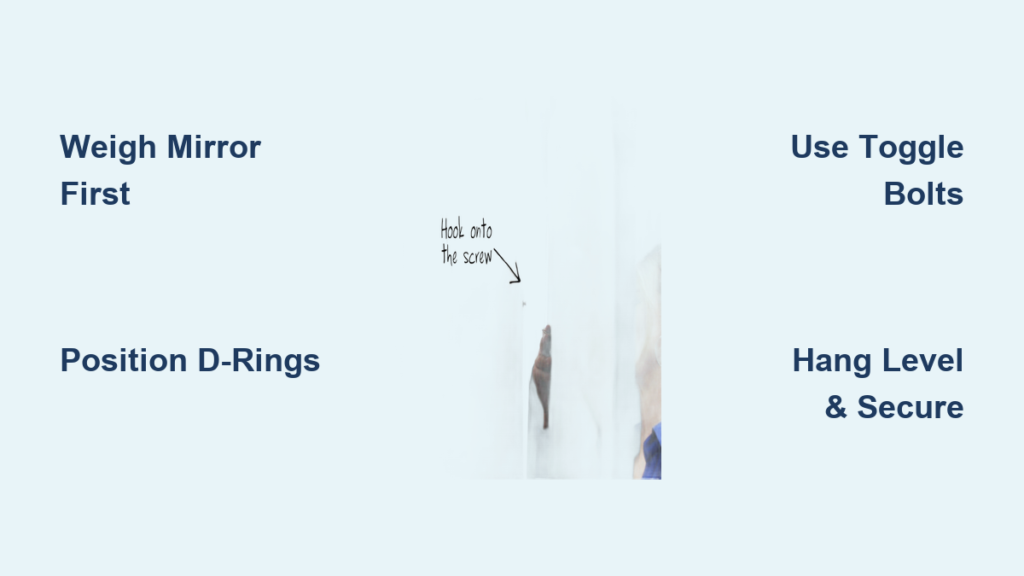
Weigh the Mirror First
Place the mirror on a bathroom scale to get an accurate weight. Never guess. Even frameless glass is heavier than it looks—6mm glass weighs about 5 pounds per square foot.
Select Fasteners with Safety Margin
Choose fasteners rated for at least double the mirror’s weight. For example, a 50-pound mirror needs hardware supporting 100 pounds. This margin provides safety and accounts for vibration or accidental impacts over time.
Light vs. Heavy Mirror Thresholds
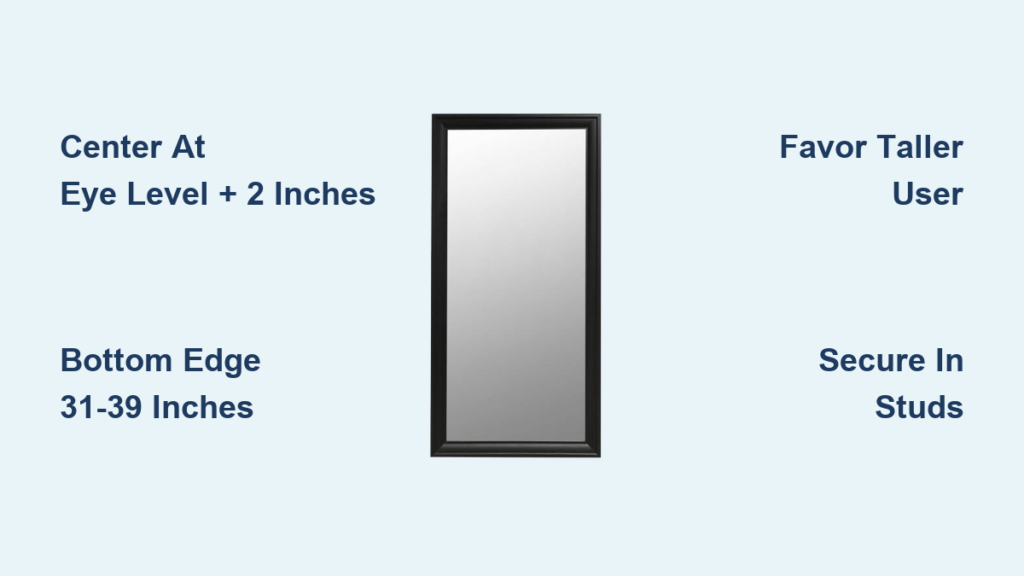
Mirrors under 10 pounds can use adhesive strips or small plastic anchors. Mirrors between 10 and 30 pounds need D-rings with wall anchors. Mirrors between 30 and 100 pounds require toggle bolts, zip-it anchors, or cleats. Mirrors over 100 pounds need French cleats, stud-mounted screws, or hybrid adhesive plus batten systems.
Prepare the Mirror and Frame for Installation
A secure mount starts with a solid mirror. Even the best hardware fails if the mirror or frame can’t handle the stress.
Inspect and Reinforce the Frame
Check wooden frames for warping or weak joints. Reinforce with L-shaped angle brackets screwed into the back if needed. A sturdy frame prevents sagging or separation over time.
Support Frameless Mirrors
No frame means you need mirror clips or adhesive for support. Clips grip the edges and screw into the wall. Ensure the glass edges are smooth and straight for full contact with clips or adhesive.
Professional Drilling for Glass
Need holes for screws? Never drill glass yourself—it will shatter. Take the mirror to a glass shop. Many offer drilling for around £5. They use diamond bits and coolant to prevent cracks.
Mark the Perfect Mounting Spot
Wrong placement ruins both function and aesthetics. Do it once, do it right.
Find the Ideal Height
Hang the mirror at 57 to 60 inches from the floor—standard for eye-level viewing. Adjust slightly based on the primary user’s height.
Use Painter’s Tape for Clean Marks
Instead of pencil lines, apply painter’s tape to the wall and mark on it. This prevents wall damage if you need to reposition.
Locate Studs and Mark Positions
Use a stud finder to locate and mark the center of studs. Mark the center, not the edge. Studs are usually 16 inches apart but verify with your finder. Hitting a stud doubles your holding power.
Transfer D-Ring Spacing
If using D-rings, measure from the top of the mirror to the center of each D-ring. Mark that distance down from your desired top edge on the wall. Use a level to mark both hook points.
Choose the Right Hardware by Wall Type
Match your fasteners to the wall. Wrong hardware equals a loose mirror.
Drywall Solutions
The best option is to screw directly into a stud for the strongest hold. If no stud aligns with your mirror, use toggle bolts or zip-it anchors rated up to 80 pounds each. Avoid plastic expansion anchors for mirrors over 20 pounds—they pull out under stress.
Plaster Wall Fasteners
Drill pilot holes with a masonry bit. Use toggle bolts or plaster-specific anchors. Go slow—plaster cracks easily under pressure.
Masonry Anchors
Use a hammer drill and masonry bit. Install concrete screws like Tapcon or masonry anchors. Ensure anchors are rated for the mirror’s weight.
Use Mechanical Mounting Systems
Mechanical fasteners offer reliable, adjustable support ideal for heavy or valuable mirrors.
Install D-Rings and Wire
This method works best for framed mirrors under 100 pounds. Attach D-rings to the frame one-third down from the top. Thread picture wire between them, leaving slack for angling. On the wall, drive in a screw or hook if over a stud, or install a toggle bolt first if not. Hang and adjust wire tension so the mirror sits flush.
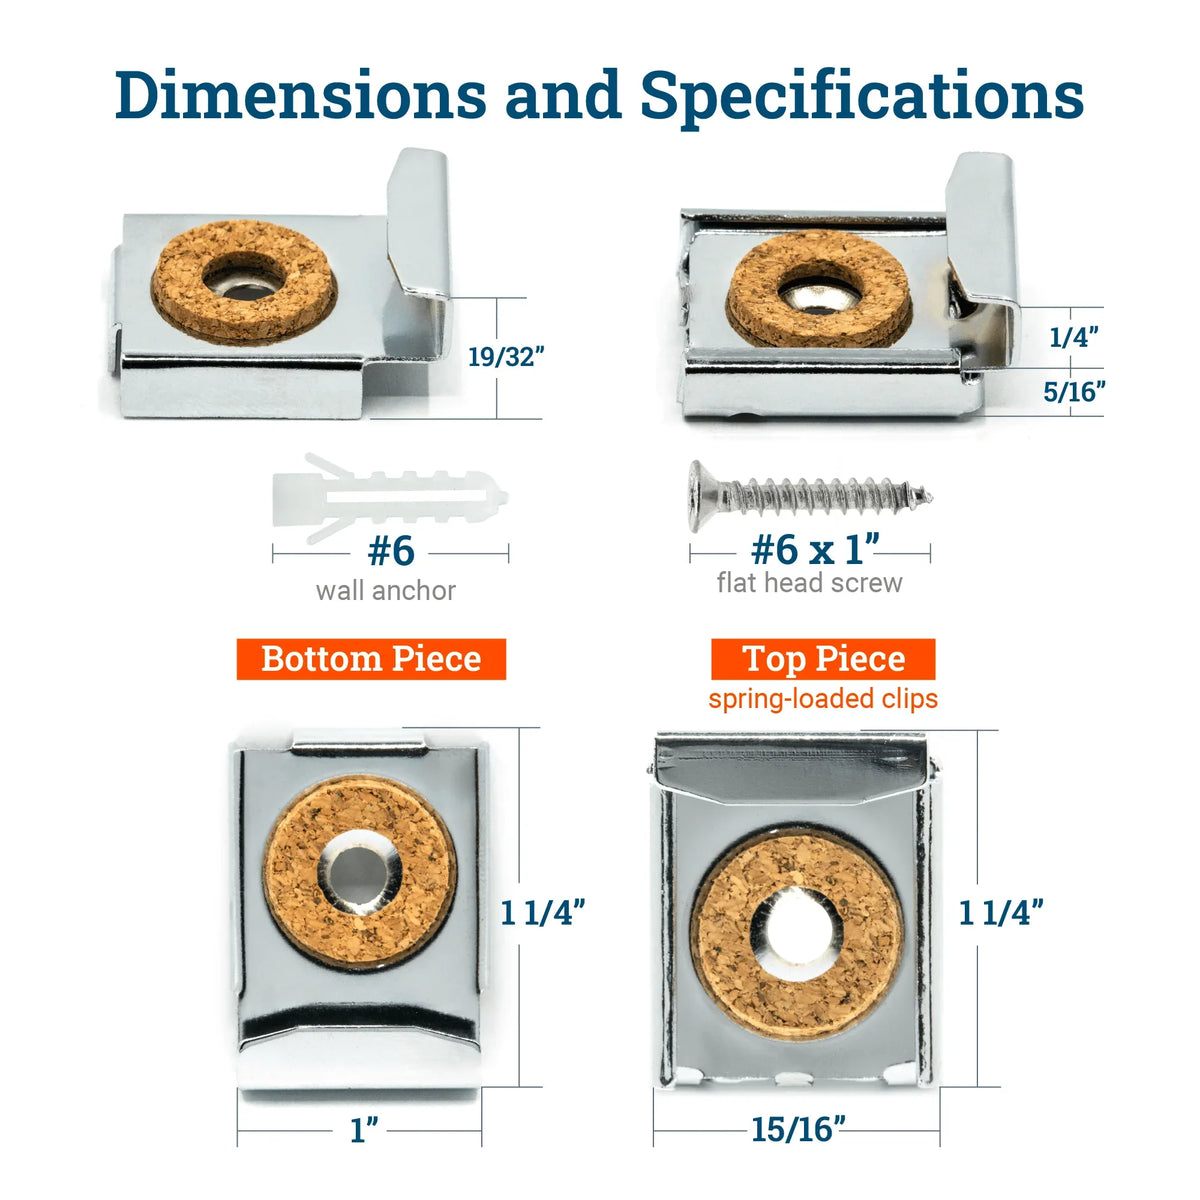
Mount with Metal Cleats
Metal cleats are ideal for heavy framed mirrors. Attach the top cleat to the wall at the mirror’s upper edge. Fix the bottom cleat to the mirror frame. Ensure both pieces are perfectly level, then slide the mirror down so the cleats lock together.
Try French Cleats for Heavy Mirrors
French cleats support mirrors up to 200 pounds. One cleat mounts to the wall, the other to the mirror. Angled edges interlock, transferring weight into the wall. The OOK 200-lb French Cleat Hanger is a trusted option.
Secure Frameless Mirrors with Clips
Mirror clips screw into the wall and grip the glass edge. Use at least three clips on top and three on bottom for large mirrors. Space clips every 16 to 24 inches. Choose low-profile clips for a clean look.
Use Adhesive for No-Drill Mounting
Want a clean, hole-free wall? Adhesive works if you do it right.
Choose Mirror-Specific Adhesives Only
Never use regular silicone. It contains acetic acid that eats away at the mirror’s silver backing, causing yellow streaks or show-through on the front. Use only Loctite PL530 Mirror, Marble & Granite Adhesive or mirror mastic. Both bond glass permanently, resist humidity, and won’t damage the reflective layer.
Prepare Surfaces Thoroughly
Adhesive fails on dirty or glossy surfaces. Clean the wall and mirror back with isopropyl alcohol. Sand glossy paint lightly. Prime bare drywall to seal pores. Work in 60°F to 85°F temperatures—cold or hot temps weaken bonding.
Apply Adhesive Correctly
Load Loctite PL530 into a caulking gun. Apply 2 to 3 inch staggered beads across the back, keeping 1 to 2 inches from edges. Avoid over-applying—squeezed-out adhesive can stain the mirror front.
Support During Curing
Lift the mirror into place with help for large pieces. Align with marks and press firmly. Use mirror tape or temporary braces to hold it for 24 to 72 hours while curing. Install a bottom batten to support weight during cure.
Combine Methods with Hybrid Mounting

For maximum safety, combine adhesive with mechanical support.
Adhesive + Bottom Batten
Screw a wooden batten to the wall at the mirror’s base. The mirror rests on it, transferring downward force. Adhesive holds it flat and prevents tipping. This method is recommended for mirrors over 48 inches tall.
Adhesive + Top Clips
Adhesive bonds the mirror to the wall. Small secondary glazing clips at the top stop it from pivoting. This reduces stress on adhesive if someone leans on the mirror.
Follow Safety and Finishing Steps
A perfect install isn’t complete without final checks.
Prioritize Safety for Large Mirrors
Mirrors over 100 pounds need dual support: cleats plus adhesive, or batten plus clips. In bathrooms or kids’ rooms, use foil-backed mirrors—they hold shards together if broken.
Prevent Wall Damage and Check Level
Attach felt or rubber bumpers to the mirror’s bottom corners. They stop the glass from scratching the wall and reduce vibration. Use a spirit level on top and side edges before finalizing.
Choose the Best Method by Use Case
Match your method to your mirror and location.
Small Mirrors Under 30 lbs
Use D-rings plus wall anchors, or heavy-duty mirror adhesive. No need for complex systems—just secure and level.
Large Mirrors 30–100 lbs
Use toggle bolts or zip-it anchors into drywall. French cleats or metal cleats provide even load distribution. Add adhesive plus top clips for extra stability.
Very Large Mirrors Over 100 lbs
The top choice is bottom batten plus adhesive plus top clips. If drilling is acceptable, mount D-rings or cleats into studs. Avoid adhesive-only unless using PL530 and proper curing support.
Frameless Mirrors
Use mirror clips with minimum six total. Combine with PL530 adhesive for a flush look. Ensure edges are clean and straight.
Bathrooms and Humid Areas
Use Loctite PL530—it resists moisture. Avoid silicone entirely. Choose foil-backed mirrors for safety.
Maintain and Inspect Over Time
Even the best install needs occasional checks.
Inspect Mechanical Mounts Annually
Check D-rings, screws, and clips for looseness, especially in high-traffic areas. Tighten if needed.
Adhesive-Bonded Mirrors
No maintenance required. But removal will likely damage the wall or mirror.
Removing a Mastic-Bonded Mirror
Expect significant effort. Score the edge with a utility knife. Slide a thin blade behind the mirror. Break the bond slowly—glass may crack.
Frequently Asked Questions About Fixing a Mirror to the Wall
Can I use regular silicone to mount a mirror?
No. Regular silicone contains acetic acid that damages the mirror’s silver backing, causing yellow streaks. Use only mirror-specific adhesives like Loctite PL530.
How do I find studs behind drywall?
Use a stud finder. Move it across the wall until it beeps or lights up. Mark the center of each stud—typically 16 inches apart.
What’s the strongest way to mount a heavy mirror?
French cleats support up to 200 pounds. For maximum security, combine adhesive with a bottom batten and top clips. This hybrid method provides the best hold for very large mirrors.
Can I mount a mirror without drilling?
Yes. Use mirror-specific adhesive like Loctite PL530. Apply staggered beads to the mirror back, press firmly against the wall, and support with tape or braces for 24 to 72 hours.
How do I remove a mirror mounted with adhesive?
Expect difficulty. Score the edges with a utility knife. Slide a thin putty knife or wire behind the mirror. Break the bond slowly—glass may crack or the wall may sustain damage.
What weight can toggle bolts hold in drywall?
Toggle bolts can typically hold 50 to 100 pounds per bolt in drywall, depending on the size. Use multiple bolts for heavier mirrors.
Key Takeaways for Fixing Your Mirror to the Wall
Following this guide ensures your mirror stays secure whether it’s a small bathroom piece or a floor-to-ceiling statement. First, know your wall—drywall, plaster, or masonry—because each needs different hardware. Second, weigh the mirror and choose fasteners rated for at least double that weight. Third, use mirror-specific adhesive like Loctite PL530, never regular silicone. Fourth, hit studs when possible for maximum holding power. Fifth, support large mirrors with hybrid methods combining adhesive plus batten or clips. Sixth, always check level before the adhesive sets since you can’t reposition once contact is made. Finally, prioritize safety with foil-backed mirrors in bathrooms and high-traffic areas.
No wobbles, no damage, no regrets—just a perfectly mounted mirror that stays exactly where you want it.