
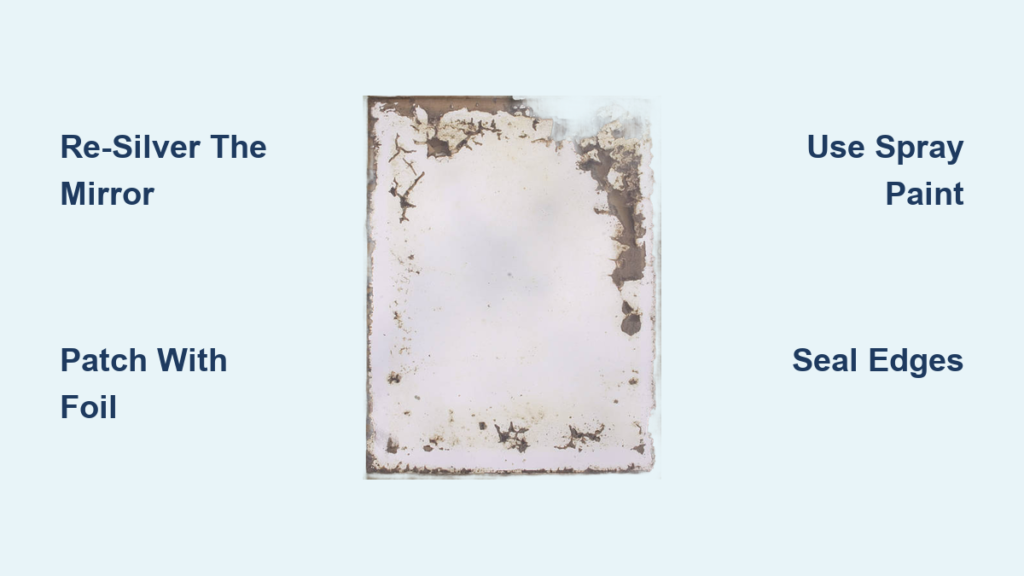
Faded mirrors—those once-bright surfaces now marked by dark spots, cloudy edges, or transparent patches—are more than just an eyesore. They signal a breakdown in the mirror’s reflective backing, commonly known as desilvering or mirror rot. This degradation happens when moisture, age, or chemical exposure corrodes the thin metal layer behind the glass. While a foggy or spotty mirror might seem beyond saving, many cases can be repaired, restored, or creatively transformed.
Whether you’re dealing with a vintage bathroom mirror showing age, a cherished heirloom losing its luster, or a modern mirror suffering from edge decay, this guide delivers actionable solutions. You’ll learn how to diagnose damage, choose between DIY fixes and professional restoration, and apply proven methods. Most importantly, you’ll discover how to prevent future fading and extend your mirror’s life.
Diagnose the Damage First
Before any repair, assess the mirror’s condition. Not all fading can or should be fixed. Understanding the type and extent of damage determines which solution will work best for your situation.
Spot vs. Edge vs. Full-Panel Deterioration
Three main patterns indicate mirror fading. Edge corrosion appears as black or brown lines creeping inward from the sides, caused by moisture entering through unsealed edges. This is common in bathroom mirrors. Spotty desilvering shows as isolated dark or clear patches, often due to physical damage or localized water exposure. Widespread delamination means large areas of missing backing, covering 40% or more of the surface, and is usually irreversible without full restoration.
Quick Test to Check Repair Potential
Press a fingertip against the dark spot. If you see a double reflection, meaning your finger and a ghostly second image, the glass is intact and repair is possible. If the spot looks transparent and you see wall or framing behind it, the backing is gone and repair options become more limited.
Check for Structural Integrity
Cracks, chips, or warping mean replacement is recommended. Intact glass with only backing loss indicates the mirror is repairable. Antique or beveled designs are likely worth restoring due to their value and character.
Safety Warning for Antique Mirrors
Avoid sanding or scraping old mirrors without protection. Pre-1900s mirrors may contain mercury or lead in the silvering process, which can release toxic dust when disturbed.
Re-Silver the Mirror (Full Restoration)
For valuable or antique mirrors, re-silvering is the only way to fully restore reflectivity. This chemical process applies a new silver layer to the back of clean glass, replacing the corroded one.
Why Re-Silvering Works
Re-silvering preserves the original glass, which is critical for vintage or custom mirrors where authenticity matters. Unlike cosmetic fixes, this method actually restores the reflective surface rather than just covering the damage.
Gather the Right Kit
Use a mirror re-silvering kit that includes tin for silver as a sensitizer, silver solution plus activator, reducer, and mirror remover for old paint and metal. Never pre-mix silver plus activator with reducer. Combine equal parts only when ready to apply.
Step-by-Step Re-Silvering Process

Remove old backing by applying Multi-Strip paint remover to the back of the mirror. Scrape off softened paint with a plastic tool. Use mirror remover to dissolve copper and silver layers.
Clean glass thoroughly by scrubbing with powdered glass cleaner. Rinse with tap water, then distilled water. Optionally, polish with cerium oxide and a felt pad to remove micro-scratches.
Prepare work surface by laying the mirror flat on a plastic-lined cardboard tray. Ensure it is level, as any tilt causes uneven coating.
Apply silver solution by mixing equal parts silver plus activator and reducer. Pour over the back and rock gently for 3 to 5 minutes. Silver will deposit gradually and the reflective surface forms in real time.
Rinse and dry by flushing extensively with distilled water. Let air dry and do not touch the coated surface.
Paint protective backing using a foam roller to apply black mirror paint. Cover all edges and surface completely. Dry overnight, which means 12 or more hours.
Final inspection involves cleaning the front edge with isopropyl alcohol to remove stray silver. Check for brightness, coverage, and streaks.
For extra durability, seal the back with moisture-resistant polyurethane after drying.
Patch Small Clear Spots with Aluminum Foil
For minor damage where the backing has been scraped off, aluminum foil offers a quick and reversible solution.
When to Use This Fix
This method works best for tiny transparent areas from moving or cleaning, when the back of the mirror is accessible, and when a quick reversible solution is needed.
How to Apply Aluminum Foil
Remove the mirror from the frame. Cut aluminum foil slightly larger than the damaged spot. Smooth and attach with clear tape such as packing tape. Reinstall the mirror.
Stand back to check if the patch blends. Foil may show slight texture but often disappears at a distance.
Pros and Cons
This fix is inexpensive and requires no chemicals. It is fully reversible. However, it is not suitable for large or multiple spots and may look hazy up close.
Restore Shine with Mirror Spray Paint
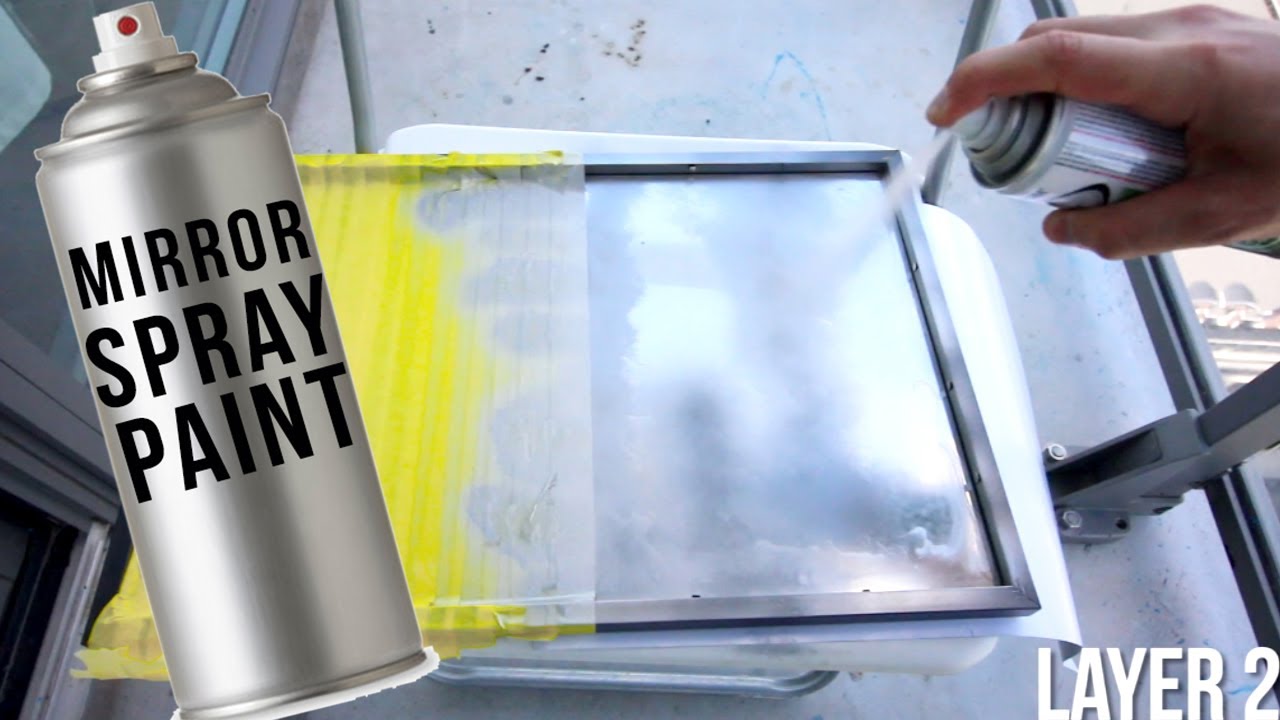
Mirror spray paint works well for scattered spots or large areas of desilvering. It creates a reflective silver surface without the complexity of chemical re-silvering.
Choose the Right Paint
Rust-Oleum Mirror Spray and Krylon Looking Glass Spray both create reflective silver surfaces. Test first on scrap glass to check reflectivity and color match.
Application Steps
Remove the mirror and place it back-side up. Clean with isopropyl alcohol. Mask off edges and frame. Spray 2 to 3 light coats, waiting 15 minutes between applications. Cure for 24 hours before reinstalling.
For best results, paint the entire back for uniform reflectivity. Use brush-on metallic paint for precision on small areas.
Limitations to Consider
Expect slight color mismatch with aged mirrors. This method is not as durable as original silvering. The paint may chip if touched.
Treat Edge Corrosion with WD-40
Quick fix for bathroom mirrors with black or brown edges involves using WD-40, which penetrates moisture and reduces rust visibility.
How WD-40 Helps
WD-40 does not restore silver, but it penetrates moisture, reduces rust visibility, and leaves a water-repellent barrier. It provides a temporary improvement and helps prevent further moisture damage.
Step-by-Step Application
Attach the straw nozzle to the WD-40 can. Insert into the gap between mirror and wall or backing. Spray along damaged edges. Wait 10 minutes. Gently scrub with an old toothbrush. Wipe clean with a damp sponge.
One user reported that from a distance, the damage is no longer visible after this treatment.
Realistic Expectations
Do not expect full restoration or a long-term fix without additional sealing. This works best as a temporary improvement for mirrors you cannot remove easily.
Cover Edges with Mirror Repair Tape
Mirror repair tape offers a cosmetic fix for exposed or damaged borders without tools or mess.
How to Apply
Clean and dry the edge. Cut self-adhesive silver tape to length. Press firmly into place. Choose from 3M or specialty mirror tape in 1/2 inch to 1 inch widths. Select matte or reflective finish to match the mirror.
Pros and Cons
This method requires no tools and is inexpensive, costing about $10 to $15. However, it may peel over time and shows a visible seam under close inspection.
Install New Mirror Behind Old Glass
This method preserves vintage glass while restoring reflectivity, ideal when the original glass is flawless but the backing is gone.
Ideal Situations for This Method
This works best when the mirror has beveled or antique design, when replacement would ruin frame or fit, and when the original glass is intact but backing is completely degraded.
How to Do It
Strip the old backing completely. Clean original glass thoroughly. Order a thin new mirror cut to size, such as 1/8 inch thick. Mount behind original glass within the frame. Ensure the new mirror is thinner than the original to fit the frame depth.
The result looks like a fully restored mirror, combining modern reflectivity with vintage charm.
Hide Damage with Painted Borders
Turn flaws into art by creating a decorative frame around the damaged areas.
Create a Custom Edge
Mask a 1 to 2 inch border on the mirror’s front. Spray paint with gold, silver, black, or colored paint. Apply 2 to 3 coats, drying between each. Remove tape carefully.
Creative Upgrades
Use Gallery Glass outline tubes to create raised designs and fill with paint. Apply stick-on decals for patterns or quotes. Add frosted film for privacy and style. These options draw the eye away from damaged edges.
This approach works well for bathroom or hallway mirrors, for DIYers seeking no-chemical solutions, and for renters who cannot replace fixtures.
Add Trim or Molding
Cover edge rot on built-in mirrors by installing trim around the perimeter.
How to Install
Measure the mirror perimeter. Cut wood, MDF, or plastic molding to size. Attach with mirror-safe adhesive or small nails. Paint or stain to match decor.
When to Avoid This Method
Skip this approach if the mirror is glued to the wall or if the damage is in the central area, as trim only hides edges.
Prevent Future Mirror Fading
Repair is only half the battle. Stop fading from happening again by taking preventive measures.
Seal the Edges
Apply clear silicone sealant around the perimeter. Focus on back edges where moisture enters. Reapply every 2 to 3 years in high-humidity areas.
Control Humidity
Run bathroom exhaust fan during and after showers. Use a dehumidifier in damp rooms. Wipe mirror edges with a dry towel weekly.
Choose Safe Cleaners
Avoid ammonia-based sprays such as Windex, as harsh cleaners eat through protective paint and speed up desilvering. Use 50/50 vinegar-water, rubbing alcohol, or a microfiber cloth instead. Never use abrasive pads.
Apply Water-Repellent Spray
Spray WD-40 along edges every 3 to 6 months. This creates a temporary moisture barrier that helps protect the backing.
Repair vs. Replace: Make the Right Call
Use this guide to decide whether to repair or replace your faded mirror.
Repair If
The mirror is antique, beveled, or framed. The glass is intact. You want to preserve authenticity. The mirror has high sentimental or historical value.
Replace If
The glass is cracked or warped. Damage covers over 40% of the surface. The mirror is modern and inexpensive. Installation is easy and safe.
A 32 inch by 36 inch new mirror costs around $85. Consider whether your time is worth more than that investment.
Frequently Asked Questions About Fixing Faded Mirrors
Can a faded mirror be repaired, or does it need replacing?
It depends on the damage extent and mirror value. If the glass is intact and the mirror is antique or custom, repair is often worth the effort. If the glass is cracked or damage covers over 40% of the surface, replacement is usually smarter.
What causes mirrors to fade or develop dark spots?
Mirrors fade due to desilvering, which occurs when moisture infiltrates the edges and corrodes the reflective backing. This is common in bathrooms with high humidity, from harsh cleaning chemicals, and from natural aging.
Is re-silvering a DIY project?
Re-silvering is possible as a DIY project using a mirror re-silvering kit, but it requires careful chemical handling and precise application. For valuable antique mirrors, professional re-silvering is recommended.
How long does WD-40 treatment last on mirror edges?
WD-40 treatment is temporary, providing improvement that lasts several months. For longer-lasting results, apply silicone sealant to the edges after treating with WD-40.
Does mirror spray paint actually work?
Mirror spray paint creates a reflective surface that improves appearance, but it is not as durable or bright as original silvering. It works well for cosmetic improvements but does not fully restore reflectivity.
How can I prevent my bathroom mirror from fading?
Seal the edges with silicone, control humidity with exhaust fans and dehumidifiers, avoid ammonia-based cleaners, and apply water-repellent spray along edges every few months.
Key Takeaways for Fixing Your Faded Mirror
Fixing a faded mirror requires understanding the damage first. Test whether the glass is intact by checking for double reflections. Only mirrors with undamaged glass are worth repairing.
Re-silvering provides the only true restoration of full reflectivity. This method preserves original glass while applying a new silver layer. It works best for antique, beveled, or custom mirrors with high value.
Cosmetic fixes work for temporary or budget-conscious solutions. Aluminum foil patches, spray paint, WD-40 treatment, and decorative borders improve appearance without full restoration. These are ideal for modern mirrors or rental situations.
Prevention matters more than repair. Seal edges, control humidity, and avoid harsh cleaners to extend your mirror’s life. Regular maintenance prevents the desilvering process from starting.
For most homeowners, the best approach combines practical repair with creative concealment. But for heirloom pieces, professional re-silvering is worth the investment. With the right method, your mirror can shine like new again.


