
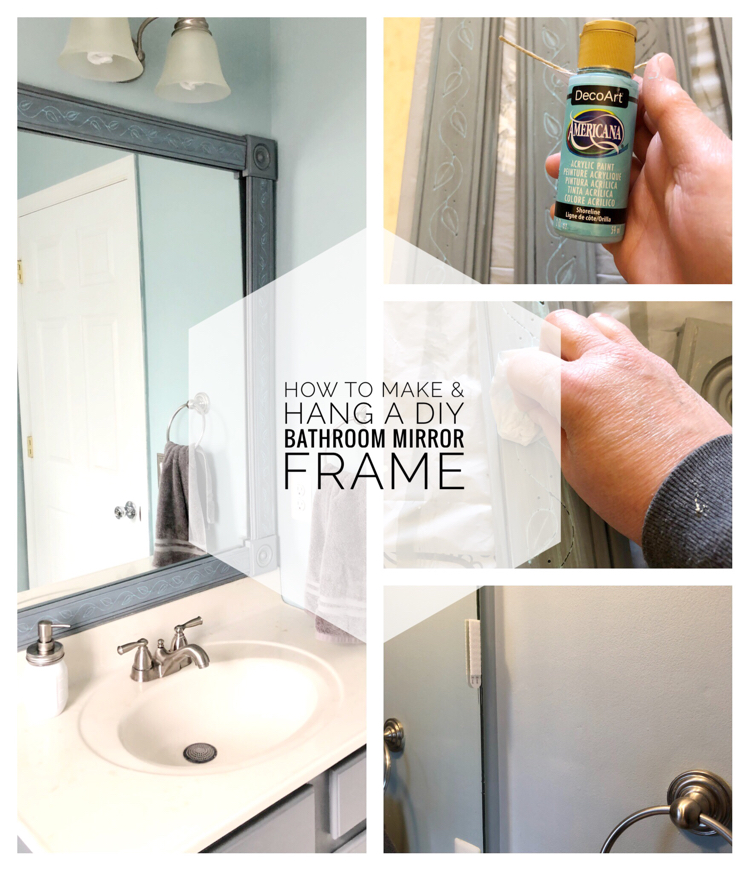
Tired of an outdated bathroom mirror frame but not ready to replace the entire fixture? Painting a bathroom mirror frame is one of the fastest, most affordable ways to transform your space without a full renovation. Whether your frame is wood, metal, or composite, the right techniques and materials can turn a dated accent into a stunning focal point that complements your bathroom decor. This guide walks you through every step, from initial prep to final sealing, so your painted frame withstands the humidity of daily shower use.
You will learn how to properly prepare the surface, select the right paint for your frame material, apply a smooth finish without drips, and protect your work for years to come. Every section includes practical tips to help you avoid common mistakes and achieve professional results on your first attempt.
Essential Prep Steps for a Lasting Finish
Proper preparation determines the success of your paint job more than any other factor. Most DIY failures stem from skipping essential prep work, not from poor paint quality.
Clean Thoroughly with Degreaser
Bathroom frames accumulate grime, soap residue, and skin oils that prevent paint from bonding properly.
• Spray a degreasing cleaner across the entire frame surface
• Scrub crevices and corners with a soft brush or toothbrush
• Wipe dry with a clean shop towel
• Follow with a damp cloth to remove remaining residue
• Allow to dry completely before painting
Moisture trapped under paint causes bubbling and peeling, so ensure the frame is fully dry before proceeding.
Remove Loose Paint and Repair Damage
Inspect the frame for peeling, chipping, or flaking paint, especially along the bottom edge where moisture accumulates.
• Use a putty knife or plastic scraper to lift loose paint
• For metal frames with rust, gently scrub with a wire brush
• Fill small dents or gaps with wood filler or all-surface repair compound
• Let repairs dry completely, then sand smooth
Sand for Better Adhesion
Even smooth, glossy finishes need texture for paint to grip effectively.
• Use 120 to 220 grit sandpaper or a sanding sponge
• Lightly scuff the entire surface without stripping to bare material
• Focus on high-gloss areas like polyurethane or lacquer finishes
• Wipe away dust with a damp cloth and allow to dry
Skipping sanding is the number one cause of peeling paint. Never skip this step, even if the surface appears clean.
Protect Glass and Surroundings
Precision masking prevents permanent paint marks on glass and adjacent surfaces.
Mask the Mirror Edge
• Apply painter’s tape along the glass edge where it meets the frame
• Press down firmly to prevent paint bleed-through
• For curved or intricate frames, use liquid mask instead of tape
Liquid mask brushes on and peels off cleanly after painting, making it ideal for complex shapes.
Shield Walls and Fixtures
• Cover the vanity top with craft paper or drop cloths
• Wrap nearby faucets, lights, or tiles with masking paper
• Use tape and paper together for double protection against overspray
Double-masking prevents paint from getting on walls and keeps your cleanup minimal.
Choose the Right Paint for Your Frame Material
Selecting the correct paint ensures durability in humid bathroom conditions.
Best Paint Types by Material
| Frame Type | Recommended Paint | Why It Works |
|---|---|---|
| Wood | Oil-based enamel or chalk mineral paint | Bonds well, resists moisture |
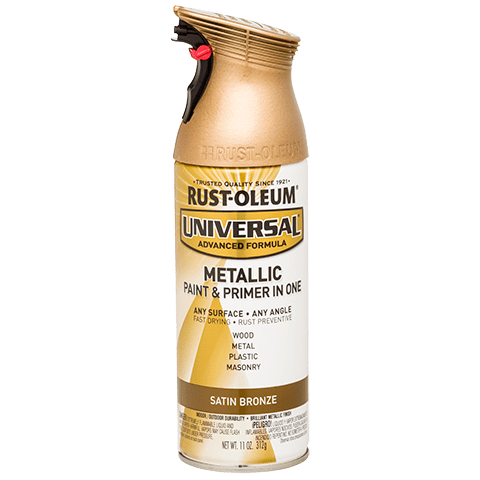
| Metal (aluminum, steel) | Universal spray paint or oil-based enamel | Adheres to glossy and metallic finishes |
| Plastic or composite | All-surface spray paint | Formulated for low-porosity materials |
Top-rated options include Rust-Oleum Protective Enamel for one-coat coverage on wood, Rust-Oleum Universal Spray Paint for smooth finishes on multiple materials, and Cobblestone Chalk Mineral Paint for a porous finish that accepts wax sealing.
Avoid Standard Latex Paint on Sealed Surfaces
Standard latex paint may flake off glossy or sealed frames. Always use oil-based, chalk, or universal formulas designed for better adhesion.
Never use interior wall paint for frames. It lacks the binders needed for durability on non-porous surfaces.
Apply Paint Like a Pro
Application technique determines the final appearance. Follow these methods for a smooth, drip-free finish.
Brush Painting: Best for Detail Work
Brush application works well for oil-based or chalk paints on textured or recessed frames.
• Use a high-quality synthetic brush to prevent bristle shedding
• For detailed areas, pounce the brush up and down to push paint into crevices
• Apply thin coats to prevent drips and ensure faster drying
• Work top to bottom to catch drips before they harden
• Let dry 4 to 24 hours before applying a second coat
Chalk paint like Cobblestone does not require masking since any paint on glass wipes off easily with a razor blade afterward.
Spray Painting: Fast and Even Coverage
Spray painting delivers smooth, even coverage on metallic or intricate frames.
• Shake the can thoroughly for at least one minute
• Hold the can 30 centimeters from the surface
• Use steady, overlapping strokes moving left to right
• Apply a light first coat to prevent runs
• Wait one hour, then apply a second coat for full coverage
For custom metallic finishes, layer Sunlit Brass with Vintage Gold spray to create a champagne-gold effect.
Add Decorative Details
Enhance your frame with depth and character using simple wax techniques.
Enhance with Brown Wax
Brown wax adds vintage charm and highlights texture.
• Apply brown furniture wax with a dedicated brush once paint is fully dry
• Work the wax into corners and grooves
• Wipe off excess with a clean shop towel
• Buff lightly after 10 to 15 minutes
Wax adds depth with minimal effort, making it an easy way to elevate the final look.
Highlight Edges with Gold Gilding Wax
Gold gilding wax creates elegant, hand-finished details on raised edges.
• Rub gold gilding wax onto raised edges using a gloved finger
• Blend lightly for a soft glow
• Combine with brown wax for farmhouse or antique styles
Fix Mistakes: Remove Paint from Glass
Despite careful masking, paint sometimes gets on the mirror surface.
Use a Razor-Blade Scraper
• Wait until paint is completely dry
• Hold the blade at a low angle of 15 to 30 degrees to avoid scratching
• Gently scrape off paint in short strokes
• Collect shavings with a shop towel
• Clean glass with ammonia-free window cleaner and a lint-free cloth
Never use abrasive pads on glass. They cause permanent scratches.
Seal for Humidity Protection
Sealing is essential in bathrooms, particularly for chalk or matte finishes that lack natural moisture resistance.
Apply Furniture Finishing Wax
• Use clear or dark finishing wax
• Apply with a soft cloth or small brush using circular motions
• Let sit 10 to 15 minutes, then buff lightly for a soft sheen
• Provides a waterproof barrier that resists moisture damage
Always seal chalk paint in bathrooms. Unsealed paint deteriorates quickly in humid conditions.
Reapply Wax Every 1 to 2 Years
For long-term protection, re-wax annually or biannually. Clean with non-abrasive, ammonia-free products and touch up any chips with matching paint before resealing.
Drying and Curing Times
Patience ensures durability. Rushing the process compromises the finish.
| Paint Type | Touch-Dry | Recoat | Full Cure |
|---|---|---|---|
| Chalky Finish | 30 minutes | 4 hours | 24 to 48 hours |
| Oil-Based Enamel | 6 to 8 hours | 24 hours | 7 days |
| Spray Paint | 15 to 30 minutes | 1 hour | 24 hours |
Wait the full cure time before exposing the frame to daily shower steam. Premature moisture exposure causes clouding or peeling.
Avoid Common Mistakes
Steer clear of these pitfalls to ensure a lasting finish.
Skipping Surface Prep
Failure to clean and sand results in paint peeling within weeks. Always clean thoroughly and lightly sand glossy surfaces before painting.
Applying Thick Coats
Thick coats create drips, runs, and uneven texture. Use thin, even layers instead of one heavy coat.
Using the Wrong Paint
Using standard latex on metal or plastic causes flaking. Always use oil-based or all-surface paint formulas.
Inadequate Ventilation
Poor ventilation causes fumes to linger and extends drying time. Open windows or use a fan while painting.
Rushing the Recoat
Applying a second coat too soon causes smudging and poor adhesion. Follow manufacturer drying times exactly.
Real-Life Makeover Examples
These transformations demonstrate how techniques work on actual frames.
Transform a Heavy Floor Mirror
A blue polyurethane-coated wood frame was too heavy to move. The solution involved using Rust-Oleum Protective Enamel with a foam brush. The result was a smooth black finish in one coat with no sanding required due to strong adhesion.
Update a 2005 Metal Frame
A pinkish silver aluminum frame needed to match a new chrome shower screen. After masking, spray painting with universal metallic gray delivered a modern, cohesive look without removal.
Create Vintage Gold Accent
A simple silver metal frame received wooden corner flourishes attached with wood glue. Layering Sunlit Brass and Vintage Gold spray created a custom antique gold finish now serving as a living room focal point.
Maintenance Tips for Longevity
Keep your painted frame looking fresh for years with proper care.
• Clean gently with a damp microfiber cloth
• Avoid harsh chemicals or abrasive sponges
• Reapply wax every one to two years
• Touch up chips promptly to prevent moisture intrusion
• Inspect annually for peeling or water damage
Key Takeaways for Painting Your Bathroom Mirror Frame
Painting a bathroom mirror frame delivers maximum impact with minimal investment. The success of your project hinges on thorough preparation: clean the frame with degreaser, sand glossy surfaces for adhesion, and mask surrounding areas carefully. Choose paint specifically formulated for your frame material, whether oil-based enamel for wood, universal spray for metal, or all-surface paint for plastic. Apply thin, even coats using brush or spray techniques, then seal chalk or matte finishes with furniture wax to protect against humidity. Allow proper cure time before exposing the frame to daily shower use. With these steps, your transformed frame will withstand bathroom conditions while elevating your decor style, whether you prefer modern minimalism or vintage charm.
Frequently Asked Questions About Painting Bathroom Mirror Frames
Can I paint over a sealed or glossy mirror frame?
Yes, but you must sand first. Glossy surfaces like polyurethane or lacquer prevent paint from gripping. Lightly sand with 120 to 220 grit sandpaper to create texture, then clean thoroughly before painting.
What happens if I do not seal chalk paint in a bathroom?
Unsealed chalk paint absorbs moisture from shower steam and deteriorates quickly. This causes water stains, peeling, and a compromised finish. Always apply furniture finishing wax for protection in humid environments.
How long should I wait before using the bathroom after painting?
Wait the full cure time listed on your paint can. Oil-based paints require up to 7 days, while spray paint typically cures in 24 hours. Premature exposure to shower steam causes clouding or peeling.
Can I use a regular roller instead of a brush or spray?
Rollers work for large, flat frames but struggle with detailed edges and recessed areas. A quality brush or spray application provides better coverage on intricate designs.
How do I match my mirror frame to existing bathroom fixtures?
Choose paint colors that complement your fixtures. Metallic spray paints like Rust-Oleum Universal in silver or brass coordinate with chrome and gold hardware. Test samples on cardboard first to confirm the match.


