Turning plain glass into a mirror sounds like something only a factory can do, but you can achieve impressive results at home with the right spray paint and technique. The secret lies in using mirror-effect spray paint applied to the back of the glass, where the smooth front surface stays untouched to deliver a clear reflection. This method works beautifully for old doors, salvaged windows, picture frames, or any decorative project you have in mind.
This guide covers two distinct finishes: a high-reflectivity mirror for modern spaces and a vintage distressed look that mimics aged antique glass. You’ll get exact materials lists, step-by-step procedures, and pro tips to avoid splotches, transparency, and ruined textures. With one can of spray paint, basic prep supplies, and a few hours, you can transform any glass pane into a functional mirror.
Prepare the Glass Surface for Painting
Clean the Glass Until Spotless
Any oil, dust, or fingerprint will show up as a flaw in your finished mirror. Start by removing the glass from its frame if possible, which gives you full access to the edges and back. Wipe both sides with a commercial glass cleaner like Windex, or use a damp cloth followed by a dry, lint-free towel. Pay close attention to corners and edges where grime tends to collect.
Once cleaned, let the glass air-dry completely. Moisture left behind interferes with paint adhesion and can ruin the chemical reaction in the antique method. Work in a low-dust environment to prevent particles from settling on the surface. If the glass has been stored for a while, do a second wipe-down right before spraying to catch any new dust.
Set Up an Outdoor Workspace
Spray paint fumes are strong and potentially hazardous, so always work outdoors or in a well-ventilated area. Lay the glass flat on a raised, clean surface like sawhorses or a workbench so you can spray the back without touching the painted side. Cover the surrounding area with a drop cloth or cardboard to catch overspray. Make sure the glass is stable and won’t shift during application.
Avoid windy days, since gusts disrupt the spray pattern and create uneven coverage. Keep all materials within reach: spray paint, vinegar solution (if distressing), paper towels, and gloves. Shake the can of mirror paint vigorously for at least one minute before use. Having everything ready ensures a smooth, uninterrupted process.
Apply Mirror Spray Paint to the Back
Spray the Back Side Only
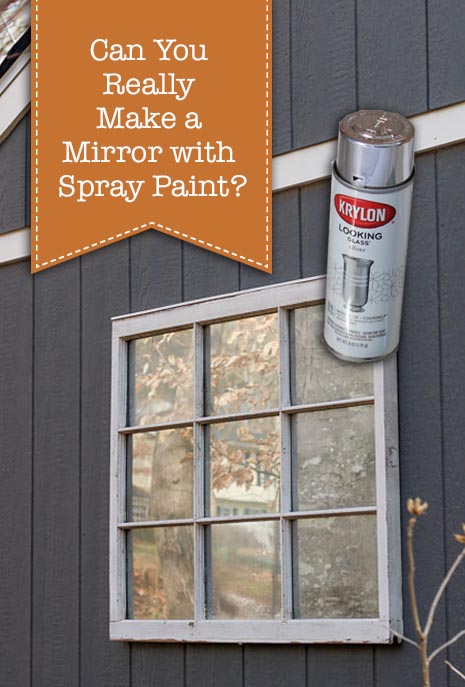
This is the most important rule: always apply the paint to the back of the glass. The front, the side you look at, must remain untouched. The glass itself acts as a protective layer. When you spray the back and flip the pane over, the smooth front surface reflects your image clearly while the painted side stays shielded from scratches and moisture.
To avoid confusion, label the sides if needed. Position the glass with the back facing up. Use Krylon Looking Glass Spray Paint or a similar mirror-effect aerosol. These paints contain metallic pigments that mimic the silvered backing of commercial mirrors. Hold the can 8 to 12 inches from the surface and apply a light, even coat in sweeping motions. Don’t oversaturate; thick globs lead to drips and splotches.
Build Up Multiple Thin Coats
One coat won’t cut it. For a truly opaque, reflective finish, you need 7 to 8 thin layers. The manufacturer may suggest 5, but real-world testing shows this often leaves the glass semi-transparent, especially on larger pieces like doors or windows.
After the first coat, wait 15 to 20 minutes for it to dry completely before adding the next. Never recoat while the paint is still wet; this is the top cause of splotchy, uneven finishes. Inspect the surface after each layer. If you can still see through, keep going. Each additional coat builds reflectivity and blocks more light. For best results, apply the paint in a crisscross pattern with horizontal then vertical passes to ensure full coverage without pooling.
Create a Vintage Mirror Effect with Vinegar
Mix the Vinegar Solution
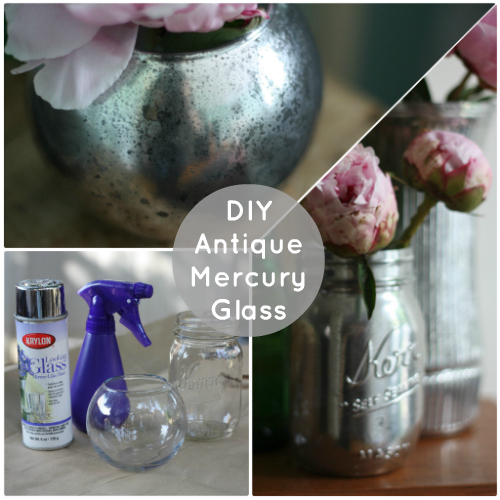
Want an aged, antique look with mottled reflections and subtle transparency? Use the vinegar distressing method. This technique leverages a chemical interaction between the spray paint and a 50/50 vinegar-water solution to create natural-looking wear patterns.
Mix equal parts white vinegar and water in a spray bottle. Shake well. This solution won’t dissolve the paint but will disrupt its adhesion when dabbed, creating soft, clouded spots that mimic decades-old mirrors. The result is a mirror that reflects with character, perfect for farmhouse, shabby-chic, or vintage decor.
Mist and Dab for an Aged Appearance
Start with a clean, dry glass pane. Lightly mist the back side with the vinegar solution, just enough to create fine droplets, not a soaking wet surface. Immediately follow with a light spray of mirror paint over the damp areas. Let it sit for about 60 seconds so the vinegar can interact with the paint.
Now take a clean, dry paper towel and gently dab the surface. Do not rub; this smears the paint and ruins the effect. Dabbing lifts the vinegar and some paint, leaving behind soft, irregular patches where the mirror effect is reduced. These areas become the “aged” spots, creating depth and dimension.
Repeat this cycle (mist, spray, wait, dab) 3 to 4 times. Each layer enhances the vintage look and builds complexity in the reflection. Flip the glass when done. The front will show a beautifully weathered mirror while the back remains textured and dull.
Assemble the Frame Securely
Trace the Glass on the Frame
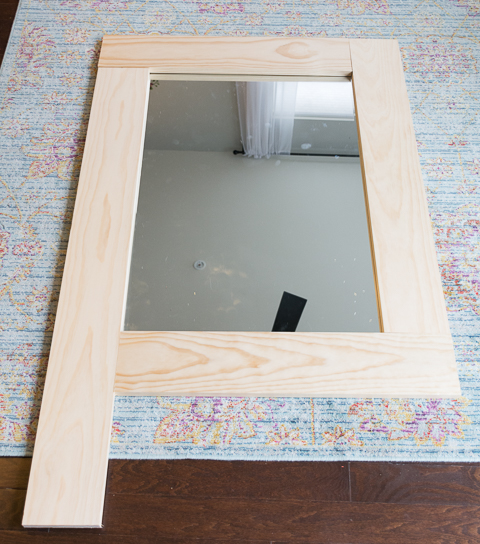
If you’re installing your DIY mirror into a frame, especially an upcycled one like an old door or window, the glass might not fit perfectly. Standard glazing points won’t hold if the pane is slightly smaller. That’s where adhesive assembly comes in.
First, prepare the frame. Paint it with acrylic craft paint if desired and let it dry. Place the finished mirror into the frame and trace the outer edge of the glass onto the frame’s lip using a pen. Do this twice to ensure a clear, visible guide. This line marks where the glue will go, ensuring the glass sits flush and centered.
Glue and Weight Overnight
Apply a continuous bead of glass-compatible adhesive along the traced line. Use a strong, clear-drying glue designed for bonding glass to wood or metal. Don’t skimp; this bond supports the entire weight of the mirror.
Carefully place the glass into the frame, aligning it with the glue line. Press down firmly for about 60 seconds to establish initial contact. Then place heavy, flat weights like books or bricks across the surface to maintain even pressure. Distribute the weight to avoid cracking.
Let it cure overnight. Even if the glue claims to set in minutes, full structural strength takes time. Avoid moving or handling the piece during this period. Once cured, your mirror is ready to hang, secure, stable, and fully functional.
Troubleshoot Common DIY Mirror Problems
Fix Splotchy or See-Through Finishes
Splotches usually mean you recoated too soon. Each layer must be fully dry before the next; rushing causes bubbling and uneven texture. If your mirror looks patchy, wait several hours, then apply another thin coat.
If you can see through the glass, you didn’t use enough paint. Standard mirrors need 7 to 8 coats for full opacity. Keep layering until the background disappears. For vintage mirrors, some transparency is intentional, but if it’s too faint, add more base coats before distressing.
Prevent Smudging and Wrong-Side Spraying
Smudged distressing happens when you rub instead of dab. Always use a light, blotting motion with a fresh paper towel. If the towel gets saturated, replace it.
Spraying the front by mistake is a common beginner error. The result is a rough, dull surface with poor reflection. Unfortunately, this can’t be fixed; you must strip the paint and restart on the back side. Double-check orientation before spraying.
Maintain and Protect Your Homemade Mirror
Clean Only the Front Surface
Never clean the painted back side. It’s delicate and can scratch or peel. Always clean only the front glass surface using a standard glass cleaner and a soft, lint-free cloth. Avoid ammonia-heavy or abrasive cleaners that could degrade the paint over time.
For bathrooms or humid areas, this DIY mirror isn’t ideal unless sealed. The paint may degrade with constant moisture. If used in such spaces, consider framing it with a moisture barrier or installing it in a well-ventilated area.
Avoid Scratches During Handling
When moving or weighting the glass, never slide objects across the surface. Use felt pads or cloth under weights to prevent scratches. Store the mirror face-up when not in use. With proper care, your homemade mirror can last for years as a striking, conversation-starting piece.
Frequently Asked Questions About Turning Glass into a Mirror
What kind of spray paint turns glass into a mirror?
Krylon Looking Glass Spray Paint is the most commonly recommended product. It’s a mirror-effect aerosol containing metallic pigments that mimic the silvered backing of commercial mirrors when applied to the back of glass.
How many coats of spray paint do you need to make a mirror?
You need 7 to 8 thin coats for full opacity and maximum reflectivity. While the manufacturer may recommend 5, real-world testing shows that fewer coats often leave the glass semi-transparent, especially on larger surfaces.
Can you make a mirror without silver nitrate?
Yes. Modern mirror-effect spray paints use metallic pigments rather than silver nitrate or mercury. These aerosols create a reflective surface when applied to the back of glass, making the process safe and accessible for DIY projects.
How do you make glass look like an antique mirror?
Use the vinegar distressing method. Mix equal parts white vinegar and water, mist it onto the back of the glass, then spray a light coat of mirror paint over it. After 60 seconds, dab (don’t rub) with a paper towel. Repeat 3 to 4 times for a mottled, aged appearance.
How long does a spray-painted mirror last?
With proper care, a DIY spray-painted mirror can last for years. Keep it out of high-humidity environments like bathrooms unless sealed, clean only the front surface, and avoid scratching the painted back during handling or installation.
Can you spray paint the front of glass to make a mirror?
No. Spraying the front creates a rough, textured surface with poor reflection. The paint must go on the back of the glass so the smooth front acts as a protective layer and delivers a clear reflection.
Key Takeaways for Creating a DIY Mirror from Glass

You now have a complete roadmap for turning any glass pane into a mirror, whether you want a sleek modern finish or a beautifully aged vintage look. The process hinges on three essentials: spraying the back side only, applying 7 to 8 thin coats for full opacity, and letting each layer dry completely before adding the next. For antique effects, the vinegar dabbing technique creates authentic-looking wear patterns without specialized tools.
Your next step is gathering your materials: Krylon Looking Glass Spray Paint, glass cleaner, a drop cloth, and your glass pane. Set aside a few hours in a well-ventilated space, and you’ll have a custom mirror ready to frame, hang, or display by the end of the day.