
A broken mirror can feel like a disaster. It ruins your bathroom or bedroom aesthetic, creates a safety hazard, and leaves you wondering whether to repair or replace it. Whether you have a hairline crack from thermal stress or a shattered antique in a custom frame, knowing how to fix a broken mirror properly saves money and stress. This guide covers every repair method from quick cosmetic fixes to permanent solutions, plus when replacement is your safest bet.
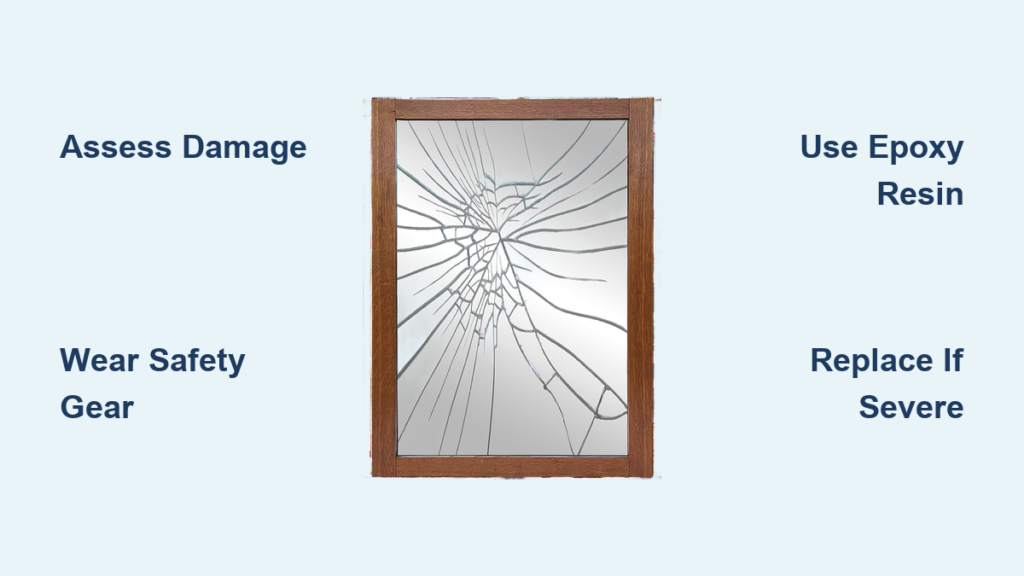
Assess the Damage First
The first step is understanding exactly what you are dealing with. Your repair approach depends entirely on the type and severity of the break.
Identify Crack Types
Look closely at the damage to determine what you are working with.
• Hairline cracks are thin, barely visible lines that often stay stable
• Edge chips are small missing pieces along the border that rarely affect function
• Spiderweb cracks form branching patterns that weaken the entire structure
• Shattered glass means pieces are loose or displaced, requiring full replacement
Visual cue: If the reflection looks distorted or pieces shift when touched, the mirror is structurally compromised.
Classify Damage Severity
| Damage Level | Signs | Repair Possible? |
|---|---|---|
| Minor | Hairline crack, edge chip, no movement | Yes |
| Moderate | Crack up to 6 inches, slight discoloration | With epoxy support |
| Severe | Webbed pattern, loose shards, warping | Replace recommended |
Safety First: Protect Yourself
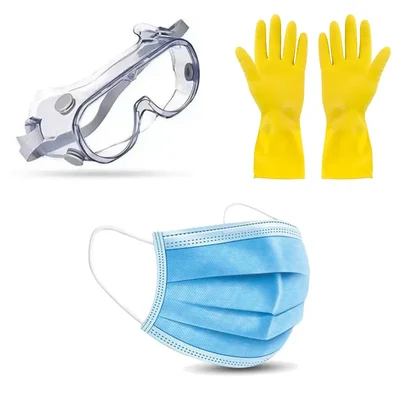
Working with broken glass demands proper precautions. Never skip safety steps, even for seemingly small repairs.
Wear Protective Gear
• Cut-resistant gloves prevent deep cuts from jagged edges
• Safety goggles shield eyes from flying glass fragments
• Respirator masks are needed when sanding, spraying paint, or using resins
• Long sleeves and closed-toe shoes minimize skin exposure
Prepare Your Workspace
• Work on a flat, soft surface like a towel or cardboard
• Lay down plastic sheeting to catch falling fragments
• Keep children and pets away from the area
• Dispose of glass waste properly by wrapping in paper and labeling it
When to Repair vs. Replace

Not every broken mirror needs replacing, but most professionals recommend replacement for safety reasons.
Repair If the Mirror Has These Qualities
• The crack is small and stable, under 3 inches
• The mirror has sentimental or antique value
• It is part of a custom frame you want to preserve
• You are creating decorative art from the damage
Replace If You Notice These Issues
- Crack is large or spreading. Risk of sudden shattering increases over time.
- Mirror shows aging signs. Black spots, cloudiness, or yellow edges mean the reflective backing is failing.
- Safety is a concern. Especially in bathrooms, kids rooms, or high-traffic areas.
- Frame is damaged. Warped or broken frames cannot hold new glass securely.
- Design no longer fits. Outdated style means replacement offers an upgrade opportunity.
DIY Fix: Super Glue Method
This method works best for small cracks or reassembling two large pieces, especially in older mirrors.
Tools You Will Need
• Glass-bonding super glue
• Lint-free cloth
• Masking tape
• Razor blade
• Cut-resistant gloves
Step-by-Step Repair
- Lay the mirror face down on a soft towel
- Align broken edges carefully
- Tape the front side across the crack to block glue seepage
- Flip and apply glue along the back of the crack
- Press pieces together and hold for 30 seconds
- Let cure for 12 to 24 hours
- Remove tape and gently scrape front-side excess with a razor at a shallow angle
Note: This method holds pieces but does not restore strength. Expect the crack to remain visible.
Quick Fix: Clear Nail Polish
A temporary cosmetic touch-up works only for tiny, stable hairline cracks.
What You Need
• Clear nail polish
• Microfiber cloth
How to Apply
- Clean the area with a lint-free cloth
- Brush on a thin coat over the crack, extending slightly beyond edges
- Wait 2 to 4 hours to dry
- Add 2 to 3 more layers if needed
- Wipe off overflow with a cotton swab
Best for: Decorative mirrors not used daily.
Strong Fix: Epoxy Resin Adhesive
For durable, long-lasting repairs on cracks up to several inches, epoxy provides the best balance of strength and clarity.
Supplies
• Two-part epoxy rated for glass
• Mixing tool
• Clear tape or aluminum foil
• Lint-free cloth
Repair Steps
- Clean the surface thoroughly
- Trace the crack path for accuracy
- Tape the back behind the crack to prevent leaks
- Mix epoxy per manufacturer instructions
- Apply with fine tip to fill the entire fissure
- Press edges together and clamp lightly
- Wait 24 hours to fully cure
Pro tip: Choose UV-resistant epoxy if the mirror gets direct sunlight.
Restore Reflectivity: Aluminum Foil Patch
Use this when the backing is damaged but the glass surface is intact.
Tools
• Shiny aluminum foil
• Clear tape
• Screwdriver or pliers
How to Patch
- Remove mirror from frame safely
- Cut foil slightly larger than the damaged spot
- Place shiny side down against the back of the glass
- Secure with clear tape
- Reinstall in frame with backing board
Note: This will not fix cracks but restores shine where silvering has peeled.
Fix with Reflective Paint
Ideal for scratches that have not broken the glass but have ruined reflectivity.
Materials
• Mirror-specific reflective paint
• Soft cloth
• Dark backing material
• Clear tape
Application Steps
- Take glass out of frame
- Clean the damaged area completely
- Apply 2 to 3 thin coats of paint, letting dry between layers
- Place dark backing behind painted zone to block light
- Reassemble securely
Creative Fix: Pigmented Resin Art Restoration
Turn a flaw into a feature by transforming damage into modern art.
Supplies
• Two-part pourable resin
• Metallallic pigment
• Hot glue gun
• Glass cutter
• Pliers
• Black silicone sealant
How to Transform
- Remove backing and disassemble frame
- Lay pieces in original layout and take a photo first
- Score broken edges with glass cutter and nibble with pliers
- Elevate each fragment with hot glue dots
- Mix resin with catalyst and pigment
- Pour into gaps and let it seep under elevated glass
- Seal edges with black silicone
- Cure 24 to 48 hours undisturbed
Final look: A modern, abstract mirror with glowing metallic veins.
Compare All Repair Methods

| Method | Best For | Visibility | Strength | Longevity |
|---|---|---|---|---|
| Super Glue | Small cracks | High | Moderate | Months to years |
| Nail Polish | Hairline cracks | High | None | Days to weeks |
| Epoxy Resin | Medium cracks | Low to Moderate | High | Years |
| Aluminum Foil | Lost reflectivity | High | None | Temporary |
| Reflective Paint | Surface damage | Moderate | None | 1 to 2 years |
| Pigmented Resin | Artistic upgrade | High | High | Permanent |
How to Replace a Broken Mirror
When repair is not safe or effective, replacement is the smarter choice.
Step 1: Measure Accurately
• Use a tape measure for height, width, and thickness
• Measure twice for accuracy
• For odd shapes, trace the outline on paper
• Note if frame requires removing top and one side for insertion
Step 2: Buy New Glass
• Standard glass costs $20 or less at home improvement stores
• Tempered glass offers stronger, safer break patterns
• Acrylic mirror is shatterproof and lightweight, great for kids rooms
• Custom shops can cut any size or shape
Step 3: Remove Old Mirror
• Wear gloves and goggles
• Disassemble frame carefully
• Lift out fragments gently
• Clean frame and backing board
Step 4: Install New Mirror
• Insert glass with reflective side out
• Reattach frame parts
• Secure with nails, clips, or adhesive
Debunked Common Mirror Repair Myths
| Myth | Reality |
|---|---|
| Toothpaste fixes cracks | False. It only polishes micro-scratches on surfaces. |
| Super glue is permanent | False. It yellows over time and weakens with UV exposure. |
| All cracks can be invisible | False. No DIY method removes visibility completely. |
Maintenance Tips to Prevent Future Breaks
Avoid repeat issues with proactive care.
• Avoid temperature shocks. Do not place mirrors near radiators or cold drafts.
• Clean gently. Use ammonia-free cleaners and soft cloths.
• Inspect regularly. Check for spreading cracks or loose mounting.
• Reinforce risky zones. Apply clear tape behind mirrors in gyms or kids rooms.
Key Takeaways for Fixing Your Broken Mirror
• For minor damage like hairline cracks, epoxy resin offers the best balance of cost, clarity, and durability.
• For major breaks including large or spreading cracks, replacement is safer, clearer, and often cheaper long-term.
• For creativity and sentimental pieces, colored resin transforms a broken mirror into custom wall art.
• For prevention, handle with care, avoid thermal stress, and pad high-risk areas.
In most cases, replacement is the standard solution, but repair remains a smart, budget-friendly option for small issues or artistic reinvention. Whether you are fixing, replacing, or upcycling, you now know exactly how to handle a broken mirror safely and successfully.
Frequently Asked Questions About Fixing Broken Mirrors
Can you fix a cracked mirror without replacing it?
Yes, small hairline cracks can be temporarily repaired using super glue, clear nail polish, or epoxy resin. However, these repairs stabilize the crack rather than eliminate it. The crack will remain visible, and structural strength is not fully restored.
What is the best adhesive for repairing a cracked mirror?
Two-part epoxy resin rated for glass provides the strongest and most durable repair. Super glue works for temporary fixes, while clear nail polish is only a cosmetic solution for hairline cracks.
How long does a DIY mirror repair last?
It depends on the method. Epoxy repairs can last several years with proper application. Super glue repairs last months to years but may yellow over time. Nail polish repairs last only days to weeks.
Does toothpaste really fix mirror cracks?
No. This is a common myth. Toothpaste may polish micro-scratches on the surface but cannot repair structural cracks in glass. It provides no structural reinforcement.
When should I definitely replace instead of repair a mirror?
Replace if the crack is large or spreading, if the mirror shows aging signs like cloudiness or black spots, if it is in a high-traffic area with safety concerns, or if the frame is damaged. Professional replacement is often safer and more cost-effective for severe damage.


