
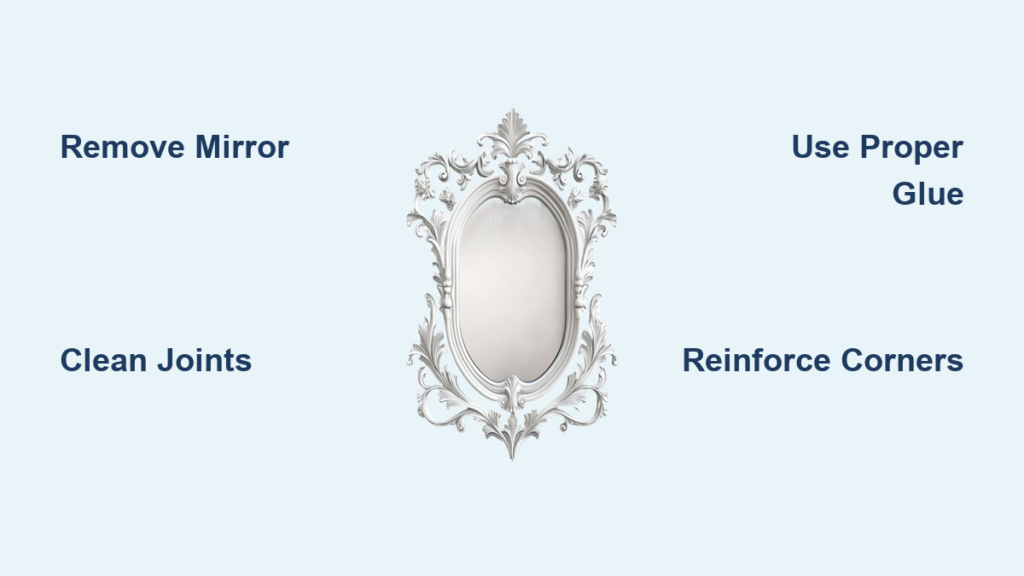
A loose or broken mirror frame isn’t just unsightly—it can become a safety hazard if the glass shifts or falls. Whether it’s a vintage bathroom mirror, a cherished heirloom, or a modern decorative piece, fixing a mirror frame is often simpler and more affordable than replacement. This guide walks you through every step, from diagnosing joint failure to rehanging a fully repaired frame, using proven techniques from woodworking and restoration experts. You’ll learn how to choose the best adhesive, clamp tricky corners, reinforce weak joints, and achieve professional results.
Assess Frame Material and Damage
Before grabbing glue or clamps, inspect the frame to determine the best repair strategy.
Identify the Frame Type
Wood frames are common in antiques and mid-century designs. Look for mitered corners and glue lines. Resin or plastic moldings are lightweight modern frames often held with staples, and they crack easily at stress points. Metal-reinforced frames may have internal brackets or L-braces at corners, common in pivoting or wall-mounted mirrors.
Tap the frame lightly. A hollow, brittle sound may indicate dry rot or failed joints.
Check for Common Failure Signs
Gaps appear at corners, especially when pressed. Visible staple or nail holes form near joints. The mirror shifts inside the frame. Warping, bowing, or twisting of frame members occurs. Previous glue squeeze-out or messy silicone seals are present.
If one corner is loose, inspect all four. Wood movement and aging often affect multiple joints.
Remove Mirror and Backing Safely
Working with the mirror in place risks breakage and limits access to joints.
Step-by-Step Removal
Lay the frame face down on a soft towel or foam pad. Remove fasteners by using side cutters to pull out staples securing the backing, and unscrew any nails or clips holding the back panel. Gently pry off the backing board, which is typically cardboard, fiberboard, or thin plywood. Carefully remove the mirror by pressing inward on retaining clips or metal tabs and sliding the glass out slowly without twisting or bending. Set the mirror aside on a flat, protected surface.
Wear gloves and eye protection. Even small chips can cause injury.
Clean and Prepare Damaged Joints
Glue won’t bond to old adhesive or dust. Clean joints are essential for a lasting repair.
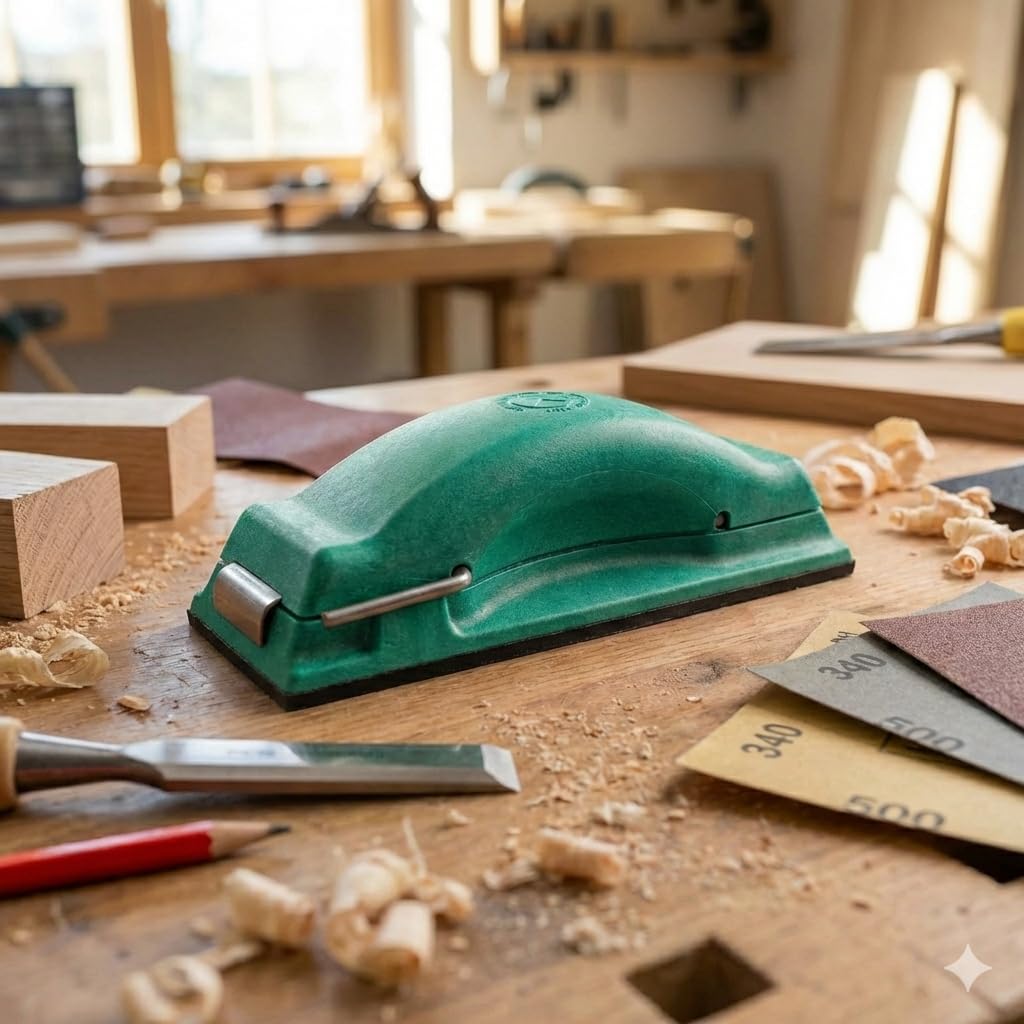
Tools for Joint Cleaning
Use sharp chisels or dental picks to dig out dried glue. A carbide scraper or wire brush roughens surfaces effectively. A heat gun on low setting softens stubborn adhesive. Fine sandpaper between 120 and 220 grit smooths splinters.
Cleaning Process
Expose both mating surfaces of the broken joint. Scrape out all residue until bare wood is visible. Lightly abrade surfaces to improve glue adhesion. Wipe clean with a dry cloth or tack cloth.
Save fine wood dust from scraping. Mix with glue later to fill small gaps with a color-matched filler.
Choose the Right Adhesive
The wrong glue can fail quickly. Match the adhesive to the frame type and environment.
Best Glue Options
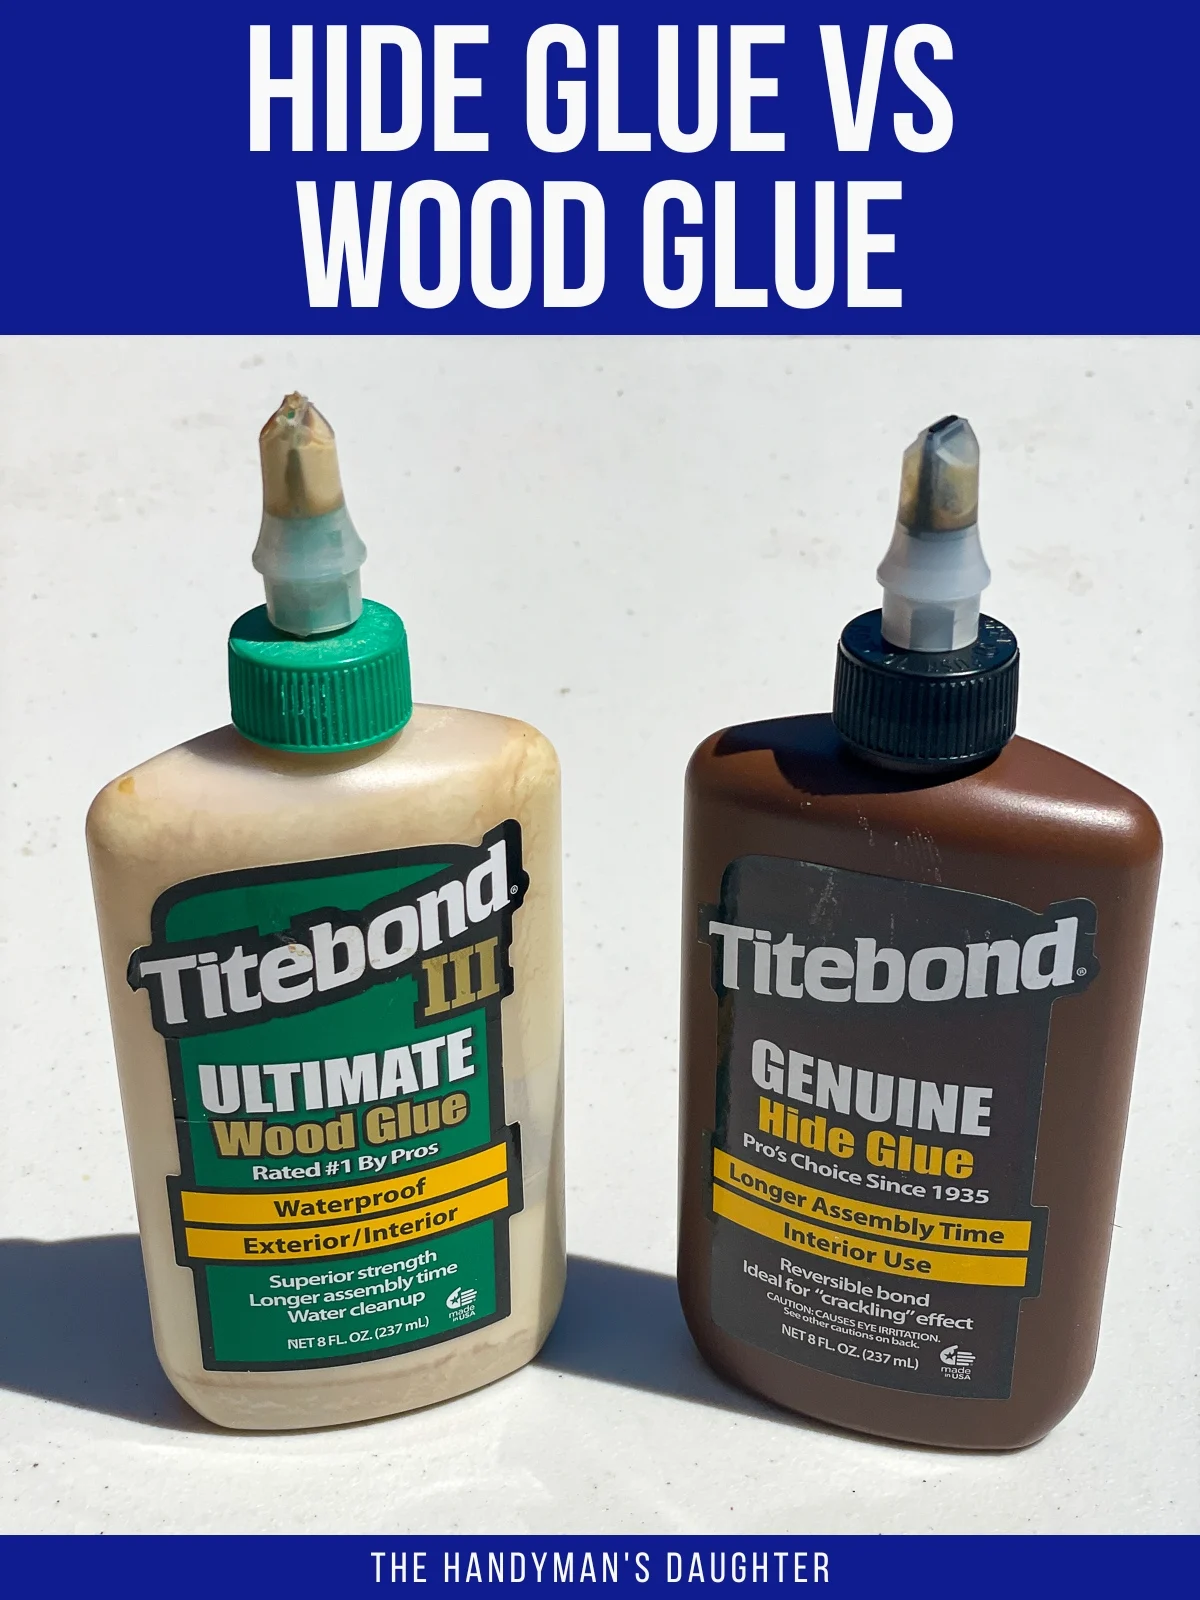
PVA yellow wood glue works well for standard wood frames. It has an 8 to 12 hour cure time and offers easy cleanup with a strong bond.
Titebond III provides water resistance for bathrooms and humid areas. It takes 12 hours to cure and resists moisture swelling.
Hide glue suits antiques and heirlooms. It cures in 6 to 8 hours and remains reversible for future repairs.
Epoxy fills voids on resin, composite, or gapped joints. It cures in 24 hours and provides very strong bonds.
Construction adhesive handles metal-reinforced frames. It takes 24 hours to cure and tolerates stress and movement.
Avoid silicone for structural repairs. It’s flexible but not strong enough for joints.
Reassemble and Clamp the Frame
Proper clamping ensures tight, square joints and prevents future separation.
Clamp Options for Different Frames
Use miter clamps for flat profiles on standard wood frames with clean edges. Apply even pressure across the corner and pad jaws with wood blocks to prevent marring.
Try a ratchet strap for bulky or molded frames. Wrap the strap around the entire frame and tighten gradually to avoid racking. Check for squareness with a ruler or speed square. Place a small corner clamp at each joint under the strap for precise alignment.
Use zip ties or string as a no-tool option. Wrap tightly around the frame after gluing and twist a screwdriver in the loop to increase tension. Secure ends with tape or knots.
Don’t overtighten. This can distort the frame or crack the wood.
Clamping Time by Glue Type
PVA glue requires 8 to 12 hours of clamping time. Hide glue needs 6 to 8 hours. Epoxy and construction adhesive require 12 to 24 hours.
Leave clamps on overnight. Rushing the cure risks weak joints.
Reinforce Weak Corners
Even a perfect glue job can fail under stress. Mechanical reinforcement adds long-term strength.
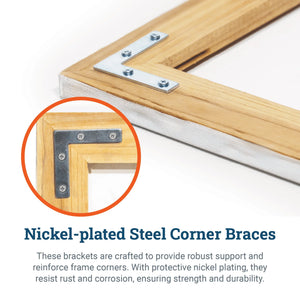
Install Metal Corner Brackets
Position a small L-bracket on the back of each corner. Align with existing screw holes if possible. Pre-drill pilot holes to prevent splitting. Secure with short wood screws between 1/4 inch and 1/2 inch.
Use brass or coated screws to resist corrosion in humid bathrooms.
Add Dowels or Splines for Heavy Frames
Drill aligned holes across the joint. Insert dowels coated in glue. Trim and sand flush after curing.
Re-Staple or Nail Modern Frames
After glue cures, reinsert staples at original points. Use channel locks and a block of wood to drive nails without hammer marks.
Reinforcement is critical for mirrors over 20 pounds or those subject to vibration.
Reinstall the Mirror Securely
A loose mirror defeats the purpose of frame repair. Secure it properly.
Step-by-Step Reinstallation
Insert spacers by cutting cardboard or foam strips at 1/8 inch thick. Place them at the top, bottom, and sides to allow for expansion. Center the mirror in the frame. Secure edges by reusing original clips, screws, or nails. For staple-free frames, use fine 5/8 inch nails driven with channel locks and a scrap wood block.
Optional Silicone Sealant
Apply a thin bead of clear silicone along the inner lip. Press mirror gently into place. Smooth excess with a damp finger. Wipe off squeeze-out with a razor blade after curing.
Silicone takes 24 hours to cure. Don’t hang the mirror until fully set.
Replace or Reattach Backing Board
The backing stabilizes the frame and protects the mirror.
Cut new backing if damaged using cardboard, hardboard, or 1/8 inch plywood. Align with original orientation, checking for wiring or label placement. Secure with original nails or screws, or use masking tape for future access. Avoid permanent glue unless restoring an antique.
Tape allows easy access if the mirror ever needs replacement.
Refinish and Clean the Frame
Restore appearance with minimal effort.
Paint or Seal
Lightly sand glossy surfaces for better adhesion. Wipe with a tack cloth to remove dust. Apply gloss paint for moisture resistance, ideal for bathrooms. For vintage charm, leave slight imperfections or layer paint for a distressed look.
Clean the Glass
Spray with glass cleaner and wipe with a lint-free cloth. Final polish with methylated spirits and newspaper for a streak-free shine.
Newspaper prevents lint and leaves a clearer finish than paper towels.
Reattach Moldings and Trim
Many frames have decorative plastic or wood strips that snap back into place.
Align molding carefully before pressing in. Use a rubber mallet or block of wood to tap gently. Apply a tiny drop of wood glue only if a section won’t stay.
Don’t over-glue. This can stain the wood or make future repairs harder.
Install Hanging Hardware
A repaired frame must be hung safely to prevent future damage.
Measure 4 inches down from the top inner edge. Mark three screw points for stability. Pre-drill holes using a depth-stopped bit to avoid piercing the front. Install screws by hand or with a slow drill to prevent stripping. Reattach hanging wire by tightening one end, cutting to length, twisting ends together, and covering the twist with electrical tape to protect walls.
Use two D-rings instead of wire for heavy mirrors. They’re more secure and cause less sag.
Special Cases for Different Frame Types
Tailor your approach to the frame’s unique construction.
Fix Antique or Heirloom Frames
Use hide glue for authenticity and reversibility. Match wood tone with glue and wood dust filler. Avoid power tools to preserve original craftsmanship.
Repair Resin or Composite Frames
Clean joints with isopropyl alcohol. Roughen surfaces with sandpaper. Use epoxy for strong, flexible bonds.
Handle Metal-Reinforced Frames
Use construction adhesive where metal meets wood. Re-tighten screws but avoid over-torquing. Check for rust or stripped threads.
Tools and Materials Checklist
Must-Have Tools
Fine screwdriver, side cutters or nail pliers, chisels and scrapers, clamps including miter, strap, or ratchet styles, channel locks, heat gun for optional use, tack cloth, caulk gun, and razor blade scraper.
Essential Materials
PVA wood glue with Titebond III recommended, hide glue for antiques, epoxy for resin or composite, construction adhesive for metal joints, silicone sealant for edge retention, metal corner brackets, 5/8 inch fine nails, cardboard spacers, backing board, gloss paint, and masking and electrical tape.
Why Repair Beats Replacement
Fixing a mirror frame isn’t just practical. It’s sustainable.
Cost to replace a mirror runs over $100. Cost to repair runs under $20 for glue, brackets, and spacers. Repairing reduces landfill waste and saves manufacturing resources.
By repairing, we preserve both the object and the effort that went into making it.
Key Takeaways for Fixing Your Mirror Frame
Always remove the mirror first. Safety and access matter. Clean joints thoroughly because glue won’t stick to old residue. Clamp overnight. Patience ensures strength. Reinforce corners, especially on large or heavy mirrors. Preserve original hardware to maintain character and value. Use quality tools. A sharp chisel or good clamp makes all the difference.
With attention to detail and the right method, fixing a mirror frame transforms a broken item into a renewed functional piece. Whether it’s a daily-use bathroom mirror or a family keepsake, a proper repair extends its life and its story.
Frequently Asked Questions About Fixing Mirror Frames
Can I fix a mirror frame without removing the mirror?
Removing the mirror is strongly recommended. Working with the mirror in place limits access to joints and risks breaking the glass. Frame repair requires full exposure of all four corners for proper cleaning, gluing, and clamping.
What is the best glue for bathroom mirror frames?
Titebond III water-resistant PVA is ideal for bathroom environments. It resists moisture and prevents joint failure from humidity. Standard PVA works for dry areas, but moisture-resistant formulas last longer in bathrooms.
How do I fix a cracked corner on a resin mirror frame?
Clean the cracked surfaces with isopropyl alcohol. Roughen both sides with fine sandpaper. Apply epoxy to both surfaces and press together firmly. Clamp for 24 hours until fully cured. Epoxy fills gaps and provides flexibility for resin frames.
Should I use silicone to glue mirror frame joints?
No. Silicone sealant works only for securing mirror edges, not for structural joint repairs. It remains too flexible to hold joints tight. Use wood glue, hide glue, epoxy, or construction adhesive depending on frame material.
How much does it cost to repair a mirror frame versus replacing it?
Repair costs under $20 for glue, brackets, and basic materials. Replacement mirrors cost $100 or more. Repair also preserves sentimental or antique value that replacement cannot match.
Can I repair an antique mirror frame without damaging it?
Yes. Use hide glue for antiques because it remains reversible. Apply heat and moisture to undo repairs if needed later. Avoid permanent epoxies or construction adhesives on heirloom pieces.


