
A mirror with dark, flaky spots creeping in from the edges isn’t just unsightly, it’s a sign of mirror back damage, often called mirror rot or desilvering. This common issue happens when moisture penetrates the protective layers on the back of the mirror, causing the reflective coating to oxidize and peel. If you’re seeing black borders, brown discoloration, or transparent patches where light shines through, you’re dealing with degraded backing. The good news? Depending on the extent of the damage, you can fix the back of a mirror using simple DIY methods or professional restoration. This guide walks you through every practical solution, from quick foil patches to full re-silvering, so you can decide whether to repair, restore, or replace your mirror.
Assess Mirror Damage Before Repair
Before attempting any fix, determine if repair is even possible. Not all mirror damage can be reversed, and some situations call for replacement instead.
Check for Glass Integrity
Inspect the front surface carefully. If the glass is cracked, chipped, or warped, no backing repair will make it safe or functional. Structural damage means replacement is the only safe option. Even if the back looks salvageable, compromised glass poses a risk of shattering.
Identify Backing Damage Type
Look at the back of the mirror (remove it from the wall or frame if needed). Common signs include:
- Black edges or spots, indicating early-stage oxidation
- Flaking silver layer, signaling advanced delamination
- Rust-like discoloration, meaning moisture has reached the metal coating
- Clear areas where the reflective coating has completely worn away
Damage starting at the edges and spreading inward is typical of humidity exposure. Central damage often indicates poor storage or physical impact instead.
Decide: Repair or Replace
Use this quick decision guide:
- Repair if: Glass is intact, damage is minor, or the mirror has sentimental or custom value.
- Replace if: Over 30% of the surface is damaged, the glass is cracked, or the mirror is inexpensive and mass-produced.
Pro tip: For modern bathroom mirrors, replacing the glass panel at a local glass shop often costs under $100 and looks better than a patch job.
Patch Small Spots with Aluminum Foil
For tiny areas where the backing has been scraped off, aluminum foil is a fast, cheap fix that uses items you already have at home.
Apply Foil Correctly
- Cut a piece of standard kitchen foil slightly larger than the damaged spot.
- Place it on the back with the shiny side facing out for best reflectivity.
- Smooth out wrinkles and bubbles.
- Secure with clear packing tape or transparent adhesive.
Limitations to Know
This method works only on small, isolated spots. The tape may yellow over time, especially in humid bathrooms. The solution isn’t waterproof, so avoid using it in steam-prone areas unless sealed with additional protection.
Expert note: This method hides damage from the front but won’t restore true reflectivity. It’s best for temporary fixes or spots that won’t be visible.
Restore Reflectivity with Mirror Spray Paint
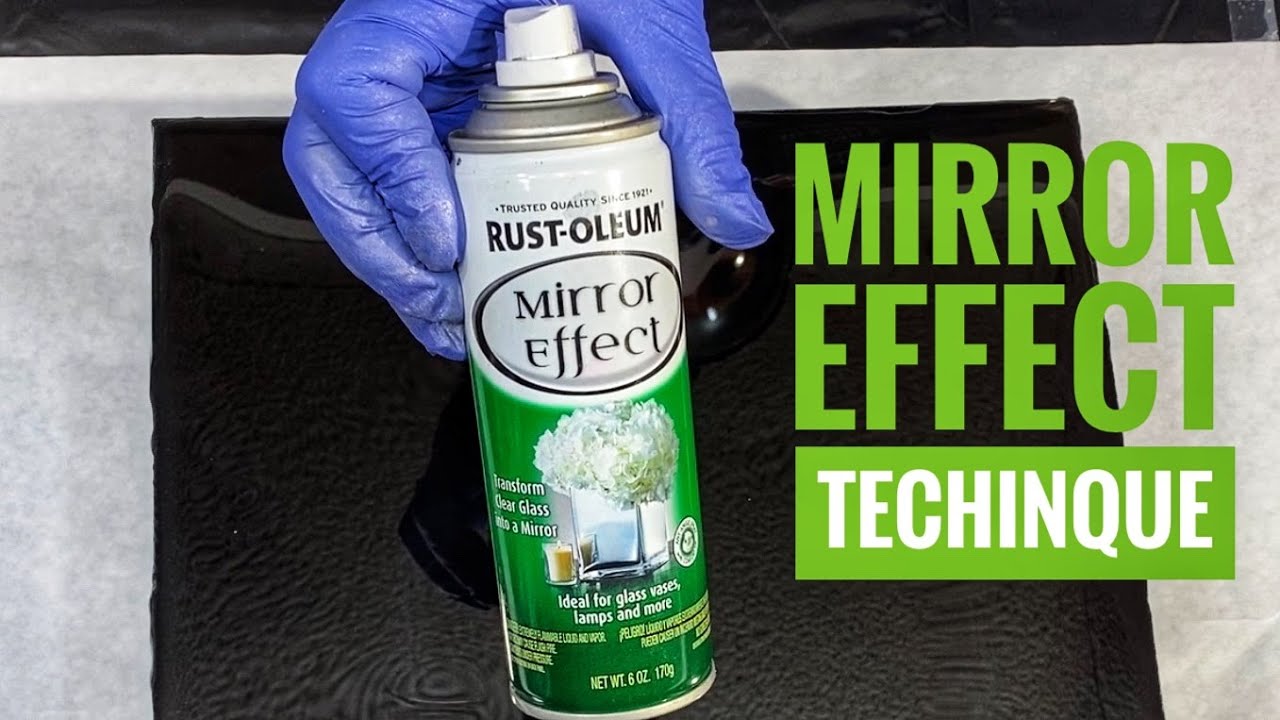
For multiple spots or widespread paint loss, mirror-effect spray paint offers a durable upgrade over foil and costs less than $20.
Use Rust-Oleum Mirror Finish Spray
This specialty paint mimics real silver backing and works on both bare glass and damaged areas.
Steps to Apply
- Remove the mirror from its frame or wall.
- Clean the back with isopropyl alcohol to remove grease and residue.
- Mask off surrounding areas with painter’s tape.
- Shake the can for 1 minute.
- Spray thin, even coats from 8 to 12 inches away.
- Wait 10 to 15 minutes between coats.
- Apply 2 to 3 coats for full coverage.
- Let dry overnight before reinstalling.
Tips for a Smooth Finish
Work in a dust-free, well-ventilated area. Hold the can steady because jittery motion causes streaks. Test on scrap glass first to practice your technique.
Longevity and Appearance
Painted areas reflect well but may appear slightly duller than the original backing. The finish lasts 1 to 3 years in dry environments and less time in bathrooms without proper ventilation. It’s resistant to normal cleaning but not immune to moisture damage.
User insight: “It’s never going to look new without complete resilvering.” But for most homes, spray paint delivers a clean, functional result at a fraction of the cost.
Treat Edge Oxidation with WD-40

If black borders are just starting at the edges, WD-40 can slow the spread by displacing moisture trapped in the backing layers.
Treat Early-Stage Damage
- Attach the straw nozzle to the WD-40 can.
- Spray along the bottom and side edges where the backing meets the glass.
- Let sit for 10 to 15 minutes to penetrate.
- Gently scrub with an old toothbrush.
- Wipe clean with a damp sponge, then dry thoroughly.
Why It Works
WD-40 is a water-displacing formula that pushes moisture out of tiny gaps. It won’t restore shine, but it can pause further corrosion, especially at the base where water pools.
Follow Up with Sealing
After treatment, apply a silicone sealant to the edges to block future moisture. This combo works best as a preventive step after cleaning.
Warning: This is a temporary fix, not a permanent repair. Use it to stabilize damage before painting or sealing.
Hide Damage with Decorative Backing
Instead of restoring reflectivity, turn the back into a design feature that makes the damage invisible.
Paint a Frame on the Back
- Use painter’s tape to mark a 1 to 2 inch border around the edge.
- Apply metallic, black, or colored spray paint in light, even coats.
- Remove tape once fully dry.
The painted border conceals edge damage and adds modern style to your mirror.
Add Artistic Designs
Use stencils or freehand painting to create patterns that mask scattered spots. Metallic paints blend well with remaining silver areas.
Pro tip: This method works best on framed mirrors where the back isn’t visible. It’s purely functional, not aesthetic.
Re-Silver Your Mirror for True Restoration
For vintage, antique, or high-value mirrors, re-silvering is the only way to fully restore the original reflective finish.
How Re-Silvering Works
This chemical process removes old backing and deposits a fresh silver layer on the glass. It’s the same method used in factories, just scaled down for DIY projects.
What You’ll Need
- Multi-Strip paint remover
- Mirror remover solution for silver and copper
- Tin for silver (sensitizer)
- Silver solution, activator, and reducer
- Backing paint
- Plastic scraper, cotton balls, and foam roller
- Distilled water (critical to avoid mineral stains)
Step-by-Step Process
1. Strip Old Backing Paint
Apply Multi-Strip evenly with a plastic scraper. Wait for paint to bubble, then scrape off. Rinse thoroughly with water.
2. Remove Silver and Copper Layers
Soak cotton balls in mirror remover. Rub over the entire surface until all metal is gone. Reapply as needed on stubborn spots.
3. Clean and Polish Glass
Scrub with powdered glass cleaner. Rinse first with tap water, then distilled water. Optional: Polish with cerium oxide and a felt pad for clarity.
4. Apply Tin Solution
Mix 10 mL tin solution with distilled water. Pour over glass and rock gently for 30 or more seconds. Rinse thoroughly.
5. Deposit New Silver Layer
Mix equal parts silver solution, activator, and reducer (30 mL each). Pour over glass. Rock gently for 3 to 5 minutes until a uniform mirror finish appears. Watch for edge coverage because uneven results mean contamination.
6. Rinse and Dry
Rinse off chemicals. Tilt to drain and let air dry completely.
7. Apply New Backing Paint
Use a foam roller for a smooth, even coat. Cover the entire back. Dry overnight.
8. Clean Front Edges
Wipe any silver that crept over the edges with mirror remover.
Risks and Warnings
The chemicals involved are hazardous. Wear gloves, eye protection, and work in a ventilated area. Precision is required because dust, grease, or uneven application causes streaks. This process isn’t for beginners because small mistakes ruin the finish.
Expert note: After re-silvering, seal the back with polyurethane to prevent future moisture damage.
Hire a Professional for Antique Mirrors
For valuable or large mirrors, professional re-silvering is safer and more reliable than DIY attempts.
Benefits of Going Pro
Professionals have industrial-grade equipment and controlled environments. They deliver perfectly even coatings with no risk of DIY errors. The service often includes cleaning, polishing, and re-framing.
Cost and Turnaround
Expect to pay $100 to $300 or more, depending on size and complexity. The process takes days to weeks. This is worth it for irreplaceable pieces that can’t be replaced.
Recommendation: If the mirror is antique, framed, or part of a collection, skip DIY kits and go straight to a restoration expert.
Replace the Mirror Glass Panel
Sometimes, the simplest solution is the best. When repair costs approach replacement prices, a new mirror makes more sense.
When to Replace
Consider replacement when damage covers more than 30% of the surface. Also replace if the glass is cracked or warped, the mirror has no sentimental value, or repair cost exceeds 50% of replacement price.
Affordable Replacement Options
- Local glass shop: Replace just the glass and keep the frame. Cost: $50 to $150.
- Home improvement stores: Pre-cut standard sizes are available.
- Upgraded mirrors: Consider anti-fog, LED-lit, or tempered safety glass for better performance.
User insight: “Why not just replace the mirror? The glass only, not the frame. If taken to a glass shop they could have it replaced in a couple hours for probably less than $100 and it would look great.”
Prevent Future Mirror Back Damage
Once repaired or replaced, protect your mirror from repeating the same fate. Moisture is the primary enemy of mirror backs.
Best Prevention Practices
Seal all edges: Use silicone-based sealant around the perimeter during installation. Reapply every 2 to 3 years in bathrooms.
Avoid direct spray cleaning: Never spray cleaner directly on the mirror. Instead, spray onto a microfiber cloth to prevent liquid from seeping into edges.
Improve ventilation: Run the bathroom fan during and after showers for at least 20 minutes. Open windows or use a dehumidifier to reduce condensation.
Apply water-repellent treatment: Every 3 to 6 months, spray WD-40 or rain-repellent on the edges to create a hydrophobic barrier.
Choose humidity-resistant mirrors: Look for labels like “bathroom-rated,” “sealed edges,” or “beveled and protected backing.”
Quick Solution Guide by Damage Type
| Damage | Best Fix | Cost | Skill | Durability |
|---|---|---|---|---|
| Small scraped spot | Aluminum foil + tape | $ | Beginner | Low |
| Multiple black spots | Mirror spray paint | $$ | Beginner | Medium |
| Edge oxidation | WD-40 + sealant | $ | Beginner | Low to Medium |
| Decorative edge cover | Spray-painted border | $$ | Beginner | Medium |
| Antique mirror | Professional re-silvering | $$$ | N/A | High |
| Cracked glass | Replace panel | $$ | N/A | High |
Frequently Asked Questions About Fixing Mirror Backs
Can I fix a mirror that has black spots on the back?
Yes, you can fix it depending on the severity. For small spots, aluminum foil or mirror spray paint works. For extensive damage, re-silvering or replacement may be necessary.
Does WD-40 repair mirror backing?
WD-40 doesn’t restore reflectivity. It displaces moisture and slows further corrosion on early-stage edge damage. Follow up with sealant for lasting results.
How much does professional mirror re-silvering cost?
Professional re-silvering typically costs $100 to $300 or more, depending on mirror size and complexity. It’s best for antique or valuable mirrors.
Can I use regular spray paint on a mirror back?
Regular spray paint won’t work. Use Rust-Oleum Mirror Finish Spray or similar mirror-effect paint designed to mimic silver backing.
How do I prevent mirror back damage in the bathroom?
Seal edges with silicone, avoid spraying cleaner directly on the mirror, run the exhaust fan during showers, and apply water-repellent treatment every 3 to 6 months.
When should I just replace the mirror instead of repairing it?
Replace if damage covers more than 30% of the surface, the glass is cracked, or repair costs exceed half the price of a new mirror.
Key Takeaways for Fixing Mirror Back Damage
No DIY method perfectly replicates factory reflectivity, but practical solutions exist for every budget and skill level. Aluminum foil and spray paint offer quick, low-cost fixes for minor damage. For true restoration on vintage mirrors, professional re-silvering is the gold standard, though it costs significantly more. For most modern mirrors with significant damage, replacing the glass panel is faster, cheaper, and more effective than repair. Most importantly, moisture is the number one enemy of mirror backs. Keep your mirror dry, seal the edges during installation, and maintain ventilation in bathrooms to prevent future damage. If you’re unsure whether to repair or replace, start by assessing the damage using the criteria in this guide, then choose the solution that best matches your mirror’s value and your budget.


