
A loose motorcycle mirror isn’t just annoying, it’s a serious safety hazard. If your mirror vibrates, droops, or spins out of position while riding at highway speeds, you’re compromising your rear visibility and putting yourself at risk. This common problem affects riders across brands like Harley-Davidson, Honda, Norton, and many others, particularly on bikes with bar-end or wing-style mirrors. The root cause varies depending on your mirror type: worn clamps, smooth stems, cracked housings, or degraded adhesives can all lead to instability. The good news? Most loose mirrors can be fixed quickly with basic tools and the right technique. This guide delivers proven fixes step by step so you can restore a rock-solid view behind you.
Identify Your Mirror Type Before Repair
Before grabbing tools, you need to determine your mirror’s specific design. The fix depends entirely on the type, and applying the wrong method wastes time and risks damage.
Bar-End vs Wing Mirrors
Bar-end mirrors attach at the handlebar tips and often use internal ball-and-socket joints inside nylon or carbon fiber housings. Wing mirrors, also called stem-mounted or clip-on mirrors, clamp onto the bar mid-section and adjust via external nuts or screws. Each has completely different failure points, so knowing which you have is critical before proceeding.
Harley-Davidson vs Standard Ball Joints
Harley-Davidson mirrors are notorious for looseness because smooth metal stems rotate inside the clamp even when fully tightened. Standard OEM or aftermarket mirrors often have better grip or accessible adjustment screws that make repairs simpler.
Check for Hidden Adjustment Points
Look for these indicators to understand your mirror’s internal access:
- A rubber boot at the base that hides adjustment nuts
- Visible Phillips screws on the housing exterior
- Glass that can be removed to access internal components
Knowing your mirror type ensures you apply the correct fix from the start.
Tighten Internal Adjustment Screws
This method works best for bar-end mirrors with exposed or hidden internal screws, including those on Norton Commando and similar models.
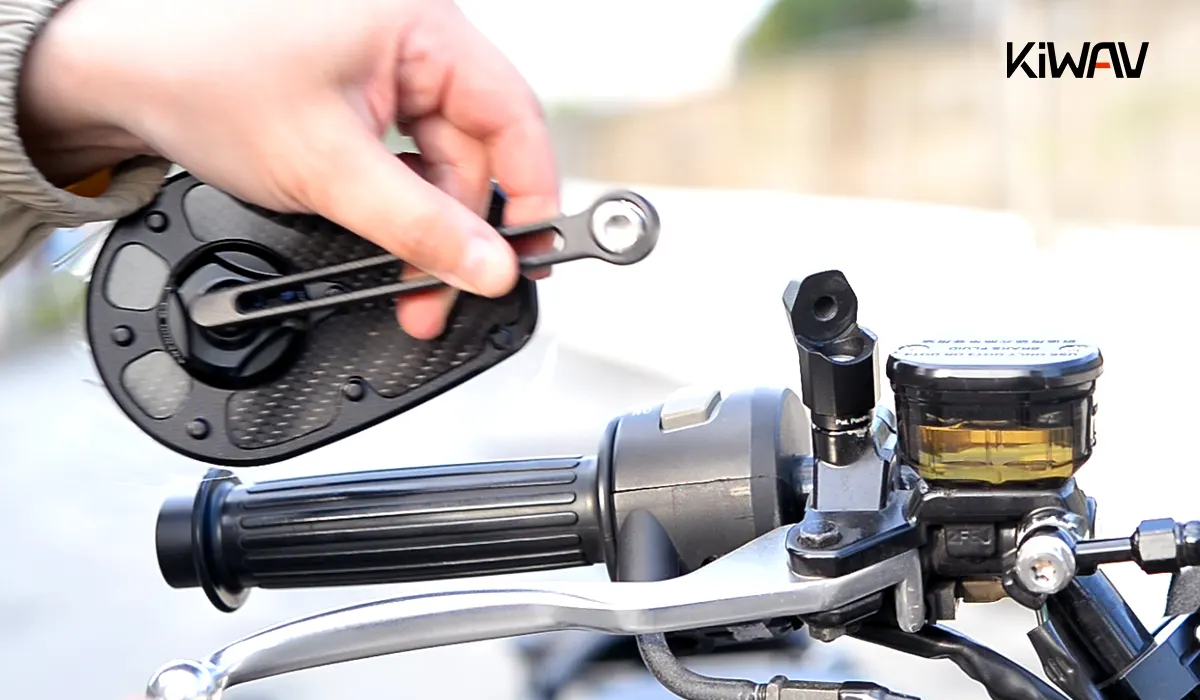
Remove Mirror Glass Safely
Use a heat gun to warm the edge of the mirror glass for 30 to 60 seconds. This softens the adhesive without damaging the housing. Gently slide a plastic pry tool or blunt knife under the glass and lift it off. Work slowly to avoid cracking the glass or housing.
Pro Tip: Let the mirror cool between heating cycles if the glass resists. Overheating can warp plastic housings.
Access and Tighten Ball-Joint Screws
Once the glass is off, you’ll see 2 to 3 Phillips screws holding an internal metal plate. Remove them and set aside in a magnetic dish. Underneath, locate the two screws pressing against the ball joint. Tighten both evenly, aiming for a quarter turn more on the loose one. One may already be maxed out. Avoid over-tightening because it can strip threads or lock the mirror permanently.
Reassemble with Heat
Replace the plate and screws. Warm the housing edge again to reactivate leftover adhesive. Press the glass back on firmly and hold for 30 seconds. Let it cool completely before riding.
Success Rate: High for intact housings. Riders report long-term stability after this fix.
Adjust Base Nut Under Rubber Boot
This approach is ideal for wing mirrors with hidden clamping hardware, commonly found on touring and cruiser models.
Expose the Hidden Nut
Push the rubber boot upward to reveal a 17 mm nut at the mirror’s base. This nut controls pressure on the ball joint inside.
Tighten with 17 mm Wrench
Use an open-ended wrench to turn the nut clockwise. Tighten gradually while testing mirror movement. Stop when the mirror resists motion but still allows manual repositioning.
Warning: Over-tightening can crush the ball joint or crack plastic. Test frequently during adjustment.
Secure Secondary Phillips Screws
If looseness persists, pull the washer outward to expose three small Phillips screws. Tighten each slightly, just enough to add pressure. Do not force them because plastic threads strip easily.
Re-seat Rubber Boot
Once firm, slide the rubber boot back down to protect the nut and restore clean appearance.
User Feedback: This non-invasive method works fast and lasts for months with no disassembly required.
Modify Smooth Mirror Stem

This critical fix is specifically for Harley-Davidson mirrors and similar designs that rotate despite tight clamps.
Remove Glass to Access Stem
Heat the glass edge and pry it off carefully. Avoid prolonged heat to prevent housing warping.
Loosen Clamp and Extract Stem
With the glass off, locate the clamp securing the ball joint to the stem. Loosen the screw and slide the stem out.
Texture the Stem with Hammer
Use a hammer to make light dents along the stem’s surface, just enough to break the smooth finish. Focus on the section that sits inside the clamp.
Key Point: You’re not bending the stem. Just create grip points. Even minor texture prevents slippage.
Reinstall and Max-Tighten Clamp
Reinsert the stem and tighten the clamp as much as possible. The textured surface should now lock firmly in place.
Reattach Glass
Heat the housing, press the glass back in, and let it cool completely before riding.
Real-World Result: Riders report zero movement at highway speeds after this modification.
Apply Thread-Locking Compound

Use this when screws or joints keep loosening despite repeated tightening.
Disassemble to Expose Threads
Remove glass or housing to access screws on the ball joint or internal plate.
Use Loctite 242 or 271
Apply medium-strength Loctite 242 to screw threads for removable but secure hold. For permanent fixes on Harley stem clamps, use high-strength Loctite 271.
Caution: Never apply thread locker to plastic parts or adhesive surfaces.
Reassemble and Cure
Tighten components to specification. Allow 24 hours for full cure before riding.
User Note: One rider used Loctite on a ball joint and saw immediate improvement with no movement after weeks of riding.
Repair Cracked Mirror Housing
This is a temporary fix when plastic housing is splitting but you need to ride immediately.
Remove Rubber Ring and Glass
Heat and pry off the glass. Remove the rubber seal to access the internal nut and washer.
Inspect for Cracks
Look for hairline fractures radiating from the center bore. If cracks are minor, proceed with repair.
Add Reinforcement Washer
Place a flat or star washer between the nut and housing. Tighten the nut to compress the washer, which helps close the crack and restore clamping force.
Source: One rider used this method on a Honda GB mirror and it held well for months.
Know the Limits
This is a short-term solution. Cracked plastic will eventually fail. Replace the mirror for long-term safety.
Replace the Mirror Assembly
When repair fails, replacement is the smarter choice.
When to Replace
Consider replacement when:
- Housing is deeply cracked
- Threads are stripped
- No internal screws or adjustment points exist
- Multiple fixes have failed
Rider Insight: Two riders switched to new mirrors after repeated repair attempts and saved both time and money.
Choose the Right Replacement
Search by these specifications:
- Handlebar diameter (7/8 inch, 1 inch, 1.25 inch)
- Mount type (bar-end, clip-on, bolt-on)
- Style preference
Ensure compatibility with your specific bike model.
Install with Thread Locker
When mounting new mirrors, apply Loctite 242 to screws to prevent future loosening.
Pro Tip: Choose mirrors with textured stems or locking nuts for better long-term hold.
Prevent Future Mirror Looseness
Stop the problem before it starts with these maintenance habits.
Avoid Wind-Flapping Bike Covers
Storing under a loose cover in windy conditions repeatedly knocks mirrors out of alignment. Switch to a snug cover or store indoors.
Check Tightness Regularly
After long rides or high-speed runs, give mirrors a quick wiggle test. Retighten if needed.
Use Thread Locker on Critical Fasteners
Apply during installation or maintenance to prevent vibration-induced loosening.
Store Indoors When Possible
UV exposure and temperature swings degrade adhesives and plastics over time.
Fix Effectiveness by Mirror Type
| Mirror Type | Best Fix | Success | Notes |
|---|---|---|---|
| Bar-End Ball Joint | Internal screw tighten | High | Requires glass removal |
| Wing Mirror | Base nut adjustment | High | Quick, no disassembly |
| Harley Ball-Joint | Stem texturing | Very High | Solves root cause |
| Cracked Housing | Washer plus nut | Medium | Temporary, replace soon |
| No Access Screws | Adhesive reheat or replace | Low to Medium | Limited options |
Real Rider Fixes That Worked
- One rider replaced a 2003 Heritage mirror after cover-induced loosening. New mirror lasted 8 years with indoor storage.
- Another rider removed glass with heat, tightened screws, and fixed wobble. The old glass broke during removal but it was due for replacement anyway.
- One user applied Loctite to ball joint with no movement after weeks of riding.
- Another added a washer to a cracked Honda mirror that held well for months.
Key Takeaways for Fixing Your Loose Motorcycle Mirror
A loose motorcycle mirror is a safety hazard, but it’s also one of the easiest fixes on two wheels. Start by diagnosing your mirror type because the repair method depends entirely on the design. Try non-invasive fixes like adjusting base nuts or external screws before disassembling anything. When you do need to take it apart, use heat and plastic tools to avoid damage. For Harley-Davidson mirrors, texture the stem rather than just retightening the clamp because smooth surfaces are the real problem. Use thread locker on critical fasteners to prevent recurrence. When in doubt, replacement is fast, affordable, and reliable. Ride safe with a mirror that stays put.
Frequently Asked Questions About Fixing Loose Motorcycle Mirrors
Why does my motorcycle mirror keep loosening while riding?
Mirrors loosen due to vibration, worn clamps, degraded adhesive, or smooth stem surfaces that don’t grip. Wind at highway speeds exacerbates the problem. Identifying the root cause for your specific mirror type determines the right fix.
Can I fix a loose mirror without removing the glass?
Yes. Wing mirrors with rubber boots allow you to tighten a base nut without disassembly. Push the boot up, tighten the 17 mm nut clockwise, and test. This works for many bar-end mirrors too if external screws are accessible.
Is the Harley-Davidson mirror problem different from other bikes?
Yes. Harley mirrors often have smooth metal stems that rotate inside the clamp even when tightened. The fix requires texturing the stem surface with a hammer to create grip, then max-tightening the clamp.
How long does it take to fix a loose motorcycle mirror?
Simple fixes like adjusting a base nut take 5 to 10 minutes. Full disassembly and stem texturing takes 30 to 45 minutes. Allow 24 hours for thread locker to cure before high-speed riding.
Should I just replace the mirror instead of repairing it?
Replace if the housing is cracked, threads are stripped, or multiple repair attempts have failed. Replacement is often faster and more reliable than repeated fixes, especially for older mirrors.


