
You’ve seen it in movies: a sleek mirror in a police interrogation room where officers watch unseen from behind the glass. That’s a two-way mirror where one side looks like a regular mirror and the other acts like a window. But here’s the truth: you cannot make a true one-way mirror without controlling lighting conditions. The “one-way” effect is not magic but science based on light contrast.
In this guide, you will learn how to build a functional double-sided mirror using safe DIY methods, understand the science behind the effect, and discover which approach fits your project whether it is for security, art, or experimentation. We will cover mirror film installation, stretched film frames, and advanced chemical silvering with safety tips and material options.
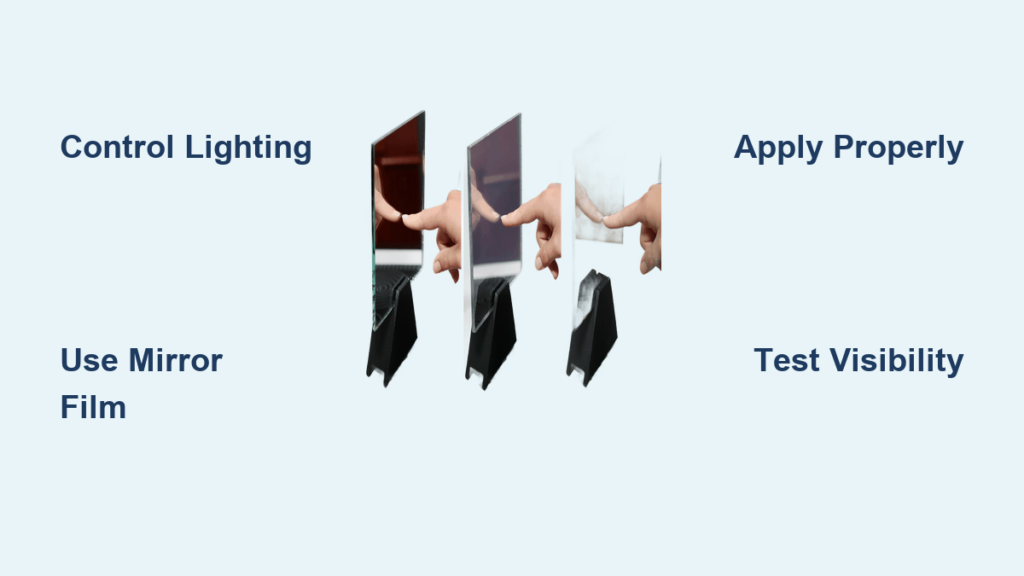
Choose Your Double-Sided Mirror Method First
Before starting your project, you need to decide which type of double-sided mirror suits your needs. The method you choose depends on your specific use case, whether it is a permanent window installation, a portable prop, or an experimental build.
Comparing Mirror Film, Silvered Glass, and Stretched Film
| Type | Best For | Lighting Requirements | Visibility |
|---|---|---|---|
| Film on glass | Windows, doors, home security | Bright outside, dark inside | Clear view from dark side |
| Stretched film (frame-only) | Theater, costumes, displays | Same as above | Slight distortion possible |
| Chemically silvered glass | Custom projects, labs | Same principle | Highest clarity when done well |
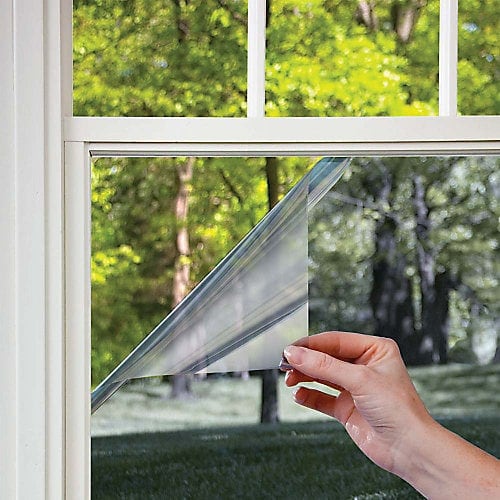
The most practical and safest option for beginners is applying two-way mirror film to glass. This method is affordable, easy to install, and produces excellent results when paired with proper lighting.
Install Mirror Film on Glass (Safest DIY Method)

This method represents the best way to create a working double-sided mirror at home without handling dangerous chemicals. It delivers excellent results with minimal risk.
Gather Your Materials
You will need specific materials to ensure success. Using quality components prevents common failures like bubbling, peeling, or insufficient opacity.
• Clear glass or acrylic panel (clean and scratch-free)
• Two-way mirror film (50% VLT, Visible Light Transmission)
• Squeegee, utility knife, measuring tape
• Spray bottle with soapy water (1 drop dish soap per quart)
• Nitrile gloves to avoid fingerprints
Pro Tip: Buy directional mirror film specifically designed for one-way visibility. These products perform significantly better than standard window tint films.
Clean the Surface Thoroughly
Dust, oil, or streaks will ruin the film application permanently. Taking time to prepare the surface properly determines the final quality.
- Wipe the glass with isopropyl alcohol or glass cleaner.
- Dry with a lint-free microfiber cloth.
- Wear gloves during application to prevent recontamination.
Even invisible oils from your fingers can cause bubbles or peeling after installation. Contamination is the most common cause of DIY mirror film failure.
Apply the Mirror Film Step by Step
Follow these steps carefully to achieve a professional-looking result. Rushing any step compromises the final outcome.
- Cut the film slightly larger than the glass to allow for trimming.
- Tape it loosely to the top edge so it does not fall during installation.
- Spray the glass with soapy water to create a slip layer for repositioning.
- Peel the backing slowly and press the film onto the wet surface.
- Squeegee from center outward to remove bubbles and excess liquid.
- Trim edges with a sharp blade once the film is flat and smooth.
- Let cure for 24 to 48 hours without touching the surface.
Warning: Low-quality films may appear too transparent or have a rainbow sheen. Invest in high-performance architectural-grade film for the best results.
Build a Glass-Free Mirror with Stretched Film
Need something lightweight, flexible, or temporary? This method skips glass entirely and creates a portable mirror surface perfect for specific applications.
Ideal for Theater, Costumes, or Props
This approach works exceptionally well for haunted house effects, stage illusions, or wearable designs where weight and flexibility matter more than permanent installation.
Materials Needed
Gather all supplies before starting to avoid mid-project interruptions that waste film and time.
• Mirror film (tension-resistant type)
• Wooden or metal frame
• Staple gun, strong tape (duct or filament tape)
• Heat gun
• Utility knife
Mount and Tension the Film Properly
Proper tensioning prevents wrinkles and distortion that ruin the mirror effect. Uneven stretching creates optical defects visible in reflections.
- Sand frame edges to prevent tearing the delicate film.
- Apply strong tape along the inner edge rather than stapling directly into film.
- Lay film over frame, pull taut, and staple through tape on one side.
- Stretch the opposite side evenly, then secure adjacent sides.
- Add a second layer of tape over staples and re-staple for security.
- Use heat gun 6 to 8 inches away to shrink film and remove ripples.
- Trim excess close to the frame edge.
Visual Cue: A properly stretched film should look smooth and reflective like a drumhead. Any wrinkles will distort the reflected image significantly.
Limitations of Stretched Film
This setup is lightweight and shatterproof but less durable than glass-mounted options. Avoid high humidity environments and contact with sharp objects. Expect 1 to 3 years of use depending on conditions.
Try Chemical Silvering (Advanced DIY Method)
Want to coat glass yourself using actual silver? You can create a real two-way mirror using silver nitrate solution, but this method comes with significant risks that require careful handling.
Safety Gear Is Non-Negotiable
Only attempt this method with proper protective equipment. Silver nitrate is corrosive and can cause permanent skin staining and eye damage.
• Nitrile gloves
• Safety goggles
• Respirator or fume hood
• Work in a well-ventilated area
Use a Mirror Silvering Kit
Purchase a pre-mixed kit from Amazon or scientific suppliers. These kits contain everything needed for successful application without mixing dangerous chemicals from scratch.
• Silver nitrate (AgNO₃)
• Reducing agent (glucose or formaldehyde)
• Sealing lacquer (optional but recommended)
Apply the Silver Coating
Follow instructions precisely. Inconsistent application produces uneven reflectivity and transparency.
- Clean glass with alcohol, removing all oils completely.
- Mix solution according to package directions.
- Brush or dip glass for a thin, even coat.
- Use less solution for thinner coating, which increases transparency (ideal for two-way effect).
- Rinse gently with distilled water.
- Air-dry in a dust-free space.
- Seal with clear lacquer to prevent rapid tarnishing.
Caution: Unsealed silver coatings oxidize quickly, especially in humid air. Without protection, they degrade within months and lose effectiveness.
Best for Experimenters and Labs
This method provides control over reflectivity levels, but it is not beginner-friendly. Expect trial and error. Results vary with temperature, humidity, and application speed.
Why Lighting Makes or Breaks the Effect
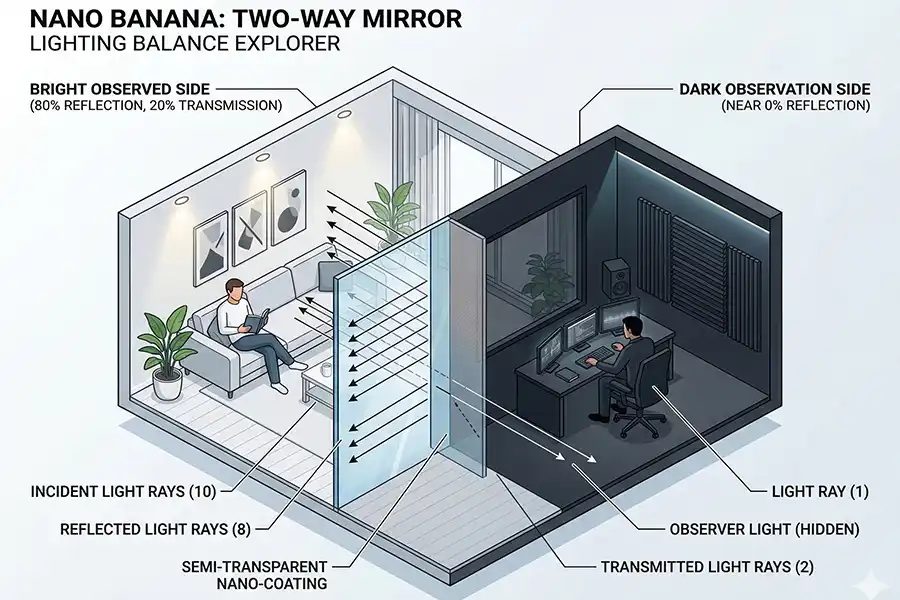
No matter how good your mirror construction is, lighting determines whether the one-way effect actually works. This is the most critical factor most DIYers overlook.
The 10:1 Brightness Rule Explained
For the one-way effect to function properly, the brightness difference between sides must be dramatic.
• The bright side must be at least 10 times brighter than the dark side.
• The observation room must be nearly pitch black.
Example: If the subject room has 500 lux lighting, the observer side should have under 50 lux, preferably less.
Optimize Your Lighting Setup
Proper lighting control transforms an average installation into a functional one-way mirror system.
• Use blackout curtains in the observation room.
• Eliminate LED status lights, phone screens, or cracks under doors.
• Add infrared lighting with night-vision cameras for invisible monitoring.
Pro Tip: Test with a flashlight. Shine it from the dark side. If you can see through, the lighting balance is working correctly.
Detect a Two-Way Mirror (And Avoid Being Watched)
Not all mirrors are what they seem. Here is how to tell if a mirror in your environment is two-way.
Do the Fingernail Test
Press your fingernail directly against the mirror surface.
• Gap between nail and reflection indicates a standard mirror (back-coated).
• No gap indicates a front-surface mirror, which could be two-way.
Standard mirrors have glass in front of the reflective layer, creating a small gap. Two-way mirrors often coat the front surface, eliminating this gap.
Use the Flashlight Test
Turn off all lights and shine a bright flashlight directly at the mirror.
• If you see through to the other side, it is a two-way mirror.
• If you see only reflection, it is likely a solid regular mirror.
Tap and Listen
Gently knock on the surface.
• Hollow sound could indicate a hidden room behind the mirror.
• Solid thud suggests a regular wall-mounted mirror.
Maintain Your Mirror for Long Life
Even the best-constructed mirror degrades without proper care. Regular maintenance extends the functional lifespan significantly.
Clean Safely
Use appropriate cleaning methods for your mirror type to avoid damage.
• Use ammonia-free cleaner (70% isopropyl alcohol mixed with water works well).
• Wipe with microfiber cloth only, avoiding paper towels or abrasive pads.
• Never use razors or scrapers on film surfaces.
Prevent Common Damage
Protect your investment from environmental factors that cause premature failure.
• Avoid high humidity, which causes oxidation on silver coatings.
• Protect from scratches since thin coatings are delicate.
• Reapply film if bubbling or peeling occurs.
Expected Lifespan by Method
Different construction methods yield different longevity expectations.
• Mirror film on glass: 5 to 10 years
• Stretched film: 1 to 3 years
• Silvered glass (sealed): 5+ years
• Unsealed silver coating: 2 to 7 years depending on climate
Frequently Asked Questions About Making a Double-Sided Mirror
Can I make a true one-way mirror without controlling lighting?
No, you cannot create a true one-way mirror without controlling lighting conditions. The effect relies entirely on differential illumination between two spaces. Without a significant brightness difference (at least 10:1), the mirror becomes semi-transparent from both sides.
What is the easiest DIY method for making a double-sided mirror?
Applying two-way mirror film to glass is the easiest and safest DIY method. It requires no chemicals, minimal tools, and produces reliable results when paired with proper lighting. This method suits most home security and privacy applications.
Does a double-sided mirror work during the day?
Double-sided mirrors work best at night or in dark rooms. During daylight, the bright side (typically outdoors) dominates the reflection, making the dark side (indoors) impossible to see through. The effect reverses at night when indoor lights are brighter than outside.
Can I use regular window tint as a two-way mirror?
Standard window tint film is not designed for two-way visibility. It may reduce visibility but does not create the mirror effect. You need specifically designed directional or dual-reflective mirror film for proper one-way functionality.
Is chemical silvering dangerous for beginners?
Yes, chemical silvering involves toxic chemicals including silver nitrate, which causes skin burns and eye damage. It requires proper ventilation, safety goggles, gloves, and a respirator. This method is not recommended for beginners or those without chemistry experience.
Where can I buy materials for making a two-way mirror?
Purchase mirror film from TwoWayMirrors.com for specialized directional films or from Amazon, Home Depot, and Lowe’s for window tint and installation tools. Silvering kits are available from scientific suppliers like Fisher Scientific and Sigma-Aldrich, or from online marketplaces like eBay and Etsy.
Key Takeaways for Building Your Double-Sided Mirror
Building a functional double-sided mirror requires matching the right method to your specific needs while understanding that lighting controls the final效果. The mirror film on glass method provides the best balance of safety, cost, and effectiveness for most applications, while stretched film suits theatrical and temporary needs, and chemical silvering remains reserved for advanced experimenters. Regardless of method chosen, the 10:1 brightness ratio between sides remains essential for the one-way effect to function. Always test your setup under real lighting conditions before final installation, and remember that privacy laws apply to two-way mirror installations in private areas.
Start with a small test piece (12 inches by 12 inches) before committing to a full window installation. This approach lets you refine your technique and verify the lighting works in your specific environment before investing in larger materials.


