
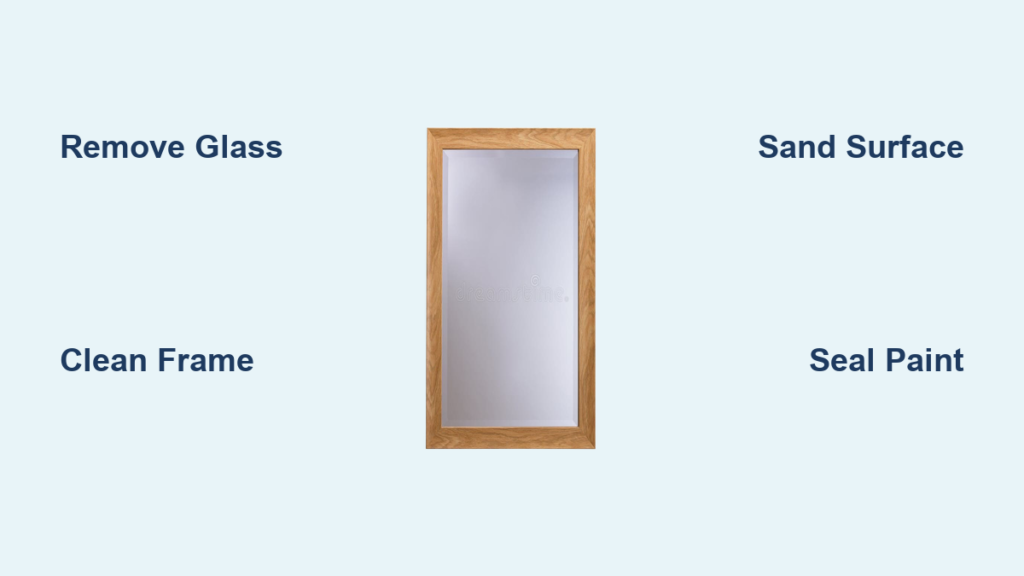
Nothing breathes new life into a tired room like a freshly painted wood frame mirror. Whether you have scored a vintage piece at a thrift store or want to modernize an outdated family heirloom, painting the frame lets you customize your decor without spending hundreds on a new mirror. This guide walks you through every step, from removing the glass to sealing the paint, so you can transform your mirror with confidence.
You will learn which paints work best for different frame styles, how to avoid common mistakes that cause peeling and drips, and pro techniques for adding elegant details like metallic accents and decorative transfers.
Remove the Mirror Safely
Take Out the Glass for Clean Results
Removing the mirror before painting gives you full access to every edge and corner, ensuring no spots are missed. This approach also protects the glass from accidental overspray and lets you paint the frame edges completely.
Start by flipping the frame face down on a soft surface. Remove the cardboard or paper backing carefully. Use a flathead screwdriver or staple remover to extract staples, nails, or metal clips holding the mirror in place. Gently lift the glass out and lay it flat on a towel to prevent scratches.
If the frame is glued or tightly secured, do not force it. Painting around the glass is still doable with proper protection, though you will need to be extra careful during cleanup to avoid damaging the seal.
Reinstall After Painting
Once the paint is fully cured, reinsert the mirror cleanly. This gives you a chance to scrape off any accidental overspray from the glass using a razor blade before reassembly. Reattach the backing with new staples or a Logan Point Driver for a secure hold. Upgrading to decorative backing paper adds a polished touch, especially if the back will be visible when hung.
Clean and Degrease the Frame
Wipe Away Grime and Residue
Old frames collect dust, oils, and sticky residues that block paint adhesion. Start by wiping the entire surface with a microfiber cloth to remove loose debris. For stubborn grime, especially on thrifted frames, dampen the cloth with white vinegar or a pre-paint degreaser. These cut through grease and nicotine buildup without leaving a filmy residue.
Pay close attention to carved details and crevices where dirt hides. Avoid furniture polishes or silicone-based sprays, as they create a slick barrier that paint cannot stick to.
Dry Completely Before Proceeding
Let the frame air dry for at least 30 minutes. If you used a wet cleaner, ensure no moisture remains in joints or recessed areas. Painting over damp wood leads to bubbling and poor adhesion. A dry, clean surface is the foundation of a long-lasting finish.
Prep the Surface for Paint
Lightly Sand for Better Adhesion
Even glossy finishes need some texture for paint to grip. Use 220-grit sandpaper to lightly scuff the surface, focusing on flat areas while preserving any delicate carvings. You are not stripping the wood. You are simply creating a tooth for the paint to bond to.
After sanding, wipe away all dust with a dry microfiber cloth. Any leftover particles can ruin a smooth paint job.
Use Deglosser Instead of Sanding
If sanding feels too risky, especially on ornate or lacquered frames, try a liquid deglosser. Apply it with a chip brush, let it sit as directed, then wipe clean. This chemically roughens the surface without altering the frame is shape. It is especially useful for laminated or high-gloss finishes.
Apply Adhesion Promoter for Tough Surfaces
For heavily varnished, laminated, or non-porous wood, use Bonding BOSS, a modern replacement for the discontinued Slick Stick. This all-in-one adhesion and stain blocker ensures paint sticks and lasts. Apply one thin coat, let it dry at least 24 hours, then paint. No sanding needed.
Pro Tip: Chalk and milk paint claim to adhere without prep, but using Bonding BOSS on glossy surfaces prevents future peeling.
Protect the Glass Completely
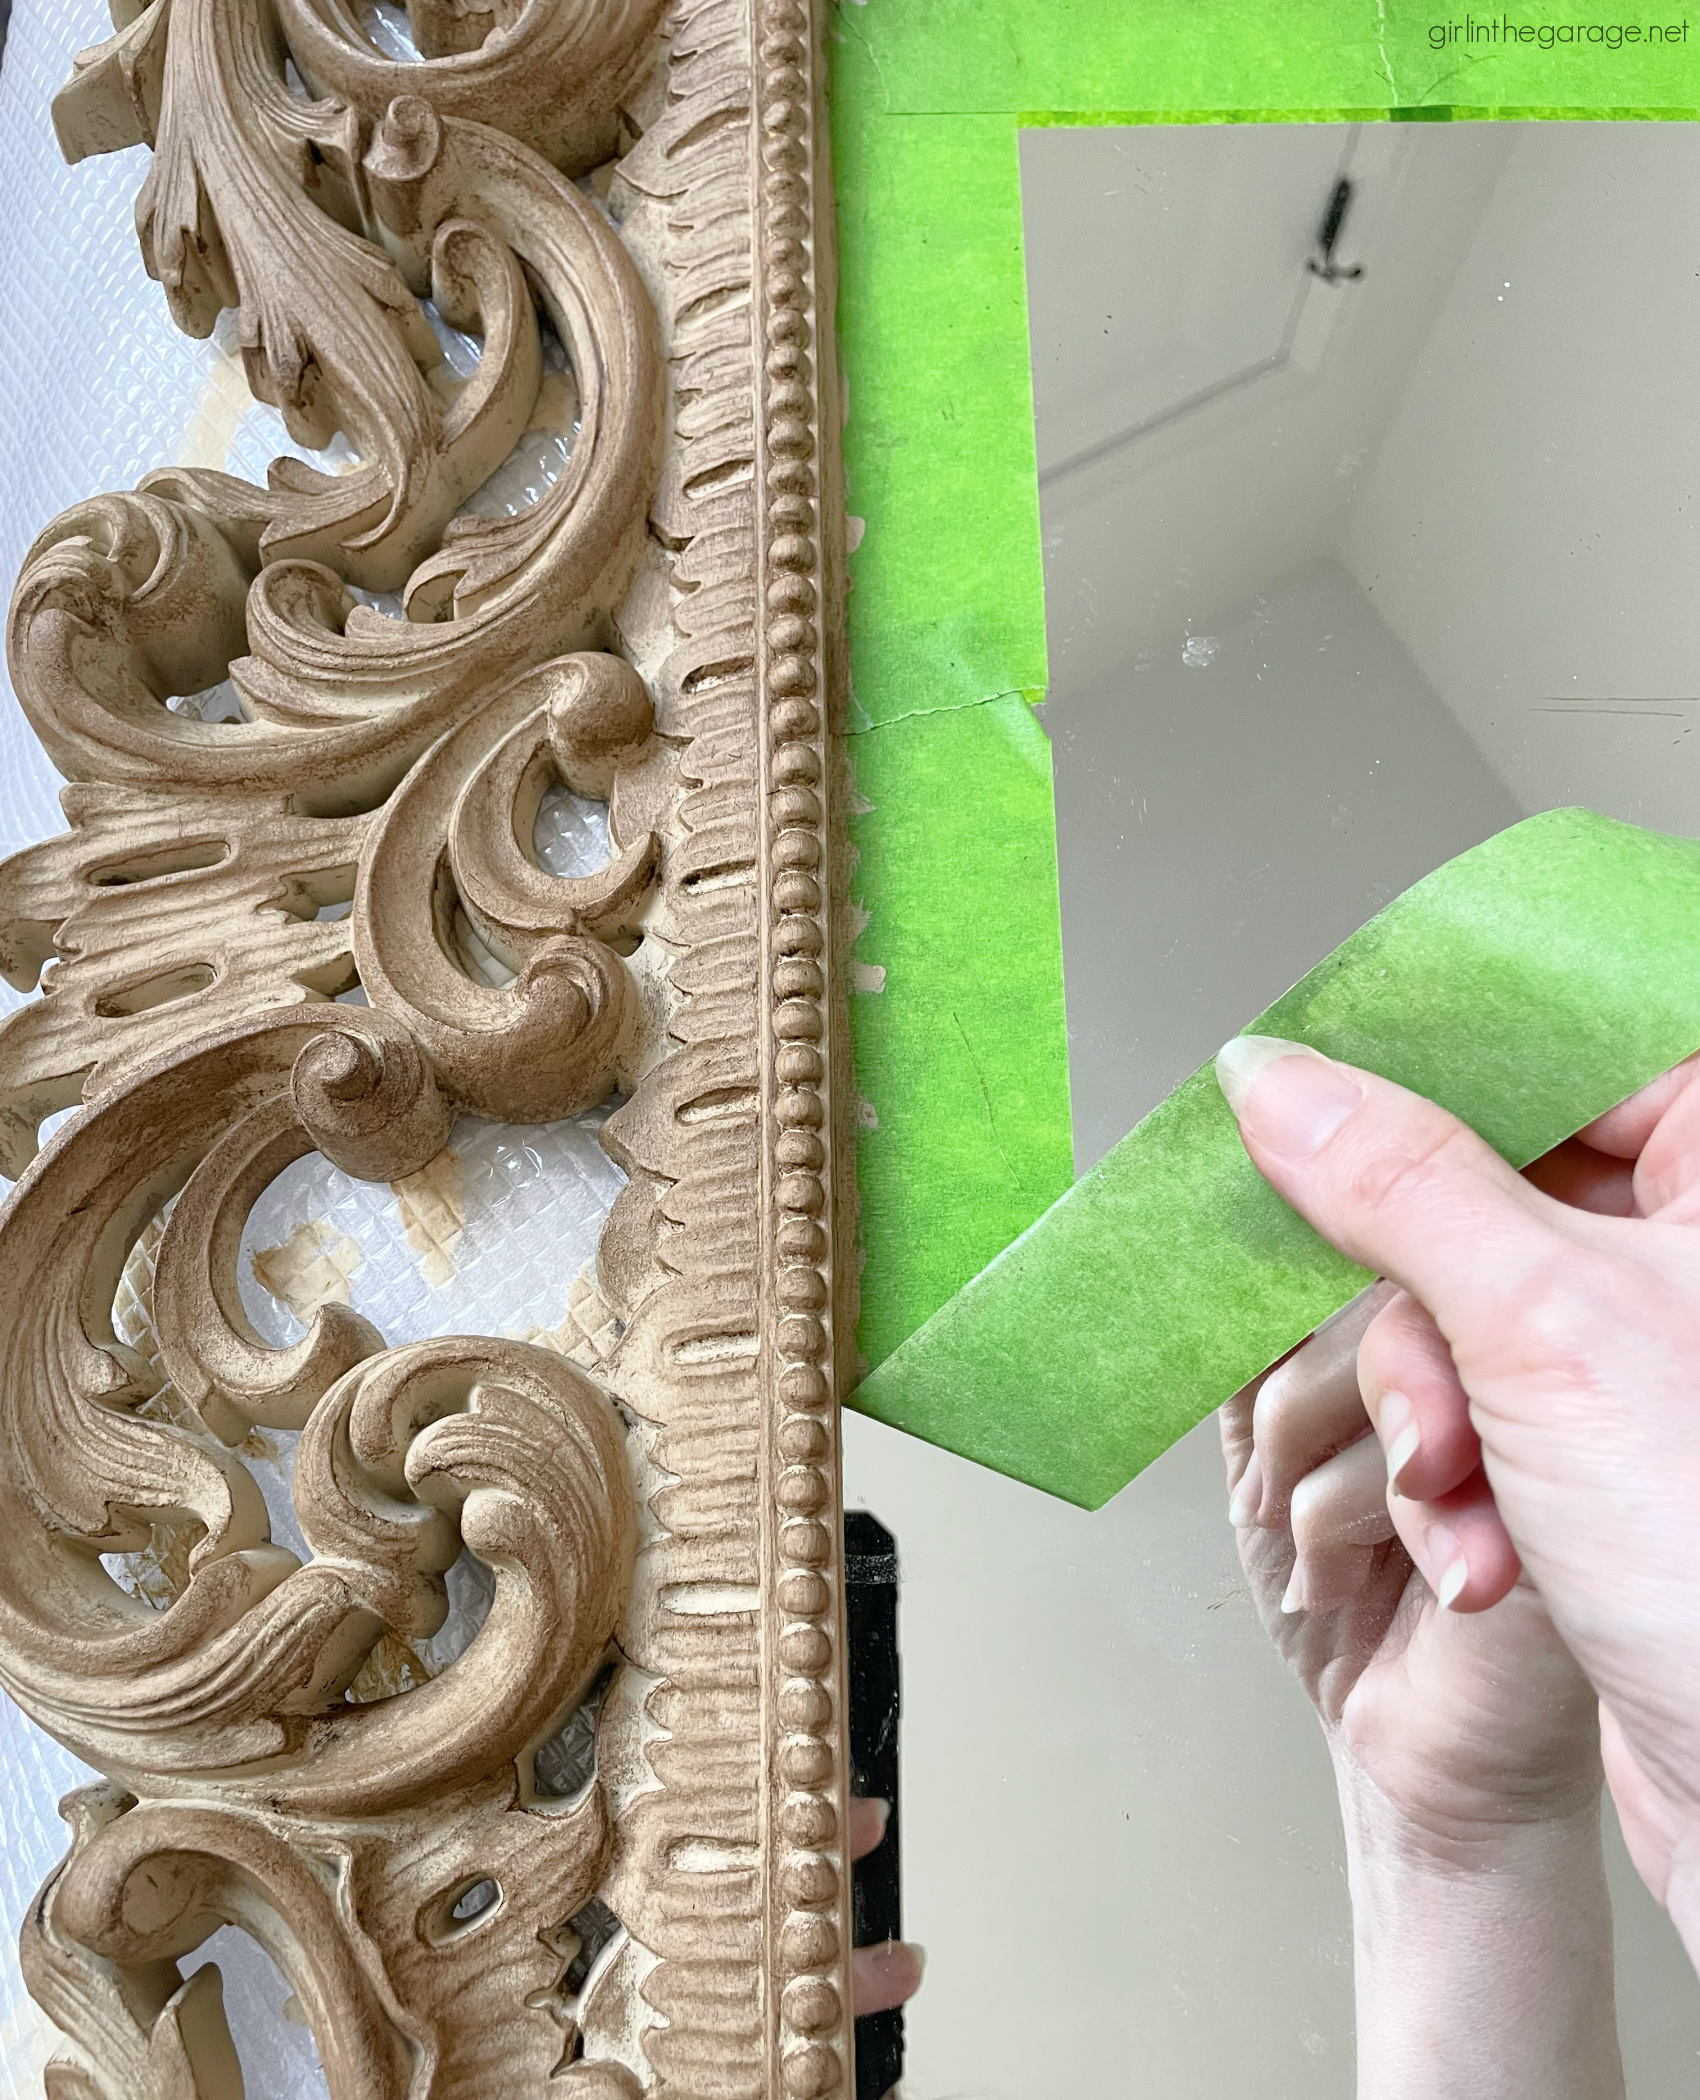
Tape the Mirror Edge Tightly
Even if the mirror stays in place, protect the glass with painter is tape. Press it firmly along the seam where glass meets frame. Run your fingernail or a straight edge over the tape to seal it and prevent bleed-through.
Trim excess tape with a utility knife for a crisp line. Leave a tiny gap, about 1/8 inch, between the tape and the frame to avoid paint bridging across.
Cover the Entire Glass Surface
Lay down newspaper, wrapping paper, or cardboard over the mirror and tape the edges securely. Make sure no glass is exposed. Overspray is tough to remove once dry. This shield keeps your mirror spotless and lets you paint confidently, even with spray paint.
Choose the Right Paint Method
Spray Paint for Smooth, Modern Finishes
Spray paint delivers a flawless, brush-mark-free finish in minutes. Krylon Fusion is a top choice. It bonds to glossy wood, metal, and laminate without primer and comes with a no-peel guarantee. Ideal for flat or simple frames, it dries fast and requires no topcoat.
Spray paint works best for glossy or laminated frames, beginners wanting a clean look, and fast projects with minimal cleanup.
Brushed Paint for Vintage or Textured Looks
Use chalk paint or milk paint, such as General Finishes or Miss Mustard Seed is, for a matte, handcrafted feel. These adhere well to most surfaces and work beautifully on ornate frames where you want to highlight details.
Brushed paint is best for carved or antique-style frames, layered or distressed effects, and eco-conscious painters seeking low-VOC options.
Key Insight: Silk Mineral Paint, such as Fusion is Oyster, offers a self-leveling finish with built-in sealer. No topcoat is needed unless in high-touch areas.
Apply Paint Like a Pro
Spray Painting Technique
Shake the can well for at least one minute. Hold the can 6 to 8 inches from the surface. Use long, sweeping motions, starting before the frame and ending after it to avoid drips. Apply thin, even coats. Two to three coats are better than one thick one. Wait 30 to 60 minutes between coats for drying.
Pro Tip: Spray in a dust-free area. Light breeze outdoors works, but avoid windy days that blow debris onto wet paint.
Brushed Painting Technique
Use a high-quality chip brush or synthetic brush. Dab paint onto the frame in light, even strokes. Do not overload the brush. Work with the grain on flat surfaces and follow contours in carved areas. Let dry 1 to 2 hours between coats. Lightly sand with 320-grit paper between coats if needed for smoothness.
User Note: Milk paint often provides full coverage in just one coat on prepped wood.
Seal and Protect the Paint
Wax Chalk and Milk Paint
Unsealed chalk or milk paint chips easily. Protect it with furniture wax, such as Miss Mustard Seed is. Apply a thin layer with a sponge or cloth, let it haze, then buff with a clean rag. This adds water resistance and a soft sheen.
Reapply every 6 to 12 months, especially on frames handled often.
Optional Topcoat for Mineral or Spray Paint
Silk Mineral Paint and Krylon Fusion are durable on their own. But in high-traffic areas, a water-based polyurethane or extra wax layer adds insurance against scratches.
Avoid oil-based topcoats. They can yellow over time.
Add Elegant Details
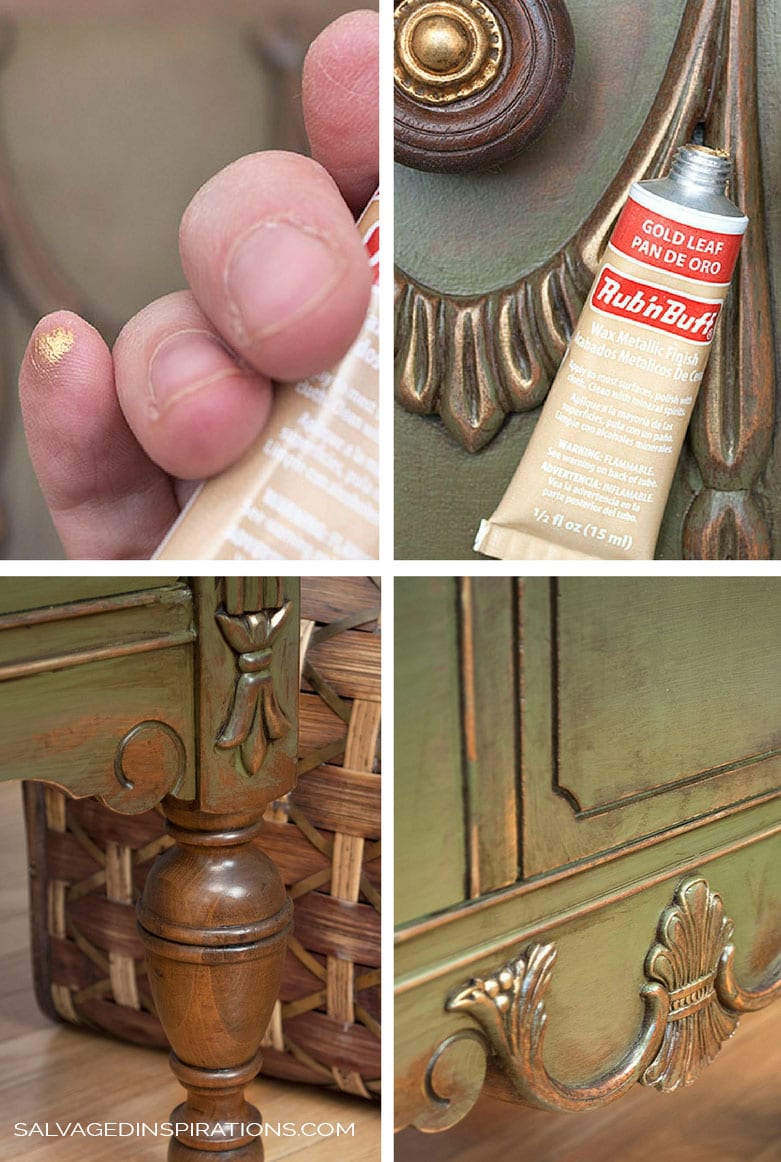
Highlight Carvings with Rub n Buff
For a luxurious touch, apply Rub is n Buff in gold, silver, or bronze to raised details. It is wax-based and easy to control.
Squeeze a small amount onto a paper plate. Use a finger or gloved hand to lightly wipe on. Less is more. Focus on edges and high points for an aged, gilded effect. Tone down bright finishes by brushing a dark paint, like black milk paint, over and wiping back.
Design Tip: Silver Rub is n Buff can look too shiny. Soften it with a dark glaze for vintage charm.
Use Antiquing Glaze for Depth
Apply antiquing glaze with a craft brush into crevices and corners. Blend with a damp paper towel to create soft shadows. This adds dimension without heavy layering.
Apply Decorative Transfers
For a high-end look, use transfers, such as Blossom Flight. Cut into sections to wrap around corners. Apply after paint fully cures. Burnish in place, then seal with wax or clear coat.
Pro Tip: Extend the transfer to the edge so it shows in reflection. This doubles the impact.
Reassemble and Finish
Reinstall the Mirror Carefully
After 24 hours of drying, reinsert the mirror. Scrape off any paint that crept onto the glass using a razor blade held at a low angle. Do not press too hard. Glass scratches easily.
Secure the mirror with staples, nails, or metal points using a staple gun or Logan Point Driver. Apply even pressure to avoid cracking.
Upgrade the Backing
Paint the back of the frame, then finish with Mod Podge and patterned kraft paper. This turns the back into a design feature, especially if the mirror hangs in an open space like a hallway.
Brush on Mod Podge. Smooth paper over it. Trim edges with a utility knife. Let dry completely.
Reattach Hanging Hardware
Reinstall D-rings, hooks, or brackets. For a coordinated look, paint the hardware to match the frame. Make sure it is secure. Test with a gentle tug before hanging.
Let It Cure and Clean Up
Wait Before Handling
Let the final coat dry 2 to 4 hours before light handling. Wait 24 hours before removing tape if you used Bonding BOSS or reactive products. Removing tape too early can lift paint.
Peel tape at a 45-degree angle away from the frame for clean edges.
Fix Overspray and Mistakes
If paint lands on glass, let it dry completely, then gently scrape with a razor blade or straight edge. For small touch-ups, use a craft brush and a dab of paint from a paper plate.
Prevent Problems Before They Start
Avoid These Common Mistakes
Skipping cleaning leads to peeling. Thick paint coats cause drips and uneven texture. Rushing between coats traps air and creates bubbles. Using low-quality brushes leaves bristles and streaks. Ignoring ventilation is dangerous because spray paint fumes are hazardous.
Pro Tip: Work in a garage, patio, or well-ventilated room. Wear gloves when handling wax or glaze.
Maintain Your Painted Frame
Dust and Clean Gently
Use a dry microfiber cloth weekly. Avoid ammonia-based glass cleaners near the frame. They degrade paint over time.
Refresh Wax as Needed
Reapply furniture wax every 6 to 12 months on chalk or milk paint. This keeps the surface protected and looking fresh.
Touch Up Chips Quickly
Store leftover paint in a labeled container. Use a fine brush to fill in nicks or scratches, then reseal if necessary.
Check Hanging Hardware
Every few months, inspect D-rings and screws. Tighten or replace if loose. This prevents accidents and damage.
Key Takeaways for Painting Your Wood Frame Mirror
Painting a wood frame mirror is a quick, affordable way to elevate your space. With proper prep, the right paint, and a few pro techniques, you will get a custom look that lasts for years. Whether you go sleek with spray paint or artistic with layered details like transfers and Rub n Buff, the transformation is always worth the effort.
The most critical steps are thorough cleaning and surface prep. Skipping these leads to peeling and bubbling. Choose your paint method based on your frame style. Spray paint works best for modern, flat frames, while chalk or milk paint suits ornate, vintage pieces. Always seal chalk and milk paint with wax, and reapply annually for durability.
Your next step is to gather your supplies, pick your color, and transform that tired mirror into a stunning focal point. Start with a small thrifted mirror to practice your technique before tackling a larger piece.
Frequently Asked Questions About Painting Wood Frame Mirrors
What type of paint works best for wood frame mirrors?
Spray paint like Krylon Fusion works best for smooth, modern finishes on glossy or laminated frames. Chalk paint or milk paint is ideal for ornate, vintage-style frames where you want a matte, handcrafted look. Silk Mineral Paint offers a self-leveling finish with built-in sealer.
Do I need to sand the frame before painting?
Light sanding with 220-grit sandpaper creates better adhesion, but you can skip it by using a liquid deglosser or an adhesion promoter like Bonding BOSS for glossy surfaces. The key is creating some texture for the paint to grip.
How long does the paint take to dry?
Spray paint dries to the touch in 30 to 60 minutes between coats. Chalk and milk paint need 1 to 2 hours between coats. Allow the final coat to cure for 24 hours before handling or reassembling the mirror.
Can I paint a mirror without removing the glass?
Yes, but you must protect the glass completely with painter is tape and covering like newspaper or cardboard. This takes more time and requires careful cleanup of any overspray after painting.
How do I seal and protect the painted finish?
Seal chalk and milk paint with furniture wax, applying a thin layer and buffing after it dries. Reapply every 6 to 12 months. Silk Mineral Paint and Krylon Fusion are durable without topcoat, but you can add extra protection with water-based polyurethane in high-traffic areas.
What are the most common mistakes to avoid?
The biggest mistakes are skipping the cleaning step, applying thick coats instead of thin ones, rushing between coats, and using low-quality brushes. These cause peeling, drips, brush marks, and poor adhesion. Always clean thoroughly and apply thin, even coats.


