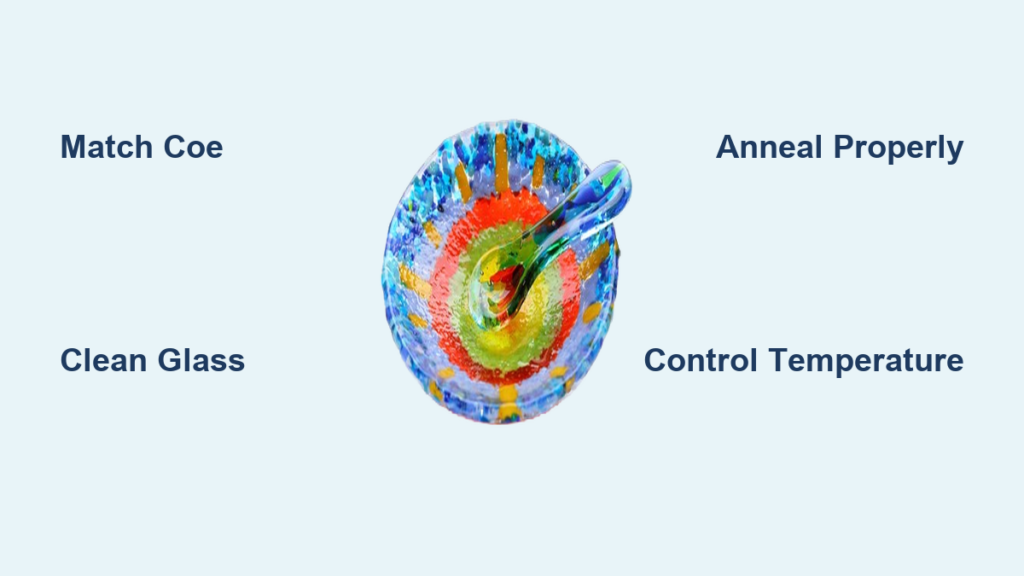
Fusing glass is a captivating blend of art and science, where heat transforms cold, flat sheets into fluid, luminous creations. If you’ve ever wondered how to fuse glass at home, you’re not alone. Thousands of crafters and artists turn to kiln-based fusing to make jewelry, coasters, wall art, and more. The process involves heating compatible glass pieces in a kiln until they melt and bond into one solid form. Unlike glassblowing or torch work, fusing lets you design with precision before the heat even starts.
But fusing isn’t just about turning on a kiln and walking away. Success hinges on understanding glass compatibility, mastering temperature schedules, and avoiding common pitfalls like cracking or bubbling. Every step, from cutting and cleaning to firing and cooling, impacts the final result. This guide walks you through everything you need to know about how to fuse glass safely, consistently, and beautifully.
Choose Compatible Glass by COE

Match COE for Stress-Free Fusing
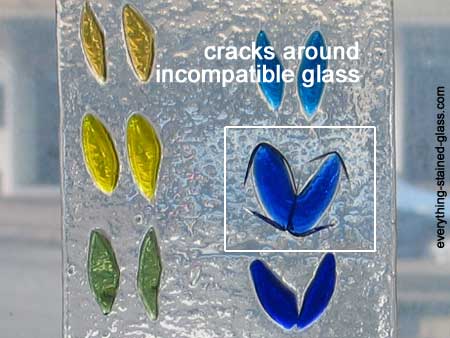
The single most important rule in glass fusing is using glass with the same Coefficient of Expansion (COE). COE measures how much glass expands when heated and contracts when cooled. If you mix COE 90 and COE 96 glass, they’ll cool at different rates, creating internal stress that leads to cracks, sometimes hours or days after firing.
Stick to one COE system per project. The two most common are COE 90 (Bullseye Glass) and COE 96 (Oceanside Glass). These brands offer full ranges of sheet glass, frit, stringers, and dichroic coatings. Never assume compatibility; always check the label.
Float glass (like window panes) has an inconsistent COE and requires higher temperatures. While experienced artists may repurpose it, avoid it as a beginner. Stick to tested fusible glass for reliable results.
Use Approved Glass Forms
Fused glass isn’t just about sheets. Artists build depth and detail with various forms:
- Frit: Crushed glass in fine, medium, or coarse grades. Use for color fields, gradients, or textured surfaces.
- Stringers: Thin rods for drawing lines or adding fine detail.
- Noodles: Thicker glass rods for bold accents.
- Dichroic glass: Coated with metal oxides for iridescent, color-shifting effects. Adds brilliance but can be costly.
- Silver foil: Insert between layers for metallic veins or mirror-like inlays.
- Powders: Create soft shading or painted effects when fired.
Avoid recycled or unknown glass unless you’ve tested it for compatibility. Impurities or unmarked COEs can ruin a kiln load.
Set Up a Safe Fusing Studio
Select the Right Kiln
A digital-programmable kiln is essential for precise fusing. Look for a model with ramp-hold programming, which lets you control heating speed, soak times, and cooling rates.
For beginners, a 14″ x 14″ or 16″ x 16″ interior is ideal. Smaller kilns (8″ x 8″) limit your work to jewelry or tiny pieces. Larger kilns offer flexibility but use more electricity.
Avoid microwave kilns. They lack temperature control and produce inconsistent results, making them unsuitable for serious fusing.
Prepare Shelves and Workspace
Kiln shelves must be protected to prevent glass from sticking. Use:
- Ceramic fiber paper: Disposable, easy to use, and perfect for beginners.
- Kiln wash: A liquid separator painted on shelves. Reapply after several firings.
- Firing paper: Pre-cut sheets designed for high-temperature separation.
Your workspace should have:
- Hard flooring (wood, tile, or concrete) to prevent glass shards from embedding.
- Bright task lighting to see cuts and debris clearly.
- Good ventilation. While glass doesn’t emit fumes, adhesives and kiln materials may release trace odors.
- 12-inch clearance around the kiln from walls and flammable objects.
Keep the area off-limits to kids and pets. Glass shards are sharp and nearly invisible on carpet.
Cut and Clean Glass Properly
Score and Break with Precision
Start with a simple design, such as a square coaster or round pendant. Sketch it on paper first, then transfer the shape to your glass.
Use a glass cutter to score a clean line. Apply steady, even pressure and don’t press too hard. Then, use running pliers to snap the glass along the score. For small adjustments, use grozing pliers to nibble edges.
For curved cuts, make multiple short scores and break incrementally. Always wear safety glasses and closed-toe shoes during cutting.
Clean Thoroughly Before Firing
Any oil, dust, or fingerprint left on glass will burn in and leave a permanent mark. Clean every piece with:
- A water and vinegar mix (1:1) in a spray bottle.
- Or a dedicated glass cleaner designed for fusing.
Wipe with a lint-free cloth and let dry completely. Never skip this step, even invisible residue can ruin your piece.
Avoid using glue if possible. If your design is complex, use a tiny drop of Elmer’s Glue-All to tack pieces in place. Too much glue will smoke and leave carbon spots.
Control Firing Temperature and Schedule

Choose the Right Fuse Type
The temperature you reach determines the final look:
- Tack fuse (1350°F–1370°F): Pieces bond but keep their shape and texture. Ideal for layered designs with depth.
- Medium/Contour fuse (1400°F–1450°F): Edges round, surface smooths, but some relief remains. Great for safe student pieces.
- Full fuse (1460°F–1500°F): Glass merges completely into a smooth, glossy sheet. Corners fully round out.
Soda-lime glass (standard fusible type) fuses in this range. Float glass may need 50°F more.
Follow a Reliable Firing Schedule
Use this sample full fuse schedule for two layers up to 30cm square:
- Ramp 1: 400°F/hr to 1100°F (remove stress gradually)
- Ramp 2: 200°F/hr to 1240°F
- Hold 1: 30 min at 1240°F (bubble squeeze to release trapped air)
- Ramp 3: Full speed to 1480°F
- Hold 2: 10 min at 1480°F (soak for even fusion)
- Ramp 4: Full speed to 960°F (annealing temp)
- Hold 3: 30 min at 960°F (stress relief)
- Cool: 200°F/hr to room temperature
Total time: 6–12 hours, depending on size and kiln.
Always adjust based on your kiln’s behavior. Keep a firing log to track results and refine future cycles.
Anneal to Prevent Cracking
Hold at Annealing Temperature
Annealing is the controlled cooling step that removes internal stress. Skip it, and your glass may crack during cooling or shatter weeks later.
Hold the glass at its annealing point, typically 900°F–1000°F, depending on COE, for 30 minutes. This allows the entire piece to equalize temperature and cool uniformly.
Cool slowly afterward. Thick glass (over 6mm) may need a slower final cooldown (e.g., 100°F/hr below 900°F).
Never Open the Kiln Early
Thermal shock is the number one cause of breakage. Never open the kiln until it’s at room temperature. Even if the digital readout says 100°F, radiant heat may still be present.
Test by hovering your hand over the glass. If you feel warmth, wait longer. Patience ensures success.
Finish and Troubleshoot Your Piece
Inspect and Clean After Firing
Once cool, remove the piece and clean off any kiln wash dust or fiber paper residue with a damp cloth.
Check the edges. If they’re sharp, use a glass grinder or diamond hand pad to smooth them. Always grind from the backside first to avoid chipping the front surface.
For functional items like bowls, a second fire (slumping) may be needed. Place the fused piece on a mold and fire to 1200°F so it drapes into shape.
Fix Common Fusing Problems
Cracks? Likely causes:
– Mixed COE glass
– Too-fast cooling
– Dirty glass or shelf
Bubbles? Usually from trapped air. Add a bubble squeeze hold at 1240°F. Avoid over-tacking with glue.
Distorted shape?
– Shrinkage: A single 3mm layer pulls inward. Use two layers or cap with clear glass.
– Spreading: Too much glass volume (over 9mm). Reduce layers or increase base size.
Burn marks or haze? Caused by excess glue, dirty hands, or uncleaned shelves. Clean everything thoroughly.
Know When to Take a Class

Start with Guided Learning
Fusing has a steep learning curve. Instead of buying a $1,500 kiln first, take a class. Many studios offer:
- Taster sessions (3 hours): Try fusing with expert help.
- Beginner workshops: Learn cutting, design, and firing.
- Open studio access: Use equipment affordably.
Classes teach safety, technique, and troubleshooting in real time, saving you money and frustration.
Build Skills Gradually
Progress like this:
1. Start with simple shapes and full fuses.
2. Master tack fusing for texture.
3. Try slumping and dichroic layers.
4. Experiment with powders and foils.
Keep a project log. Note glass types, firing schedules, and results. Every kiln behaves differently, and your log becomes your personal guide.
Maintain and Care for Fused Glass
Hand Wash and Avoid Thermal Shock
Fused glass is durable but not indestructible. Always hand wash with mild soap. Dishwashers use harsh detergents and high heat that can dull the surface over time.
Avoid sudden temperature changes. Don’t pour boiling water into a cold fused glass bowl, as it could crack.
Store flat or padded to prevent edge chipping.
Replace Kiln Components as Needed
Kiln shelves wear out. Reapply kiln wash every 3–5 firings. Replace fiber paper after each use.
Check heating elements and thermocouples annually. A malfunctioning kiln can ruin projects or become a fire hazard.
Frequently Asked Questions About How to Fuse Glass
What temperature do you need to fuse glass?
Most soda-lime fusible glass fuses between 1350°F and 1500°F. A full fuse typically occurs at 1460°F–1500°F, while a tack fuse happens at 1350°F–1370°F. Float glass requires about 50°F higher.
Can you fuse glass without a kiln?
A proper kiln is strongly recommended. Microwave kilns exist, but they offer poor temperature control and inconsistent results, making them unsuitable for reliable fusing projects.
How do you keep glass from cracking when fusing?
Use glass with the same COE, clean all pieces thoroughly, follow a proper annealing schedule, and never open the kiln until it reaches room temperature. Cracking usually results from mixed COE, thermal shock, or dirty surfaces.
How long does a glass fusing project take?
Total cycle time ranges from 3 to 4 hours for very small, thin pieces to 13 to 18 hours for larger or thicker projects. Most beginner projects fall in the 6–12 hour range including cooling.
What is the best glass for beginners?
COE 90 (Bullseye) or COE 96 (Oceanside) sheet glass are the best choices. These brands offer tested compatibility, wide color ranges, and detailed firing guides for beginners.
Can you fuse different colors of glass together?
Yes, as long as all pieces share the same COE. You can layer, mix, and combine any colors within a single COE system without compatibility issues.
Final Thoughts on Mastering How to Fuse Glass
Fusing glass is a rewarding craft that blends creativity with technical precision. The three most important factors for success are matching COE values, following a proper firing schedule with annealing, and keeping every surface clean before firing. These fundamentals prevent the vast majority of common failures.
Start small with a simple coaster or pendant, take a class if possible, and keep a detailed log of every firing. With patience and practice, you’ll master how to fuse glass like a pro and create stunning, lasting pieces from your own studio.